

 Table Of Contents
The H&S Mini Maxx Tuner is a powerful diesel vehicle performance tuning and monitoring device. Its core functions primarily revolve around the following aspects:
1.Emissions System Disabling:
Its main function is to rewrite the Engine Control Unit (ECU) program, allowing users to physically remove the Diesel Particulate Filter (DPF), Exhaust Gas Recirculation (EGR) system, Diesel Exhaust Fluid (DEF) system/Selective Catalytic Reduction (SCR), and catalytic converter without triggering a Check Engine Light (CEL) or generating Diagnostic Trouble Codes (DTCs).
2.Performance Tuning:
2. Performance Tuning: The device comes pre-loaded with multiple performance-level tunes, designed to significantly increase engine horsepower and torque. Depending on the vehicle model and tuning level, horsepower gains can range from 0 to over 250 HP.
Parameter Monitoring and Diagnostics: The Mini Maxx can act as a comprehensive digital dashboard, capable of real-time monitoring of over 20 key engine parameters, including Exhaust Gas Temperature (EGT), Boost pressure, transmission temperature, coolant temperature, and more. It also has the ability to read and clear DTCs, providing convenience for vehicle maintenance.
3.Utility Functions:
The device also offers a range of auxiliary functions, such as speedometer recalibration for non-stock tire sizes, adjusting or removing the vehicle’s top speed limiter, and enabling or disabling factory special features on specific models (like the 6.7L Cummins), such as high idle mode or seat belt chimes.
The H&S Mini Maxx Tuner is a powerful diesel vehicle performance tuning and monitoring device. Its core functions primarily revolve around the following aspects:
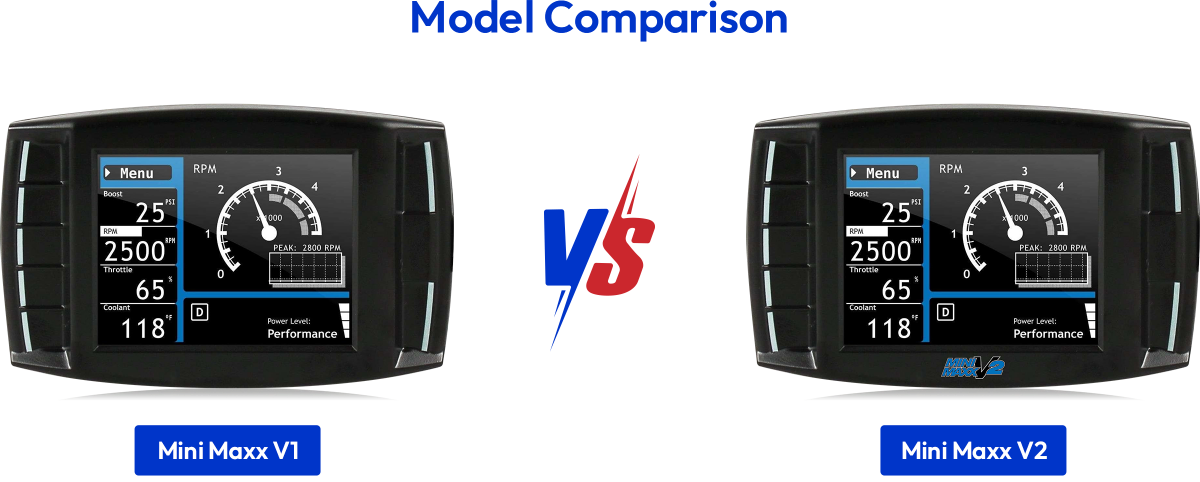
Mini Maxx V1:
This is the classic version, considered a stable and reliable “workhorse” for older models. It is particularly suitable for 2003-2007 Ford 6.0L Powerstroke, 2008-2010 Ford 6.4L Powerstroke, 2006-2012 Dodge 5.9L/6.7L Cummins, and 2007.5-2014 Duramax diesel engines. The V1 is known for the stability of its tuning programs, but its user interface is dated, and its range of supported vehicles is limited. Its common issues are usually related to hardware or physical setup, such as power connections, SD card problems, or poor cable contact.
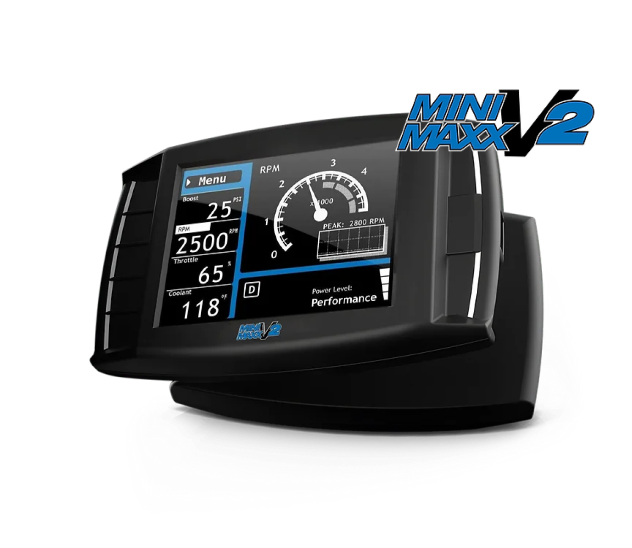
Mini Maxx V2:
As the successor to the V1, the V2 is designed to support newer diesel trucks, such as 2013 and later RAMs, and 2015 and later Powerstrokes. It features an updated user interface and broader vehicle compatibility. However, the V2 is also plagued by a series of issues related to software and firmware. Unlike the V1, the V2’s problems are more often manifested as system-level logic errors and ECU communication failures.
The Mini Maxx tuner supports the three major North American diesel pickup brands: Dodge/RAM (Cummins), Ford (Powerstroke), and GM/Chevrolet (Duramax). The following tables clearly show the differences in key features between the V1 and V2 versions, as well as the specific power increases for different models after removing the emissions systems.
| Feature | Mini Maxx V1 | Mini Maxx V2 |
|---|---|---|
| Ideal Applicable Years | 2003-2014 Model Years | 2013 and Newer Models |
| Supported Main Engines | 6.0L/6.4L Powerstroke, 5.9L Cummins | 6.7L Cummins, 6.7L Powerstroke |
| Emissions Delete Capability | DPF, EGR, DEF, SCR | DPF, EGR, DEF, SCR |
| User Interface | Classic LCD | Updated UI with wireless updates |
| Common Failure Modes | Hardware/Setup related (Power, SD card, cables) | Software/Logic related (Firmware, ECU communication) |
| Vehicle Application | Tow | Street/Mild | Performance/Wild | Extreme/Hot |
|---|---|---|---|---|
| Dodge/RAM Cummins | ||||
| 2006-2007 5.9L Cummins | 60 HP | 120 HP | 200 HP | - |
| 2007.5-2012 6.7L Cummins | 40 HP | 80 HP | 120 HP | - |
| 2013-2018 6.7L Cummins | 60 HP | 120 HP | 175 HP | - |
| Ford Powerstroke | ||||
| 2003-2007 6.0L Powerstroke | 40 HP | 80 HP | 120 HP | - |
| 2008-2010 6.4L Powerstroke | 80 HP | 160 HP | 250 HP | 300 HP |
| 2011-2014 6.7L Powerstroke | 50 HP | 100 HP | 150 HP | - |
| 2015-2019 6.7L Powerstroke | 50 HP | 100 HP | 150 HP | - |
| GM/Chevrolet Duramax | ||||
| 2007.5-2010 6.6L LMM | 60 HP | 120 HP | 175 HP | - |
| 2011-2014 6.6L LML | 50 HP | 100 HP | 150 HP | - |
| 2015-2016 6.6L LML | 50 HP | 100 HP | 150 HP | - |
Proper physical installation is the first step to ensuring the stable operation of the Mini Maxx. The following is the standard installation procedure based on the official manual :
Device Mounting:
The back of the Mini Maxx device has a T-slot mount. Insert the top of the included suction cup windshield mount into the slot and slide it forward to secure the device to the mount. Choose a location that does not obstruct the driver’s view and is easy to operate, then firmly attach the mount to the windshield .
Connecting the OBDII Adapter:
Locate the OBDII diagnostic port under the dashboard near the driver’s side. Firmly insert the OBDII adapter plug into this port. This adapter is the bridge for communication between the device and the vehicle’s ECU, and it integrates the main harness port, power wire port, fuse, and a USB port for connecting the EGT probe.
Connecting the Power Wire:
To ensure a stable power supply for the device, the power wire needs to be connected to the vehicle’s fuse box. Route the power wire from the adapter to the fuse box. Remove the fuse specified in the vehicle’s manual and insert the power wire’s fuse tap into that location. Critical Operation: Be sure to place the fuse tap on the “dead side” of the fuse socket to ensure the Mini Maxx device is protected by the original vehicle fuse.
Connecting the EGT Probe (Optional):
If you purchased the H&S thermocouple (Pyrometer) kit to monitor exhaust gas temperature, it needs to be connected to the four-pin USB port on the OBDII adapter.
2018+ RAM Cummins Models:
These models must use a dedicated Bypass Cable. During installation, one end of this cable needs to be connected to the green connector behind the dashboard, and the other end to the tuner. This is a mandatory step for successfully tuning newer RAM models .
Ford and RAM Models:
Before installing the tuning program, the throttle valve plug needs to be disconnected, ensuring it remains in the fully open position .
Universal Checklist for All Models:
To ensure stable operation of the Mini Maxx V1 Diesel Tuner, users should follow proven maintenance routines and best practices. These guidelines can help avoid frequent errors such as black screens, error code 399, and failed tune installations—while also extending the life of your tuner.
Use Recommended SD Cards and Formats(The V1 has strict requirements for SD card compatibility):
Use 2GB–8GB SanDisk or Kingston cards only
Must be formatted in FAT32 (not exFAT)
Avoid using cards larger than 8GB
Tune files must be placed in the root directory of the card
Proper Firmware Update Process(To prevent failed updates or bricking the tuner):
Keep the truck battery charged (use a charger if needed).
Only download firmware from official sources (never flash V2 files to V1).
Insert SD card and follow screen prompts.
Do not remove power or SD card during the update process.
Pre-Tune Vehicle Checklist, before applying the tune, make sure:
EGR, DPF, and DEF systems are physically removed or disconnected.
ECU has not been modified by a previous tuner.
Battery voltage is stable at 12.5V+ to prevent voltage drops during flashing.
Avoid Excessive Tune Switching:
Although V1 supports multiple power levels, excessive switching may confuse the ECU. Choose a setting and drive normally before switching again.
Use OBD Splitters to Isolate Interference:
If you experience issues with your stereo, A/C, or infotainment after plugging in the tuner, try using an OBD splitter to isolate power and data signals, reducing CAN bus interference.
How to Verify Tune Installation
Navigate to: Menu > Settings > Tune Status.
If it shows “Installed,” the tune is active.
If it shows “Not Installed,” reinstall the tune file properly.
Mini Maxx V1 Installation Manual Download:
Mini Maxx V2 Usage Tips and Best Practices (How to Avoid Install Failures)
The Mini Maxx V2 offers powerful functionality, but its sensitivity to voltage, file structure, and system logic requires users to follow specific best practices. Even a minor mistake can result in an installation failure or device lockout.
Use the Right SD Card and Format:
Recommended Size: 2GB, 4GB, or 8GB (SanDisk or Kingston preferred).
Format: Only use FAT32 (avoid exFAT).
Tip: Reformat the card before each new update to avoid file conflicts.
Stable Firmware Update Process:
Always use a laptop or desktop to download files—not mobile apps or browser extensions.
Unzip files and place them in the root directory of the SD card.
Do not disconnect power, remove the card, or turn off the ignition during the update process.
Correct Bypass Cable Installation:
The power lead must be connected to the correct ECM fuse slot (usually marked ACC or IGN).
Incorrect fuse location will result in power failure to the device.
Use a multimeter to confirm voltage at the fuse before connecting the tuner.
Do Not Power Off Before Tune Completes:
Some users turn off the ignition or remove the tuner too early, causing a failed write.
Wait until the device confirms completion and returns to the home screen before disconnecting or shutting off.
How to Check if the Tune Was Installed:
Navigate to: Menu > Settings > Tune Status.
Installed: Tune was applied successfully.
Not Installed: Tune failed—re-run the install process.
Mini Maxx V2 Installation Manual Download:
The firmware update process for the Mini Maxx V2 is extremely strict, and any deviation can lead to the device being “bricked” (unusable). The following is the update protocol that must be strictly followed to minimize the risk of failure.
* This update is only for the V2, do not use this update on Mini Maxx V1 tuners
Pre-Update Preparations:
Hardware Requirements: A Windows OS computer, a Micro SD to USB adapter, and a compliant Micro SD card .
SD Card Rules (Crucial):
Capacity: Only use SD cards with a capacity of 2GB, 4GB, or 8GB. Using cards larger than 8GB (such as 16GB or 64GB) will cause the device to fail to recognize it or report an error.5 SanDisk or Kingston brands are recommended.5
Format: The SD card must be formatted to the FAT file system. Using common formats like FAT32 or exFAT will result in a “missing sd card” error message . This is the most easily overlooked and fatal step.
Naming: The SD card must be named exactly “MINI MAXX” (without quotes) .
Update Process:
Uninstall Tuner: Before starting the update, be sure to first “Return to Stock” through the tuner’s menu .
Download and Unzip: Download the latest V2 version update file package from a reliable source . Unzip it to a local folder on your computer.
Copy Files: Open the unzipped folder and copy all files and subfolders within it to the root directory of the prepared SD card. Note: Copy the contents of the folder, not the entire parent folder itself, onto the SD card .
Update Firmware: Insert the SD card with the new files back into the tuner. Power on the tuner, go to the Menu, scroll down and select “Update Firmware.” The update process will proceed automatically, during which the device will restart. Do not cut power under any circumstances during this process .
Reinstall Tune Program: After the firmware update is complete, connect the tuner to the vehicle, go to the menu, select “Install Download,” and follow the on-screen prompts to re-flash the tuning program to the vehicle.
The extreme procedural nature and demanding attention to detail of the V2 update process actually reflect the fragility of its underlying software architecture. Modern electronic devices typically have strong fault tolerance for common user errors, such as supporting universal file systems and built-in error-checking mechanisms. However, the Mini Maxx V2 relies on an outdated file system (FAT), has strict limitations on memory card capacity, and lacks effective error checking during file transfers . A simple mistake, like dragging the wrong folder, can cause the entire update process to fail. This indicates that the device’s bootloader and operating system are relatively primitive, lacking the ability to handle common, foreseeable user errors. Therefore, high-incidence issues like “black screen,” “stuck in recovery mode,” and “missing SD card” are not accidental but are direct products of this fragile software architecture. The device shifts the entire burden of ensuring a flawless process onto the user.
This section aims to provide a systematic guide for fault diagnosis and solutions. First, a quick reference matrix helps users locate the problem, followed by detailed solution steps for various issues.
| Symptom / Error Code | Affected Platform | Possible Cause | See Section |
|---|---|---|---|
| Black Screen / No Power | V1 & V2 | Low voltage, loose cable, CAN bus interference | 3.1 |
| No Performance Gain | V1 & V2 | Tune program not successfully written to ECU | 3.1 |
| Error Code 399 / 327 | 2003-2014 Model Years | 2013 and Newer Models | 3.1 |
| "Insert SD Card" Prompt | 2003-2014 Model Years | 2013 and Newer Models | 3.1 |
| P04E3 | 2016 Ford Powerstroke | Firmware looking for a non-existent PCV sensor | 3.2 |
| P24C6 / P24DA | 2011+ Ford Powerstroke | Calibration issue with older tune files | 3.2 |
| “Unrecognized Part Number” | Ford Powerstroke | ECU calibration file not in the database | 3.2 |
| Boost Drop / No Power | 2017-2019 Ford Powerstroke | Powerstroke Tune file incompatible with factory EGT sensor | 3.2 |
| SOTF Fails to Switch | 2011-2019 Ford Powerstroke | Rare PCM software incompatibility | 3.2 |
| Boost Drops to 20 PSI | 2013-2021 RAM Cummins | Known bug in the tune file | 3.3 |
| “Loping/Surging” | 2014-2015 RAM Cummins | Calibration issue with the tune file | 3.3 |
| “Part Number Not Supported” | 2018+ RAM Cummins | PCM reflashed by dealer, part number mismatch | 3.3 |
| Error Code 312 | 2007.5-2010 GM Duramax | Specific programming state error | 3.4 |
| Error Code 316 | GM Duramax | Remnants of an old tune program in the ECU | 3.4 |
| No Performance Gain | V1 & V2 | Tune program not successfully written to ECU | 3.1 |
Proper physical installation is the first step to ensuring the stable operation of the Mini Maxx. The following is the standard installation procedure based on the official manual :
Power and Display Issues:
Symptoms: Device has a black screen, is stuck on the startup screen, or will not power on at all.
Causes: Vehicle battery voltage is below 12.5V; HDMI or OBDII cable is loose or damaged; an OBDII Y-splitter is being used, causing CAN bus signal interference.
Solution: Charge the vehicle’s battery; carefully check and reseat all connecting cables; remove all other OBDII devices to ensure the Mini Maxx is the only device connected to the diagnostic port.
SD Card Logic Errors (Codes 399 / 327):
Symptoms: Screen prompts “Insert SD Card” or displays error code 399/327.
Causes: SD card capacity exceeds 8GB; SD card format is not FAT (but exFAT or FAT32); tune files are corrupted or not placed in the SD card’s root directory.
Solution: Strictly follow the “SD Card Rules” in section 2.3 to prepare a 2-8GB SD card, format it to the FAT file system, then re-download and correctly place the tune files.
Tune Installation Failure:
Symptoms: No performance increase is felt after installation, boost gauge reads 0.
Causes: The tuning program failed to write to the ECU successfully.
Solution: Go to Menu > Settings > Tune Status. If the status shows “Not Installed,” you need to re-run the “Install Download” process while ensuring stable power.
Code P04E3 (for 2016 models):
Cause: The 2016 Powerstroke model does not have a PCV (Positive Crankcase Ventilation) sensor, but the Mini Maxx V2 firmware attempts to detect it, thus throwing an error.
Solution: This is a known software defect that requires a specific patch file. Download the fix file named “MGGDT.IT1” from an official support channel, place it in the “FORD” folder on the SD card, and then reinstall the tuning program.
Codes P24C6 / P24DA (for 2011+ models):
Cause: Older versions of the tune files have compatibility issues with certain specific PCM (Powertrain Control Module) calibrations.
Solution: This issue has been resolved in firmware updates released after October 2023. Updating the tuner to the latest firmware will fix it.
Boost Drop / No Power (for 2017-2019 models):
Cause: The Mini Maxx’s tuning program does not support the factory EGT sensors on these model years.
Solution: The temporary fix is to unplug the EGT sensor’s connector and then clear the fault codes. The vehicle will regain normal power, but you will not be able to read the exhaust gas temperature through the tuner.
Shift-On-The-Fly (SOTF) Function Failure:
Cause: This is a rare issue affecting about 7% of 2011-2019 Ford models, stemming from incompatibility between certain factory PCM software and the Mini Maxx’s SOTF strategy.
Solution: There is currently no universal fix for this; it is a known limitation.
“Unrecognized Part Number”:
Cause: The vehicle’s ECU calibration version is too new or special and is not in the tuner’s database.
Solution: Connect the SD card to a computer and navigate to the corresponding Ford model folder. Find a filename that most closely matches the “unrecognized part number” displayed on the tuner’s screen. Copy and paste that file, then rename the copy to the exact filename the tuner prompted. Insert the SD card back into the tuner and try the installation again.
Boost Pressure Drops to 20 PSI (for 2013-2021 models):
Cause: A known software bug in the tune file.
Solution: For 2013-2018 models, the latest firmware update includes a BETA fix file. For 2019-2021 models, a fix is still in development.
“Loping/Surging” (for 2014-2015 models):
Cause: Another tune file calibration issue.
Solution: Update the device firmware to version 2.0.0.4 or higher.
“Part Number Not Currently Supported” (for 2018+ models):
Cause: The tuner only supports original factory PCM software with part numbers that start with a number. If the vehicle’s software has been updated by a dealer, its PCM part number may change to start with a letter, causing the tuner to fail to recognize it.
Solution: First, try updating to the latest tuner firmware. If the problem persists, it means the tuner is currently incompatible with your vehicle.
LML (2011+) Engine Limitations:
Users should be aware that the Mini Maxx V2 does not support dual-tank configurations on cab and chassis models (it will disable the rear tank after installation), and the boost gauge function will not work. These are not malfunctions but unsupported features of the device.
Error Code 312 (for 2007.5-2010 LMM engines):
Solution: This is an error that requires a special unlock procedure. Go to “Show Settings,” press and hold the bottom-left key on the screen for 10 seconds, and an input screen will pop up. Enter the unlock code 0468. Then select “Reset Unit” and immediately proceed directly to “Install Download” without re-selecting the vehicle year and model.
Error Code 316:
Cause: This code means the tuner cannot communicate properly with the ECM, usually indicating that there are still “imprints” or incompletely cleared programs from a previous tuner of another brand on the ECU.
Solution: The only solution is to take the vehicle to a dealer or a capable repair shop and have them use a factory diagnostic tool (like IDS) to completely flash the ECU back to its original factory state. After that, the Mini Maxx should install normally.

