facebook
FREE SHIPPING ON ALL ORDERS FROM U.S.A.
45-DAY RETURN POLICY
My Coupons

What Are OBD-II Trouble Codes?

OBD-II trouble codes, also known as diagnostic trouble codes (DTCs), are standardized codes stored by the vehicle's onboard computer when it detects a problem. Every car and truck manufactured in the United States after 1996 is equipped with an OBD-II system.

The OBD-II system monitors the engine, emissions, and other critical systems to ensure that the vehicle meets environmental standards set by agencies such as the U.S. Environmental Protection Agency (EPA). When a sensor or system malfunctions, the OBD-II system triggers the check engine light (CEL) and records a specific fault code.

Understanding these codes can help you:
- Quickly diagnose problems: Avoid unnecessary repair costs.
- Prevent serious damage: Address minor issues promptly to avoid major repairs.
- Pass emissions tests: Resolve the fault code that caused the test failure.

Understanding OBD-II Codes: What Each Character Means

When your "check engine light" or other dashboard warning light illuminates, your vehicle's OBD-II system generates one or more DTCs. Each DTC is a five-digit alphanumeric automotive diagnostic trouble code (e.g., P0420) that describes the type of fault, system location, and specific issue.

These engine codes typically begin with a letter and are categorized into four types based on the prefix:

First Character: System Category

P-Codes (Powertrain)

Engine and transmission systems

C-Codes (Chassis)

Suspension, brakes, steering

B-Codes (Body)

Interior systems like airbags or climate control

U-Codes (Network)

Communication issues between modules

Second Digit: Code Type

The second character in the code tells you whether the fault is generic or manufacturer-specific:

0 = Generic code (SAE-compliant, applicable to all brands)

1 = Manufacturer-specific code

Third Digit: Vehicle System Category

The third digit pinpoints which system is affected. There are eight categories:

0 = Fuel and air metering and auxiliary emission controls

1 = Fuel and air metering

2 = Fuel and air metering (injector circuits)

3 = Ignition system or misfire

4 = Auxiliary emission controls

5 = Vehicle speed control and idle control system

6 = Computer and output circuits

7 = Transmission

Last Two Digits: Specific Fault

The last two digits identify the exact fault or component involved, allowing the technician (or DIY owner) to determine the precise problem.

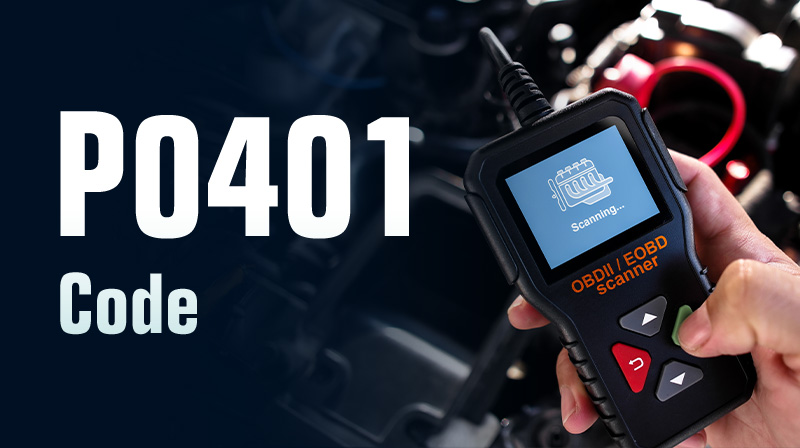
✅ Example: P0401 – Exhaust Gas Recirculation (EGR) Flow Insufficient Detected

This means the issue comes from the Powertrain (P), is a generic standard code (0), and is related to the Auxiliary emission controls (4).

How to Read & Retrieve OBD-II Codes

Step 1: Locate the OBD-II Port

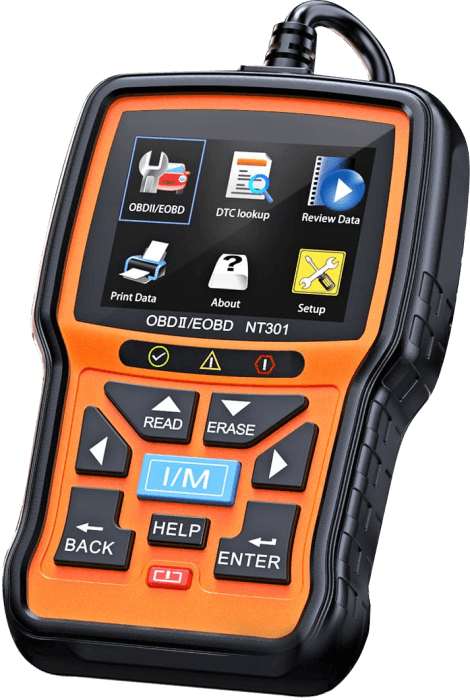
Locate the OBD-II diagnostic port, typically located below the dashboard near the steering wheel. In some vehicles, it may also be located near the center console or behind a small cover.

Step 2: Plug in the OBD-II Scanner

Connect your OBD-II code reader to the port. Turn the ignition key to the "ON" position (without starting the engine) so that the scanner starts and communicates with the vehicle's computer.

Step 3: Retrieve Diagnostic Trouble Codes (DTCs)

Follow the scanner's instructions to read stored and pending codes. The results will be displayed as a five-character code. Write it down or save it for future reference.

👉 Use our OBD Code Lookup Tool to learn what each code means, common causes, and possible solutions.

How to Clear OBD-II Trouble Codes

When your check engine light comes on, an OBD-II scanner can help pinpoint the problem. But once the issue is resolved, don't forget to clear the check engine light codes to reset the light. Here are the most recommended steps:

Step 1: Plug the scanner into the OBD-II port (usually located under the dashboard).

Step 2: Turn the ignition switch to the ON position, but do not start the engine.

Step 3: Navigate to "Clear DTCs" or "Clear Trouble Codes" in the scanner menu.

Step 4: Wait for confirmation, then turn the ignition off and restart the vehicle.

👉 Pro Tip: Always diagnose and fix the underlying cause first. Clearing the OBD2 codes won't fix the problem; it will only reset the warning light.

Search OBD-II Trouble Codes Database

Quickly look up OBD codes and learn their meanings and solutions. Enter a five-character code beginning with P, C, B, or U (e.g., P0420) in the search box below to find the code.

Note: The database is still being updated, and individual code information may not yet be displayed.

Result: {{ codeResultItem.code }} - {{ codeResultItem.title }}

OBD Codes List

Still struggling with the P0404 fault code? This OBD code indicates a problem with your EGR system. Learn what it means, why it occurs, and how to fix it.

Experiencing the P20EE fault code? Learn about triggering causes, diagnostics, and the best fixes for diesel trucks equipped with SCR/DEF systems.

Is your check engine light on and displaying the P0087 code? Learn the symptoms, causes, and fixes for low fuel rail/system pressure to prevent costly engine damage.

This article explains the meaning of the P040D fault code, common symptoms and causes, and provides diagnostic procedures and repair recommendations to help you quickly restore diesel vehicle performance and emissions compliance.

Learn what the P1491 code means for Honda, Dodge, Jeep, and other vehicles. Explore the causes, repair steps, and how an EGR delete kit can prevent P1491 problems from recurring.

p2bac-code
Still struggling with P2BAC fault codes? Our complete guide covers diagnosis, repair procedures, and performance upgrades, including high-quality EGR flush kits from SuncentAuto.

p1405-code
Experiencing code P1401? This guide explains DPFE sensor failures, how to fix them, and when to consider removing the exhaust gas recirculation (EGR) system for off-road driving.

Seeing the P1401 code in your OBD-II scan? Learn what "DPFE Sensor Circuit High Voltage" means, how it affects your Ford, Volkswagen, Audi, or BMW vehicle, and how to fix it quickly and affordably.

Struggling with the P0406 error code? We'll explain what it means, why it happens, and what steps you can take to fix and prevent this problem yourself.

Is your check engine light on with the P0405 fault code? Don’t worry, follow along as we explain what the P0405 code means, why it occurs, and how to fix it.

p2002-code
Struggling with a P2002 code? Discover the root causes, repair costs, and expert tips to restore your diesel vehicle’s emissions system performance.

Is your check engine light on with the P0403 code? Learn what it means, symptoms, causes, and how to fix this EGR control circuit malfunction problem.

p1404-code
Is your check engine light on with the P1404 code? Learn what it means, symptoms, causes, and how to fix it yourself on Chevrolet, Dodge, Jeep, and more.

Learn what the P0402 code means, how it affects your engine, and how to fix it on Ford F-150, Toyota Prado, 6.7 Powerstroke engines and more.

Don't ignore the P0401 fault code! It means your EGR system isn't working properly. Learn what it means, symptoms, common causes, how to fix and avoid.

Learn what the P0400 code means, why your vehicle triggers it, and how to fix it. This guide includes DIY tips, repair costs, and prevention tips.

p246c-code
Is your vehicle in limp mode due to a P246C code? Learn why this DPF-related fault occurs, how to diagnose it, and step-by-step fixes to restore engine power.

p2463-code
Struggling with a P2463 code? Learn why DPF soot accumulation happens, how to fix it, and prevent future issues. Get step-by-step solutions now!

Learn what P2453 means, why it occurs, and what solutions experts recommend. Use these practical tips to keep your diesel engine running efficiently.

p2452-code
Encountering the P2452 trouble code? Learn what it means, common symptoms, causes, and step-by-step solutions to resolve this DPF sensor issue.

If your check engine light illuminates, indicating U0008, it often points to an issue with the high-speed CAN communication bus (-) high. You might experience loss of communication with various control modules and erratic behavior of electronic systems (e.g., lights, power windows, HVAC). To address this, remove any aftermarket accessories that may be causing electrical interference with the high-speed CAN bus. Inspect the high-speed CAN bus wiring and connectors for damage or corrosion, and repair or replace as necessary.

To resolve the U0008 Ford issue, which is related to the high-speed CAN communication bus (-) high, you should immediately test the control modules within the communication network for faults or malfunctions. Replace any faulty modules with new or refurbished units. Begin by inspecting the wiring harness connected to the high-speed CAN bus for any signs of damage, corrosion, or loose connections, and repair or replace any faulty wiring as needed. Ignoring this could lead to overall poor vehicle performance or drivability, as well as transmission shifting issues.

To resolve the U0008 Lincoln issue, which is related to the high-speed CAN communication bus (-) high, you should immediately perform a thorough visual inspection of the wiring harness and connectors for any damage or corrosion. Clear the DTC (Diagnostic Trouble Codes) and perform a test drive to ensure the issue has been resolved. Ignoring this could lead to erratic behavior of electronic systems (e.g., ABS, airbags) and an illuminated check engine light.

To resolve the U0008 Mercury issue, which is related to the high-speed CAN communication bus (-) high, you should immediately clear the diagnostic trouble codes (DTC) and perform a system relearn procedure. Begin by conducting a thorough inspection of the wiring and connections in the high-speed CAN communication bus circuit. Ignoring this could lead to erratic behavior of electronic components (such as windows, lights, or HVAC controls) and loss of communication with various modules.

Ignoring the U0009 fault code, which signals a high-speed CAN communication bus (-) shorted to bus (+) issue, can lead to serious problems like loss of communication with certain vehicle systems and transmission shifting issues. It’s crucial to check the electronic control units for any faults and address them accordingly, then conduct a final road test to confirm that all systems are functioning correctly.

Are you noticing transmission shifting issues or an inability to start the vehicle, and your check engine light is on? This could be due to U0009 Ford, indicating a high-speed CAN communication bus (-) shorted to bus (+) problem. The recommended action is to clear the DTC (Diagnostic Trouble Codes) from the vehicle's memory using a diagnostic scan tool and perform a test drive to ensure proper communication between modules. Use a multimeter to check for continuity and resistance on the CAN bus lines to pinpoint the location of the short circuit.

Are you noticing erratic behavior of electronic systems (e.g., transmission shifting irregularities) or vehicle stalling/difficulty starting, and your check engine light is on? This could be due to U0009 Lincoln, indicating a high-speed CAN communication bus (-) shorted to bus (+) problem. The recommended action is: if the problem persists, further diagnostic testing may be required to pinpoint the exact cause of the short circuit, such as testing individual modules or ECUs connected to the CAN bus.

To resolve the U0009 Mercury issue, which is related to the high-speed CAN communication bus (-) shorted to bus (+), you should immediately: 1. Test system functionality: After repairing the wiring, conduct a thorough test to ensure that the high-speed CAN bus communication is restored and all systems are functioning properly. 2. Clear codes: Clear the DTCs (Diagnostic Trouble Codes) from the vehicle's memory using the diagnostic scan tool to reset the check engine light and verify that the issue has been resolved.

When the U0010 code appears, it directly signifies a problem with the medium-speed CAN communication bus. Drivers often notice the check engine light illuminated on the dashboard and loss of communication with various control modules (e.g., ABS, airbags). A good first step is to use a diagnostic scan tool to check for specific trouble codes related to the medium-speed CAN bus communication, as this can help pinpoint the exact module or area of concern. If a faulty control module is suspected, it may need to be reprogrammed or replaced.

When the U0010 Chrysler code appears, it directly signifies a problem with the CAN communication interior bus. Drivers often notice inoperative power windows or door locks, as well as malfunctioning interior lights or displays. A good first step is to begin by conducting a thorough inspection of the CAN bus wiring, connectors, and modules to identify any visible damage or corrosion. If the problem persists, further diagnostics may be required to identify any underlying issues with the vehicle's electrical system.

Are you noticing erratic behavior of interior electronics or illuminated warning lights on the dashboard, and your check engine light is on? This could be due to U0010 Dodge, indicating a CAN communication interior bus problem. The recommended action is to repair or replace any damaged wiring, connectors, or modules as needed, then conduct a thorough test drive to verify that the issue has been resolved and all systems are functioning properly.

Are you experiencing unresponsive interior electronic components (e.g., power windows) or a non-working radio? Your vehicle's diagnostic system might be reporting U0010 Jeep, indicating a CAN communication interior bus issue. Addressing this typically involves beginning by inspecting the wiring and connections on the interior bus for any signs of damage or corrosion, then repairing or replacing any faulty wiring as needed. Test the CAN bus for damage and replace it if necessary.

Are you noticing the vehicle going into limp mode or erratic behavior of electronic components (e.g., power windows, door locks), and your check engine light is on? This could be due to U0010 RAM, indicating a CAN communication interior bus problem. The recommended action is to clear the code, reset the system, and perform a test drive to ensure the issue has been resolved. Inspect the wiring harness for any signs of damage, corrosion, or loose connections.

A common cause for U0011 is related to the medium-speed CAN communication bus performance. This can result in symptoms such as erratic behavior of electronic components (e.g., radio, climate control) and illuminated ABS or traction control warning lights. The best course of action is to use a diagnostic scan tool to identify the specific module causing the issue, then inspect the wiring and connectors in the medium-speed CAN bus network for any damage or corrosion.

A common cause for U0011 Chrysler is related to the CAN communication interior bus performance. This can result in symptoms such as an unresponsive climate control system and erratic behavior of interior lights or controls. The best course of action is to inspect the wiring harness and connectors for any signs of damage or corrosion, then clear the code from the vehicle's system and test all affected components to ensure proper operation.

To resolve the U0011 Dodge issue, which is related to CAN communication interior bus performance, you should immediately use a diagnostic scanner to check for specific fault codes and pinpoint the exact source of the communication issue. Clear the DTC (Diagnostic Trouble Codes) and perform a reset procedure to ensure the communication system is functioning correctly. Ignoring this could lead to malfunctioning HVAC controls, erratic temperature regulation, and affected safety systems (e.g., airbags, stability control).

A common cause for U0011 Jeep is related to the CAN communication interior bus performance. This can result in symptoms such as an unresponsive HVAC system and intermittent power window or door lock operation. The best course of action is to diagnose the specific cause of the communication issue using a diagnostic scan tool to pinpoint the faulty component or connection, then clear the code from the vehicle's computer system and perform a test drive to ensure the issue has been resolved.

A common cause for U0011 RAM is related to the CAN communication interior bus performance. This can result in symptoms such as erratic behavior of interior components and unresponsive infotainment system controls. The best course of action is to use a diagnostic scan tool to retrieve specific trouble codes and pinpoint the exact location of the communication error, then test individual interior modules for functionality and communication with the CAN bus system.

A common cause for U0012 is related to the medium-speed CAN communication bus (+) open. This can result in symptoms such as the check engine light illuminated on the dashboard and inability to access certain features controlled by the affected modules. The best course of action is to use a diagnostic scan tool to identify the specific module or section of the CAN bus that has lost communication (this will help narrow down the potential cause), then begin by conducting a visual inspection of the wiring and connectors in the medium-speed CAN bus network.

Ignoring the U0012 Chrysler fault code, which signals a CAN communication interior bus (+) open issue, can lead to serious problems like reduced fuel efficiency and illuminated dashboard warning lights. It’s crucial to clear the diagnostic trouble codes (DTC) from the vehicle's computer and perform a test drive to ensure that the issue has been resolved and communication is restored. Inspect the interior control modules connected to the CAN bus for any internal faults and replace any modules that are found to be defective.

Are you noticing malfunctioning interior lights or displays, or a non-responsive climate control system, and your check engine light is on? This could be due to U0012 Dodge, indicating a CAN communication interior bus (+) open problem. The recommended action is: if the problem persists, further diagnostics may be required to identify any underlying issues with the vehicle's electrical system. Begin by conducting a thorough inspection of the CAN bus wiring, connectors, and modules to identify any visible damage or corrosion.

To resolve the U0012 Jeep issue, which is related to the CAN communication interior bus (+) open, you should immediately begin by inspecting the wiring and connections on the interior bus for any signs of damage or corrosion, then repair or replace any faulty wiring as needed. Clear the diagnostic trouble codes (DTC) and test the vehicle to ensure the issue has been resolved. Ignoring this could lead to a malfunctioning instrument cluster display and unresponsive interior electronic components.

A common cause for U0012 RAM is related to the CAN communication interior bus (+) open. This can result in symptoms such as loss of communication with certain vehicle systems and illuminated dashboard warning lights. The best course of action is to clear the code, reset the system, and perform a test drive to ensure the issue has been resolved, then replace any faulty control modules or components.

If your check engine light illuminates, indicating U0014, it often points to an issue with the medium-speed CAN communication bus (-) open. You might experience the vehicle going into limp mode (limiting performance) and erratic behavior of electronic components (e.g., radio, climate control). To address this, test the continuity of the wiring using a multimeter to ensure there are no breaks or shorts. Use a diagnostic scan tool to check for specific trouble codes related to the medium-speed CAN bus communication, as this can help pinpoint the exact module or area of concern.

To resolve the U0014 Chrysler issue, which is related to the CAN communication interior bus (-) open, you should immediately use a diagnostic scan tool to identify the specific module or section of the CAN bus that has lost communication (this will help narrow down the potential cause). Clear the diagnostic trouble codes (DTC) from the vehicle's computer and perform a test drive to ensure that the issue has been resolved and communication is restored. Ignoring this could lead to inoperative interior features and loss of communication with interior modules (e.g., radio, HVAC, power windows).

To resolve the U0014 Dodge issue, which is related to the CAN communication interior bus (-) open, you should immediately use a diagnostic scan tool to pinpoint the exact location of the communication error and any specific modules that may be at fault. Clear the diagnostic trouble codes (DTC) from the vehicle's ECM and perform a test drive to ensure the issue has been resolved. Ignoring this could lead to a non-responsive climate control system and inoperative power windows or door locks.

Are you noticing a non-functioning climate control system or unresponsive interior electronic components, and your check engine light is on? This could be due to U0014 Jeep, indicating a CAN communication interior bus (-) open problem. The recommended action is to check the modules on the bus for proper functionality and replace any malfunctioning modules. Update or reflash the software in the vehicle's control modules to ensure proper communication on the interior bus.

If your check engine light illuminates, indicating U0014 RAM, it often points to an issue with the CAN communication interior bus (-) open. You might experience illuminated dashboard warning lights and erratic behavior of electronic components (e.g., power windows, door locks). To address this, clear the code, reset the system, and perform a test drive to ensure the issue has been resolved. Replace any faulty control modules or components.

According to OBD-II standards, U0018 falls under the category of medium-speed CAN communication bus (+) shorted to bus (-) problems. This often manifests as transmission shifting issues and the vehicle going into limp mode (limiting performance). The primary fix involves testing the continuity of the wiring using a multimeter to ensure there are no breaks or shorts. Clear the trouble codes from the vehicle's computer after completing the repair and perform a test drive to verify that the issue has been resolved.

To resolve the U0018 Chrysler issue, which is related to the CAN communication interior bus (+) shorted to bus (-), you should immediately inspect the interior control modules connected to the CAN bus for any internal faults and replace any modules that are found to be defective. Test the continuity and resistance of the CAN bus wires using a multimeter to confirm an open circuit; if an open circuit is found, trace the wiring to locate the break. Ignoring this could lead to loss of communication with interior modules (e.g., radio, HVAC, power windows).

If your vehicle is displaying the U0018 Dodge code, it means there’s a concern with the CAN communication interior bus (+) shorted to bus (-). You may observe illuminated warning lights on the dashboard (e.g., ABS, airbag, traction control) and a non-responsive climate control system. To rectify this, use a diagnostic scan tool to pinpoint the exact location of the communication error and any specific modules that may be at fault. Repair or replace any damaged wiring, connectors, or modules as needed.

A common cause for U0018 Jeep is related to the CAN communication interior bus (+) shorted to bus (-). This can result in symptoms such as a non-functioning climate control system and unresponsive interior electronic components. The best course of action is to clear the diagnostic trouble codes (DTC) and test the vehicle to ensure the issue has been resolved. Update or reflash the software in the vehicle's control modules to ensure proper communication on the interior bus.

If your check engine light illuminates, indicating U0018 RAM, it often points to an issue with the CAN communication interior bus (+) shorted to bus (-). You might experience the vehicle going into limp mode and erratic behavior of electronic components (e.g., power windows, door locks). To address this, clear the code, reset the system, and perform a test drive to ensure the issue has been resolved. Inspect the wiring harness for any signs of damage, corrosion, or loose connections.

When the U0019 code appears, it directly signifies a problem with the medium-speed CAN communication bus (-) shorted to bus (+). Drivers often notice transmission shifting issues and the check engine light illuminated on the dashboard. A good first step is to test the continuity of the wiring using a multimeter to ensure there are no breaks or shorts. Clear the trouble codes from the vehicle's computer after completing the repair and perform a test drive to verify that the issue has been resolved.

Ignoring the U0019 Chrysler fault code, which signals a CAN communication interior bus (-) shorted to bus (+) issue, can lead to serious problems like inoperative interior features and reduced fuel efficiency. It’s crucial to test the continuity and resistance of the CAN bus wires using a multimeter to confirm an open circuit; if an open circuit is found, trace the wiring to locate the break. Use a diagnostic scan tool to identify the specific module or section of the CAN bus that has lost communication (this will help narrow down the potential cause).

A common cause for U0019 Dodge is related to the CAN communication interior bus (-) shorted to bus (+). This can result in symptoms such as a non-responsive climate control system and malfunctioning interior lights or displays. The best course of action is to begin by conducting a thorough inspection of the CAN bus wiring, connectors, and modules to identify any visible damage or corrosion. Clear the diagnostic trouble codes (DTC) from the vehicle's ECM and perform a test drive to ensure the issue has been resolved.

Are you noticing a non-functioning climate control system or unresponsive interior electronic components, and your check engine light is on? This could be due to U0019 Jeep, indicating a CAN communication interior bus (-) shorted to bus (+) problem. The recommended action is to check the modules on the bus for proper functionality and replace any malfunctioning modules. Clear the diagnostic trouble codes (DTC) and test the vehicle to ensure the issue has been resolved.

Are you experiencing illuminated dashboard warning lights or loss of communication with certain vehicle systems? Your vehicle's diagnostic system might be reporting U0019 RAM, indicating a CAN communication interior bus (-) shorted to bus (+) issue. Addressing this typically involves replacing any faulty control modules or components, then inspecting the wiring harness for any signs of damage, corrosion, or loose connections.

If your check engine light illuminates, indicating U0028, it often points to an issue with the vehicle communication bus A performance. You might experience transmission shifting issues and erratic vehicle behavior. To address this, remove any aftermarket accessories that may be causing electrical interference with the communication bus. Inspect the vehicle communication bus wiring and connectors for any damage, corrosion, or loose connections, and repair or replace as necessary.

Ignoring the U0028 Chrysler fault code, which signals a vehicle communication bus A performance issue, can lead to serious problems like transmission shifting issues and loss of communication with certain modules. It’s crucial to perform a thorough visual inspection of the wiring harness and connectors for any damage or corrosion. Check for water intrusion in connectors and dry them out if necessary.

Are you experiencing illuminated warning lights on the dashboard or inoperative power windows/door locks? Your vehicle's diagnostic system might be reporting U0028 Dodge, indicating a vehicle communication bus A performance issue. Addressing this typically involves conducting a thorough test drive to verify that the issue has been resolved and all systems are functioning properly. Diagnose the specific location of the communication fault using a CAN bus diagnostic tool.

According to OBD-II standards, U0028 Jeep falls under the category of vehicle communication bus A performance problems. This often manifests as unresponsive interior electronic components and a non-working radio. The primary fix involves clearing the diagnostic trouble codes (DTC) and testing the vehicle to ensure the issue has been resolved. Check the modules on the bus for proper functionality and replace any malfunctioning modules.

If your vehicle is displaying the U0028 RAM code, it means there’s a concern with the vehicle communication bus A performance. You may observe the vehicle going into limp mode and erratic behavior of electronic components (e.g., power windows, door locks). To rectify this, replace any faulty control modules or components. Check for any software updates or reprogramming needed for the control modules involved.

When the U0029 code appears, it directly signifies a problem with the vehicle communication bus A (-) open. Drivers often notice loss of communication with various control modules and erratic vehicle behavior. A good first step is to inspect for water intrusion in the communication bus connections and seal any leaks to prevent further damage. Remove any aftermarket accessories that may be causing electrical interference with the communication bus.

Ignoring the U0029 Chrysler fault code, which signals a vehicle communication bus A (-) open issue, can lead to serious problems like illuminated dashboard warning lights and loss of communication with certain modules. It’s crucial to use a multimeter to test the resistance and continuity of the communication bus network. Check for water intrusion in connectors and dry them out if necessary.

Are you noticing inoperative power windows/door locks or loss of communication with the infotainment system, and your check engine light is on? This could be due to U0029 Dodge, indicating a vehicle communication bus A (-) open problem. The recommended action is to clear the DTC (Diagnostic Trouble Codes) and perform a system reset to reestablish communication between ECUs. Repair or replace any damaged wiring, connectors, or modules as needed.

If your check engine light illuminates, indicating U0029 Jeep, it often points to an issue with the vehicle communication bus A (-) open. You might experience a non-working radio and unresponsive interior electronic components. To address this, update or reflash the software in the vehicle's control modules to ensure proper communication on the interior bus. Check the modules on the bus for proper functionality and replace any malfunctioning modules.

The U0029 RAM code typically arises due to a malfunction in the vehicle communication bus A (-) open. Common indicators include difficulty starting the vehicle and erratic behavior of electronic components (e.g., power windows, door locks). For resolution, consider replacing any faulty control modules or components. Clear the code, reset the system, and perform a test drive to ensure the issue has been resolved.

Ignoring the U0030 fault code, which signals a vehicle communication bus A (+) open issue, can lead to serious problems like loss of communication with various control modules and an illuminated check engine light. It’s crucial to inspect the vehicle communication bus wiring and connectors for any damage, corrosion, or loose connections, and repair or replace as necessary. Check for any short circuits or open circuits in the communication bus and repair the wiring if needed.

To resolve the U0030 Chrysler issue, which is related to the vehicle communication bus A (+) open, you should immediately check for water intrusion in connectors and dry them out if necessary. Perform a thorough visual inspection of the wiring harness and connectors for any damage or corrosion. Ignoring this could lead to loss of communication with certain modules and reduced fuel efficiency.

Are you experiencing loss of communication with the infotainment system or inoperative power windows/door locks? Your vehicle's diagnostic system might be reporting U0030 Dodge, indicating a vehicle communication bus A (+) open issue. Addressing this typically involves diagnosing the specific location of the communication fault using a CAN bus diagnostic tool. Repair or replace any damaged wiring, connectors, or modules as needed.

When the U0030 Jeep code appears, it directly signifies a problem with the vehicle communication bus A (+) open. Drivers often notice a malfunctioning instrument cluster display and a non-functioning climate control system. A good first step is to clear the diagnostic trouble codes (DTC) and test the vehicle to ensure the issue has been resolved. Test the CAN bus for damage and replace it if necessary.

Ignoring the U0030 RAM fault code, which signals a vehicle communication bus A (+) open issue, can lead to serious problems like erratic behavior of electronic components (e.g., power windows, door locks) and difficulty starting the vehicle. It’s crucial to inspect the wiring harness for any signs of damage, corrosion, or loose connections. Check for any software updates or reprogramming needed for the control modules involved.

According to OBD-II standards, U0031 falls under the category of vehicle communication bus A (-) shorted to bus (+) problems. This often manifests as transmission shifting issues and reduced engine performance. The primary fix involves removing any aftermarket accessories that may be causing electrical interference with the communication bus. Inspect the vehicle communication bus wiring and connectors for any damage, corrosion, or loose connections, and repair or replace as necessary.

To resolve the U0031 Chrysler issue, which is related to the vehicle communication bus A (-) shorted to bus (+), you should immediately use a multimeter to test the resistance and continuity of the communication bus network. Check for water intrusion in connectors and dry them out if necessary. Ignoring this could lead to erratic behavior of electronic systems (e.g., radio, HVAC, power windows) and reduced fuel efficiency.

The U0031 Dodge code typically arises due to a malfunction in the vehicle communication bus A (-) shorted to bus (+). Common indicators include erratic behavior of interior electronics and inoperative power windows/door locks. For resolution, consider diagnosing the specific location of the communication fault using a CAN bus diagnostic tool. Repair or replace any damaged wiring, connectors, or modules as needed.

A common cause for U0031 Jeep is related to the vehicle communication bus A (-) shorted to bus (+). This can result in symptoms such as a non-functioning climate control system and a malfunctioning instrument cluster display. The best course of action is to begin by inspecting the wiring and connections on the interior bus for any signs of damage or corrosion, then repair or replace any faulty wiring as needed. Test the CAN bus for damage and replace it if necessary.

A common cause for U0031 RAM is related to the vehicle communication bus A (-) shorted to bus (+). This can result in symptoms such as erratic behavior of electronic components (e.g., power windows, door locks) and the vehicle going into limp mode. The best course of action is to clear the code, reset the system, and perform a test drive to ensure the issue has been resolved. Check for any software updates or reprogramming needed for the control modules involved.

The U0032 code typically arises due to a malfunction in the vehicle communication bus A (+) shorted to bus (-). Common indicators include erratic vehicle behavior and transmission shifting issues. For resolution, consider scanning all control modules for communication faults and addressing any malfunctions or reprogramming as necessary. Inspect the vehicle communication bus wiring and connectors for any damage, corrosion, or loose connections, and repair or replace as necessary.

A common cause for U0032 Chrysler is related to the vehicle communication bus A (+) shorted to bus (-). This can result in symptoms such as erratic behavior of electronic systems (e.g., radio, HVAC, power windows) and loss of communication with certain modules. The best course of action is to replace any faulty modules or components identified during testing. Clear the DTC (Diagnostic Trouble Codes) and perform a test drive to ensure the issue has been resolved.

Ignoring the U0032 Dodge fault code, which signals a vehicle communication bus A (+) shorted to bus (-) issue, can lead to serious problems like loss of communication with the infotainment system and erratic behavior of interior electronics. It’s crucial to inspect the wiring harness, connectors, and modules for any visible damage or corrosion. Diagnose the specific location of the communication fault using a CAN bus diagnostic tool.

If your vehicle is displaying the U0032 Jeep code, it means there’s a concern with the vehicle communication bus A (+) shorted to bus (-). You may observe a non-functioning climate control system and a non-working radio. To rectify this, test the CAN bus for damage and replace it if necessary. Update or reflash the software in the vehicle's control modules to ensure proper communication on the interior bus.

To resolve the U0032 RAM issue, which is related to the vehicle communication bus A (+) shorted to bus (-), you should immediately diagnose the issue using a professional-grade scan tool to pinpoint the exact module or wiring causing the communication error. Check for any software updates or reprogramming needed for the control modules involved. Ignoring this could lead to loss of communication with certain vehicle systems and difficulty starting the vehicle.

A common cause for U0033 is related to the vehicle communication bus A (+) shorted to bus (+). This can result in symptoms such as transmission shifting issues and an illuminated check engine light. The best course of action is to inspect for water intrusion in the communication bus connections and seal any leaks to prevent further damage. Check for any short circuits or open circuits in the communication bus and repair the wiring if needed.

If your vehicle is displaying the U0033 Chrysler code, it means there’s a concern with the vehicle communication bus A (+) shorted to bus (+). You may observe illuminated dashboard warning lights and reduced fuel efficiency. To rectify this, clear the DTC (Diagnostic Trouble Codes) and perform a test drive to ensure the issue has been resolved. Check for water intrusion in connectors and dry them out if necessary.

To resolve the U0033 Dodge issue, which is related to the vehicle communication bus A (+) shorted to bus (+), you should immediately conduct a thorough test drive to verify that the issue has been resolved and all systems are functioning properly. Inspect the wiring harness, connectors, and modules for any visible damage or corrosion. Ignoring this could lead to erratic behavior of interior electronics and illuminated warning lights on the dashboard.

Are you experiencing a non-working radio or unresponsive interior electronic components? Your vehicle's diagnostic system might be reporting U0033 Jeep, indicating a vehicle communication bus A (+) shorted to bus (+) issue. Addressing this typically involves beginning by inspecting the wiring and connections on the interior bus for any signs of damage or corrosion, then repairing or replacing any faulty wiring as needed. Clear the diagnostic trouble codes (DTC) and test the vehicle to ensure the issue has been resolved.

Are you experiencing erratic behavior of electronic components (e.g., power windows, door locks) or illuminated dashboard warning lights? Your vehicle's diagnostic system might be reporting U0033 RAM, indicating a vehicle communication bus A (+) shorted to bus (+) issue. Addressing this typically involves checking for any software updates or reprogramming needed for the control modules involved. Replace any faulty control modules or components.

If your check engine light illuminates, indicating U0034, it often points to an issue with the vehicle communication bus A (-) shorted to bus (-). You might experience transmission shifting issues and an illuminated check engine light. To address this, inspect for water intrusion in the communication bus connections and seal any leaks to prevent further damage. Remove any aftermarket accessories that may be causing electrical interference with the communication bus.

According to OBD-II standards, U0034 Chrysler falls under the category of vehicle communication bus A (-) shorted to bus (-) problems. This often manifests as loss of communication with certain modules and illuminated dashboard warning lights. The primary fix involves clearing the DTC (Diagnostic Trouble Codes) and performing a test drive to ensure the issue has been resolved. Use a multimeter to test the resistance and continuity of the communication bus network.

If your check engine light illuminates, indicating U0034 Dodge, it often points to an issue with the vehicle communication bus A (-) shorted to bus (-). You might experience inoperative power windows/door locks and loss of communication with the infotainment system. To address this, inspect the wiring harness, connectors, and modules for any visible damage or corrosion. Clear the DTC (Diagnostic Trouble Codes) and perform a system reset to reestablish communication between ECUs.

Are you experiencing a non-working radio or a non-functioning climate control system? Your vehicle's diagnostic system might be reporting U0034 Jeep, indicating a vehicle communication bus A (-) shorted to bus (-) issue. Addressing this typically involves beginning by inspecting the wiring and connections on the interior bus for any signs of damage or corrosion, then repairing or replacing any faulty wiring as needed. Clear the diagnostic trouble codes (DTC) and test the vehicle to ensure the issue has been resolved.

When the U0034 RAM code appears, it directly signifies a problem with the vehicle communication bus A (-) shorted to bus (-). Drivers often notice loss of communication with certain vehicle systems and illuminated dashboard warning lights. A good first step is to check for any software updates or reprogramming needed for the control modules involved. Clear the code, reset the system, and perform a test drive to ensure the issue has been resolved.

A common cause for U0035 is related to the vehicle communication bus A (+) shorted to bus (-). This can result in symptoms such as loss of communication with various control modules and erratic vehicle behavior. The best course of action is to remove any aftermarket accessories that may be causing electrical interference with the communication bus. Scan all control modules for communication faults and address any malfunctions or reprogramming as necessary.

If your vehicle is displaying the U0035 Chrysler code, it means there’s a concern with the vehicle communication bus A (+) shorted to bus (-). You may observe erratic behavior of electronic systems (e.g., radio, HVAC, power windows) and reduced fuel efficiency. To rectify this, replace any faulty modules or components identified during testing. Check for water intrusion in connectors and dry them out if necessary.

To resolve the U0035 Dodge issue, which is related to the vehicle communication bus A (+) shorted to bus (-), you should immediately clear the DTC (Diagnostic Trouble Codes) and perform a system reset to reestablish communication between ECUs. Inspect the wiring harness, connectors, and modules for any visible damage or corrosion. Ignoring this could lead to loss of communication with the infotainment system and illuminated warning lights on the dashboard.

According to OBD-II standards, U0035 Jeep falls under the category of vehicle communication bus A (+) shorted to bus (-) problems. This often manifests as a non-working radio and a non-functioning climate control system. The primary fix involves testing the CAN bus for damage and replacing it if necessary. Clear the diagnostic trouble codes (DTC) and test the vehicle to ensure the issue has been resolved.

The U0035 RAM code typically arises due to a malfunction in the vehicle communication bus A (+) shorted to bus (-). Common indicators include difficulty starting the vehicle and erratic behavior of electronic components (e.g., power windows, door locks). For resolution, consider checking for any software updates or reprogramming needed for the control modules involved. Clear the code, reset the system, and perform a test drive to ensure the issue has been resolved.

Are you experiencing an illuminated check engine light or transmission shifting issues? Your vehicle's diagnostic system might be reporting U0036, indicating a vehicle communication bus A (+) shorted to bus (+) issue. Addressing this typically involves inspecting the vehicle communication bus wiring and connectors for any damage, corrosion, or loose connections, then repairing or replacing as necessary. Scan all control modules for communication faults and address any malfunctions or reprogramming as necessary.

The U0036 Chrysler code typically arises due to a malfunction in the vehicle communication bus A (+) shorted to bus (+). Common indicators include erratic behavior of electronic systems (e.g., radio, HVAC, power windows) and illuminated dashboard warning lights. For resolution, consider performing a thorough visual inspection of the wiring harness and connectors for any damage or corrosion. Clear the DTC (Diagnostic Trouble Codes) and perform a test drive to ensure the issue has been resolved.

According to OBD-II standards, U0036 Dodge falls under the category of vehicle communication bus A (+) shorted to bus (+) problems. This often manifests as erratic behavior of interior electronics and illuminated warning lights on the dashboard. The primary fix involves repairing or replacing any damaged wiring, connectors, or modules as needed. Inspect the wiring harness, connectors, and modules for any visible damage or corrosion.

Are you noticing a non-functioning climate control system or a malfunctioning instrument cluster display, and your check engine light is on? This could be due to U0036 Jeep, indicating a vehicle communication bus A (+) shorted to bus (+) problem. The recommended action is to update or reflash the software in the vehicle's control modules to ensure proper communication on the interior bus. Begin by inspecting the wiring and connections on the interior bus for any signs of damage or corrosion, then repair or replace any faulty wiring as needed.

Ignoring the U0036 RAM fault code, which signals a vehicle communication bus A (+) shorted to bus (+) issue, can lead to serious problems like erratic behavior of electronic components (e.g., power windows, door locks) and loss of communication with certain vehicle systems. It’s crucial to inspect the wiring harness for any signs of damage, corrosion, or loose connections. Replace any faulty control modules or components.

According to OBD-II standards, U0037 falls under the category of vehicle communication bus A (-) shorted to bus (-) problems. This often manifests as transmission shifting issues and an illuminated check engine light. The primary fix involves inspecting the vehicle communication bus wiring and connectors for any damage, corrosion, or loose connections, then repairing or replacing as necessary. Remove any aftermarket accessories that may be causing electrical interference with the communication bus.

Are you noticing loss of communication with certain modules or transmission shifting issues, and your check engine light is on? This could be due to U0037 Chrysler, indicating a vehicle communication bus A (-) shorted to bus (-) problem. The recommended action is to use a multimeter to test the resistance and continuity of the communication bus network. Replace any faulty modules or components identified during testing.

If your vehicle is displaying the U0037 Dodge code, it means there’s a concern with the vehicle communication bus A (-) shorted to bus (-). You may observe illuminated warning lights on the dashboard and a malfunctioning instrument cluster or dashboard gauges. To rectify this, conduct a thorough test drive to verify that the issue has been resolved and all systems are functioning properly. Inspect the wiring harness, connectors, and modules for any visible damage or corrosion.

According to OBD-II standards, U0037 Jeep falls under the category of vehicle communication bus A (-) shorted to bus (-) problems. This often manifests as a non-functioning climate control system and a non-working radio. The primary fix involves checking the modules on the bus for proper functionality and replacing any malfunctioning modules. Update or reflash the software in the vehicle's control modules to ensure proper communication on the interior bus.

A common cause for U0037 RAM is related to the vehicle communication bus A (-) shorted to bus (-). This can result in symptoms such as loss of communication with certain vehicle systems and erratic behavior of electronic components (e.g., power windows, door locks). The best course of action is to check for any software updates or reprogramming needed for the control modules involved. Replace any faulty control modules or components.

Are you noticing reduced engine performance or loss of communication with various control modules, and your check engine light is on? This could be due to U0038, indicating a vehicle communication bus A (+) shorted to bus (+) problem. The recommended action is to inspect for water intrusion in the communication bus connections and seal any leaks to prevent further damage. Check for any short circuits or open circuits in the communication bus and repair the wiring if needed.

A common cause for B0005 Lincoln is related to collapsible steering column deployment control. This can result in symptoms such as loss of power steering assistance and unusual noise coming from the steering column. The best course of action is to diagnose the issue using a diagnostic scan tool to confirm the B0005 code and pinpoint the exact cause of the problem. Inspect the wiring and connections in the steering column system for any damage or corrosion, and repair or replace as necessary.

To resolve the B0005 Mercury issue, which is related to collapsible steering column deployment control, you should immediately check the collapsible mechanism for any damage or wear, repairing or replacing parts as needed. Clear the DTC (Diagnostic Trouble Codes) from the vehicle's computer system and perform a test drive to ensure the issue has been resolved. Ignoring this could lead to difficulty steering or controlling the vehicle, as well as a loose or wobbly steering wheel.

According to OBD-II standards, B0010 falls under the category of passenger frontal stage 1 deployment control problems. This often manifests as diagnostic trouble code B0010 stored in the vehicle's computer system and the passenger airbag indicator showing as "off" when a passenger is seated. The primary fix involves consulting a professional for diagnosis.

To resolve the B0010 Acura issue, which is related to decreased resistance in the passenger airbag first inflator, you should immediately perform a final test drive to confirm that the passenger airbag first inflator is functioning as intended and that the fault code does not reappear. Diagnose the specific cause of the decreased resistance in the passenger airbag first inflator by using a scan tool to retrieve the fault code and inspecting the wiring, connectors, and components in the airbag system. Ignoring this could lead to the passenger airbag status light showing a fault.

Are you experiencing an illuminated airbag warning light on the dashboard or fault codes related to the airbag system stored in the vehicle's computer? Your vehicle's diagnostic system might be reporting B0010 Chrysler, indicating a passenger frontal squib 1 control issue. Addressing this typically involves consulting a professional for diagnosis.

A common cause for B0010 Dodge is related to passenger frontal squib 1 control. This can result in symptoms such as fault codes related to the airbag system in the vehicle's diagnostic system and an illuminated airbag warning light on the dashboard. The best course of action is to clear the fault codes from the vehicle's system after repairing the issue. Test the squib control module and replace it if faulty.

When the B0010 Ford code appears, it directly signifies a problem with passenger frontal stage 1 deployment control. Drivers often notice an airbag system warning message displayed on the instrument cluster and inability to turn off the passenger airbag. A good first step is to replace any faulty sensors, wiring harnesses, or connectors as needed; if the issue persists, consult with a professional mechanic or dealership for further troubleshooting and repair.

Are you noticing that the vehicle may fail safety inspections due to an airbag system fault, hearing an audible warning chime indicating a problem with the airbag system, and your check engine light is on? This could be due to B0010 Honda, indicating a decreased resistance in the passenger airbag first inflator problem. The recommended action is to diagnose the specific cause of the decreased resistance in the passenger airbag first inflator circuit using a diagnostic scan tool. Reset the airbag system and clear the DTC (Diagnostic Trouble Codes) from the vehicle's computer.

If your vehicle is displaying the B0010 Infiniti code, it means there’s a concern with the passenger airbag module. You may observe intermittent or inconsistent airbag deployment and an illuminated airbag warning light on the dashboard. To rectify this, test the passenger airbag module for proper functionality and replace if necessary. Diagnose the specific cause of the B0010 code using a professional OBD-II scanner.

Ignoring the B0010 Jeep fault code, which signals a passenger frontal squib 1 control issue, can lead to serious problems like diagnostic trouble code (DTC) B0010 stored in the vehicle's computer system and an illuminated airbag warning light on the dashboard. It’s crucial to consult a professional for diagnosis.

To resolve the B0010 Lincoln issue, which is related to passenger frontal stage 1 deployment control, you should immediately inspect the airbag control module, sensor, and wiring for any visible damage or issues. Clear the diagnostic code and reset the airbag system. Ignoring this could lead to the vehicle failing safety inspections due to an airbag system malfunction and intermittent or faulty deployment of the passenger-side airbag.

The B0010 Mercury code typically arises due to a malfunction in passenger frontal stage 1 deployment control. Common indicators include inability to turn off the airbag warning light and an inoperative passenger airbag system. For resolution, consider clearing the fault codes and performing a system reset to ensure the issue is resolved. Perform a thorough system test to verify that the passenger frontal airbag system is functioning correctly after repairs.

To resolve the B0010 Nissan issue, which is related to the passenger airbag module, you should immediately test the sensors in the passenger seat to ensure they are functioning correctly. Diagnose the specific cause of the B0010 code using a diagnostic scanner. Ignoring this could lead to the passenger airbag not inflating properly during a crash simulation and the vehicle displaying an error message related to the airbag system.

Ignoring the B0011 fault code, which signals a passenger frontal stage 2 deployment control issue, can lead to serious problems like an illuminated airbag warning light on the dashboard and the passenger airbag not deploying in a crash. It’s crucial to consult a professional for diagnosis.

Are you noticing inability to turn off the passenger airbag or error messages related to the airbag system on the vehicle's display, and your check engine light is on? This could be due to B0011 Acura, indicating a decreased resistance in the passenger airbag second inflator problem. The recommended action is to consult a professional for diagnosis.

Ignoring the B0011 Chrysler fault code, which signals a passenger frontal squib 2 control issue, can lead to serious problems like an illuminated airbag warning light on the dashboard and diagnostic trouble codes related to the airbag system. It’s crucial to clear the diagnostic trouble codes and reset the airbag system. Inspect the wiring and connections in the airbag system for any damage or corrosion.

According to OBD-II standards, B0011 Dodge falls under the category of passenger frontal squib 2 control problems. This often manifests as inability to reset the airbag system after a crash and electrical issues affecting other components in the airbag system. The primary fix involves replacing the passenger frontal squib 2 control module if it is found to be faulty. Perform a thorough test of the airbag system to ensure proper functionality and safety.

Ignoring the B0011 Ford fault code, which signals a passenger frontal stage 2 deployment control issue, can lead to serious problems like a warning message indicating an airbag system malfunction and an illuminated airbag warning light on the dashboard. It’s crucial to clear the fault codes from the system using the diagnostic scanner and test the airbag system to ensure that the issue has been resolved. Test the passenger frontal stage 2 deployment control module for proper functioning; if it is faulty, replace it with a new module.

To resolve the B0011 Honda issue, which is related to decreased resistance in the passenger airbag second inflator, you should immediately inspect the wiring and electrical connections in the airbag system to check for any damage or loose connections. Clear the diagnostic trouble codes and reset the airbag system to ensure that the issue has been resolved. Ignoring this could lead to intermittent loss of communication with the airbag control module and inconsistent or delayed deployment of the passenger airbag.

Ignoring the B0011 Infiniti fault code, which signals a passenger airbag module issue, can lead to serious problems like the passenger airbag not deploying in the event of a collision and an audible chime indicating an airbag system fault. It’s crucial to consult a professional for diagnosis.

Are you noticing diagnostic trouble code (DTC) B0011 stored in the vehicle's computer system or an illuminated airbag warning light on the dashboard, and your check engine light is on? This could be due to B0011 Jeep, indicating a passenger frontal squib 2 control problem. The recommended action is to consult a professional for diagnosis.

The B0011 Lincoln code typically arises due to a malfunction in passenger frontal stage 2 deployment control. Common indicators include intermittent or faulty deployment of the passenger-side airbag and an error message indicating an issue with the airbag system. For resolution, consider diagnosing the specific cause of the B0011 code using a diagnostic scanner or tool. Clear the diagnostic code and reset the airbag system.

According to OBD-II standards, B0011 Mercury falls under the category of passenger frontal stage 2 deployment control problems. This often manifests as fault codes related to the passenger frontal airbag system and inability to turn off the airbag warning light. The primary fix involves inspecting the passenger frontal airbag sensor, wiring, and connectors for any damage or corrosion, and repairing or replacing as necessary. Clear the fault codes and perform a system reset to ensure the issue is resolved.

When the B0011 Nissan code appears, it directly signifies a problem with the passenger airbag module. Drivers often notice that the airbag system may fail to deploy during a crash test and the passenger airbag may not inflate properly during a crash simulation. A good first step is to test the sensors in the passenger seat to ensure they are functioning correctly. Inspect the wiring and connectors in the airbag system for any damage or corrosion.

According to OBD-II standards, B0012 falls under the category of passenger frontal stage 3 deployment control problems. This often manifests as an illuminated airbag warning light on the dashboard and intermittent deployment of the passenger airbag. The primary fix involves consulting a professional for diagnosis.

To resolve the B0012 Acura issue, which is related to decreased resistance in the passenger airbag third inflator, you should immediately consult a professional for diagnosis. Ignoring this could lead to an illuminated airbag warning light on the dashboard and error messages related to the airbag system on the vehicle's display.

According to OBD-II standards, B0012 Chrysler falls under the category of passenger frontal squib 3 control problems. This often manifests as an illuminated airbag warning light on the dashboard and diagnostic trouble codes related to the airbag system. The primary fix involves inspecting the wiring and connections in the airbag system for any damage or corrosion. Perform a thorough test to ensure proper functioning of the airbag system.

Are you noticing an illuminated airbag warning light on the dashboard or non-deployment of the passenger-side airbag during a collision, and your check engine light is on? This could be due to B0012 Dodge, indicating a passenger frontal squib 3 control problem. The recommended action is to inspect the wiring and connections in the airbag system for any damage or corrosion. Reset the airbag system and clear the diagnostic trouble codes.

According to OBD-II standards, B0012 Ford falls under the category of passenger frontal stage 3 deployment control problems. This often manifests as inability to turn off the passenger airbag and faulty or intermittent deployment of the passenger airbag. The primary fix involves clearing the fault codes from the system using the diagnostic scanner and testing the airbag system to ensure that the issue has been resolved. Reset the airbag warning light on the dashboard if it was illuminated, and confirm that the system is functioning correctly.

If your check engine light illuminates, indicating B0012 Honda, it often points to an issue with decreased resistance in the passenger airbag third inflator. You might experience intermittent loss of communication with the airbag control module and inconsistent or delayed deployment of the passenger airbag. To address this, test the passenger airbag third inflator to determine if it is functioning properly or if it needs to be replaced. Clear the diagnostic trouble codes and reset the airbag system to ensure that the issue has been resolved.

If your check engine light illuminates, indicating B0012 Infiniti, it often points to an issue with the passenger airbag module. You might experience an illuminated airbag warning light on the dashboard and the passenger airbag not deploying in the event of a collision. To address this, consult a professional for diagnosis.

According to OBD-II standards, B0012 Jeep falls under the category of passenger frontal squib 3 control problems. This often manifests as an illuminated airbag warning light on the dashboard and diagnostic trouble code (DTC) B0012 stored in the vehicle's computer system. The primary fix involves consulting a professional for diagnosis.

A common cause for B0012 Lincoln is related to passenger frontal stage 3 deployment control. This can result in symptoms such as intermittent or faulty deployment of the passenger-side airbag and the vehicle failing safety inspections due to an airbag system malfunction. The best course of action is to diagnose the specific cause of the B0012 code using a diagnostic scanner or tool. Replace any faulty components, such as the control module or sensor.

Ignoring the B0012 Mercury fault code, which signals a passenger frontal stage 3 deployment control issue, can lead to serious problems like an inoperative passenger airbag system and inability to turn off the airbag warning light. It’s crucial to inspect the passenger frontal airbag sensor, wiring, and connectors for any damage or corrosion, and repair or replace as necessary. Perform a thorough system test to verify that the passenger frontal airbag system is functioning correctly after repairs.

A common cause for B0012 Nissan is related to the passenger airbag module. This can result in symptoms such as the vehicle displaying an error message related to the airbag system and the passenger airbag not inflating properly during a crash simulation. The best course of action is to diagnose the specific cause of the B0012 code using a diagnostic scanner. Clear the code from the vehicle's system and perform a test to ensure the issue has been resolved.

A common cause for B0013 is related to driver frontal stage 1 deployment control. This can result in symptoms such as the driver airbag not deploying in a crash and an illuminated airbag warning light on the dashboard. The best course of action is to consult a professional for diagnosis.

If your check engine light illuminates, indicating B0013 Acura, it often points to an issue with decreased resistance in the driver airbag first inflator. You might experience inability to turn off the driver airbag and an illuminated airbag warning light on the dashboard. To address this, consult a professional for diagnosis.

The B0013 Chrysler code typically arises due to a malfunction in driver frontal squib 1 control. Common indicators include intermittent airbag deployment and an illuminated airbag warning light on the dashboard. For resolution, consider diagnosing the specific cause of the code using a scan tool and diagnostic equipment. Replace the driver frontal squib 1 control module if it is found to be faulty.

If your vehicle is displaying the B0013 Dodge code, it means there’s a concern with driver frontal squib 1 control. You may observe non-deployment of the driver-side airbag during a collision and electrical issues affecting other components in the airbag system. To rectify this, reset the airbag system and clear the diagnostic trouble codes. Inspect the wiring and connections in the airbag system for any damage or corrosion.

Ignoring the B0013 Ford fault code, which signals a driver frontal stage 1 deployment control issue, can lead to serious problems like inability to turn off the driver airbag and a warning message indicating an airbag system malfunction. It’s crucial to clear the fault codes from the system using the diagnostic scanner and test the airbag system to ensure that the issue has been resolved. Reset the airbag warning light on the dashboard if it was illuminated, and confirm that the system is functioning correctly.

Ignoring the B0013 Honda fault code, which signals a decreased resistance in the driver airbag first inflator issue, can lead to serious problems like an illuminated airbag warning light on the dashboard and inconsistent or delayed deployment of the driver airbag. It’s crucial to begin by diagnosing the specific cause of the decreased resistance in the driver airbag first inflator using a diagnostic scanner to retrieve the trouble codes. Clear the diagnostic trouble codes and reset the airbag system to ensure that the issue has been resolved.

If your vehicle is displaying the B0013 Infiniti code, it means there’s a concern with the driver airbag module. You may observe an audible chime indicating an airbag system fault and diagnostic trouble codes stored in the vehicle's computer system. To rectify this, consult a professional for diagnosis.

Ignoring the B0013 Jeep fault code, which signals a driver frontal squib 1 control issue, can lead to serious problems like an illuminated airbag warning light on the dashboard and diagnostic trouble code (DTC) B0013 stored in the vehicle's computer system. It’s crucial to consult a professional for diagnosis.

The B0013 Lincoln code typically arises due to a malfunction in driver frontal stage 1 deployment control. Common indicators include an illuminated airbag warning light on the dashboard and an error message indicating an issue with the airbag system. For resolution, consider clearing the diagnostic code and resetting the airbag system. Perform a comprehensive test to ensure the airbag system is functioning correctly.

The B0013 Mercury code typically arises due to a malfunction in driver frontal stage 1 deployment control. Common indicators include fault codes related to the driver frontal airbag system and an illuminated airbag warning light on the dashboard. For resolution, consider beginning by diagnosing the specific cause of the B0013 code using a scan tool to retrieve fault codes and perform system tests. Check the airbag control module for faults and replace if needed.

If your vehicle is displaying the B0013 Nissan code, it means there’s a concern with the driver airbag module. You may observe that the airbag system may fail to deploy during a crash test and the vehicle may display an error message related to the airbag system. To rectify this, inspect the wiring and connectors in the airbag system for any damage or corrosion. Test the sensors in the driver seat to ensure they are functioning correctly.

The B0014 code typically arises due to a malfunction in driver frontal stage 2 deployment control. Common indicators include diagnostic trouble codes related to the airbag system stored in the vehicle's computer and intermittent deployment of the driver airbag. For resolution, consider consulting a professional for diagnosis.

If your vehicle is displaying the B0014 Acura code, it means there’s a concern with decreased resistance in the driver airbag second inflator. You may observe inability to turn off the driver airbag and an illuminated airbag warning light on the dashboard. To rectify this, consult a professional for diagnosis.

Are you experiencing an illuminated airbag warning light on the dashboard or intermittent airbag deployment? Your vehicle's diagnostic system might be reporting B0014 Chrysler, indicating a driver frontal squib 2 control issue. Addressing this typically involves replacing the driver frontal squib 2 control module if it is found to be faulty. Inspect the wiring and connections in the airbag system for any damage or corrosion.

To resolve the B0014 Dodge issue, which is related to driver frontal squib 2 control, you should immediately reset the airbag system and clear the diagnostic trouble codes. Perform a thorough test of the airbag system to ensure proper functionality and safety. Ignoring this could lead to an illuminated airbag warning light on the dashboard and non-deployment of the driver-side airbag during a collision.

If your vehicle is displaying the B0014 Ford code, it means there’s a concern with driver frontal stage 2 deployment control. You may observe a warning message indicating an airbag system malfunction and inability to turn off the driver airbag. To rectify this, reset the airbag warning light on the dashboard if it was illuminated, and confirm that the system is functioning correctly. Test the driver frontal stage 2 deployment control module for proper functioning; if it is faulty, replace it with a new module.

The B0014 Honda code typically arises due to a malfunction in decreased resistance in the driver airbag second inflator. Common indicators include diagnostic trouble codes related to the airbag system and an illuminated airbag warning light on the dashboard. For resolution, consider testing the driver airbag second inflator to determine if it is functioning properly or if it needs to be replaced. Clear the diagnostic trouble codes and reset the airbag system to ensure that the issue has been resolved.

Are you experiencing diagnostic trouble codes stored in the vehicle's computer system or an illuminated airbag warning light on the dashboard? Your vehicle's diagnostic system might be reporting B0014 Infiniti, indicating a driver airbag module issue. Addressing this typically involves consulting a professional for diagnosis.

The B0014 Jeep code typically arises due to a malfunction in driver frontal squib 2 control. Common indicators include an illuminated airbag warning light on the dashboard and diagnostic trouble code (DTC) B0014 stored in the vehicle's computer system. For resolution, consider consulting a professional for diagnosis.

To resolve the B0014 Lincoln issue, which is related to driver frontal stage 2 deployment control, you should immediately inspect the airbag control module, sensor, and wiring for any visible damage or issues. Clear the diagnostic code and reset the airbag system. Ignoring this could lead to an illuminated airbag warning light on the dashboard and the vehicle failing safety inspections due to an airbag system malfunction.

Ignoring the B0014 Mercury fault code, which signals a driver frontal stage 2 deployment control issue, can lead to serious problems like an inoperative driver airbag system and fault codes related to the driver frontal airbag system. It’s crucial to begin by diagnosing the specific cause of the B0014 code using a scan tool to retrieve fault codes and perform system tests. Clear the fault codes and perform a system reset to ensure the issue is resolved.

When the B0014 Nissan code appears, it directly signifies a problem with the driver airbag module. Drivers often notice that the vehicle may fail a safety inspection due to an issue with the airbag system and the airbag system may fail to deploy during a crash test. A good first step is to test the sensors in the driver seat to ensure they are functioning correctly. Diagnose the specific cause of the B0014 code using a diagnostic scanner.

Ignoring the B0015 fault code, which signals a driver frontal stage 3 deployment control issue, can lead to serious problems like an illuminated airbag warning light on the dashboard and intermittent deployment of the driver airbag. It’s crucial to consult a professional for diagnosis.

A common cause for B0015 Acura is related to decreased resistance in the driver airbag third inflator. This can result in symptoms such as inability to turn off the driver airbag and error messages related to the airbag system on the vehicle's display. The best course of action is to consult a professional for diagnosis.

According to OBD-II standards, B0015 Chrysler falls under the category of driver frontal squib 3 control problems. This often manifests as an illuminated airbag warning light on the dashboard and intermittent airbag deployment. The primary fix involves diagnosing the specific cause of the code using a scan tool and diagnostic equipment. Replace the driver frontal squib 3 control module if it is found to be faulty.

Are you experiencing faulty or intermittent airbag deployment or an illuminated airbag warning light on the dashboard? Your vehicle's diagnostic system might be reporting B0015 Dodge, indicating a driver frontal squib 3 control issue. Addressing this typically involves performing a thorough test of the airbag system to ensure proper functionality and safety. Inspect the wiring and connections in the airbag system for any damage or corrosion.

A common cause for B0015 Ford is related to driver frontal stage 3 deployment control. This can result in symptoms such as an illuminated airbag warning light on the dashboard and inability to turn off the driver airbag. The best course of action is to begin by diagnosing the specific cause of the B0015 code, using a diagnostic scanner to retrieve the fault codes and pinpoint the issue. Inspect the wiring and connections in the airbag system, looking for any damage, corrosion, or loose connections; repair or replace any damaged components as necessary.

If your check engine light illuminates, indicating B0015 Honda, it often points to an issue with decreased resistance in the driver airbag third inflator. You might experience intermittent loss of communication with the airbag control module and an illuminated airbag warning light on the dashboard. To address this, clear the diagnostic trouble codes and reset the airbag system to ensure that the issue has been resolved. Replace any faulty components, such as the inflator or sensors, and ensure that all connections are secure.

The B0015 Infiniti code typically arises due to a malfunction in the driver airbag module. Common indicators include an audible chime indicating an airbag system fault and diagnostic trouble codes stored in the vehicle's computer system. For resolution, consider consulting a professional for diagnosis.

A common cause for B0015 Jeep is related to driver frontal squib 3 control. This can result in symptoms such as an illuminated airbag warning light on the dashboard and diagnostic trouble code (DTC) B0015 stored in the vehicle's computer system. The best course of action is to consult a professional for diagnosis.

According to OBD-II standards, B0015 Lincoln falls under the category of driver frontal stage 3 deployment control problems. This often manifests as an illuminated airbag warning light on the dashboard and inconsistent functionality of the airbag system during diagnostic tests. The primary fix involves diagnosing the specific cause of the code and replacing any faulty components, such as the control module or sensor. Perform a comprehensive test to ensure the airbag system is functioning correctly.

If your check engine light illuminates, indicating B0015 Mercury, it often points to an issue with driver frontal stage 3 deployment control. You might experience inability to turn off the airbag warning light and an inoperative driver airbag system. To address this, inspect the driver frontal airbag sensor, wiring, and connectors for any damage or corrosion, and repair or replace as necessary. Clear the fault codes and perform a system reset to ensure the issue is resolved.

If your ABS/Traction control warning lights turn on and braking gets worse—with longer stops, unexpected traction control activation, uneven braking (pulling left/right), or ABS acting up—act fast. Use a pro diagnostic tool to find the issue first. Check the left front inlet control valve, wiring, and connectors for damage or rust; replace bad parts. Test the ABS module, swap it if faulty. Check brake fluid: flush if dirty. Take a test drive to confirm ABS and traction control work normally.

This code shows up when the ABS light is on, stopping takes longer, the brake pedal pulses, or brakes lock unexpectedly. Start with a diagnostic scanner to pinpoint the problem. Inspect the left front outlet control circuit’s wiring and connections for damage. Test the control valve—replace if it fails. Swap the ABS module if faulty. Clear the code and test drive to ensure no more braking issues and the light stays off.

Typically, this happens when the ABS light is on, braking has longer stops or a spongy pedal, transmission shifts harshly/delayed, or suspension has uneven height/poor handling. Use a scanner to diagnose the circuit failure. Check the solenoid, wiring, and connectors for damage; replace the solenoid if bad. Fix damaged wiring/connectors, clear codes, and test drive to confirm all issues (braking, shifting, suspension) are gone.

To solve this problem, note the symptoms: spongy brake pedal, longer stops, pedal sinking to the floor, brake warning light on, or uneven front braking. Use a scan tool to find the cause. Inspect the hydraulic system (valve, lines, pump) for damage. Bleed the system to remove air bubbles. Replace faulty parts like the valve or pump. Test drive to ensure the brake pedal feels firm and stops are consistent.

If you notice reduced engine power, uneven heating/cooling, strange right-front noises, or the check engine light on, this code may be the issue. Do a diagnostic scan to confirm. Inspect the right front inlet control valve, wiring, and sensors—clean or replace damaged components. Reset the car’s computer, test drive, and recalibrate or replace parts if the problem comes back.

Does your vehicle have an ABS warning light on, traction control malfunctions, longer stops, pulls when braking, or unexpected ABS engagement? Use a scanner to diagnose. Check the right front inlet solenoid, wiring, and connectors. Test the solenoid with a multimeter—replace if faulty. Clear codes, reset the ABS system, and take a road test to verify smooth braking and no warnings.

Ignoring this fault code may keep the ABS light on, cause uneven right-front braking, grinding noises when stopping, pulling to one side, or worse braking. Use a diagnostic scanner to find the cause. Inspect the right front inlet control module, wiring, and sensor for damage. Test components, replace/repair faulty parts, clear codes, and test drive to ensure safe, quiet braking.

According to OBD-II standards, this code relates to ABS issues: warning light on, uneven braking, longer stops, unexpected ABS, or right-front noises. Inspect the right front inlet solenoid and circuit for damage. Test the solenoid with a multimeter—replace if bad. Fix wiring/connectors; check the brake module if issues persist. Replace parts and test drive to confirm ABS works right.

If your right front outlet has inconsistent airflow, no heat/AC, unresponsive controls, or strange noises, use a diagnostic scanner first. Retrieve error codes, then inspect the control module, wiring, and sensors for damage. Test the outlet to rule out blockages. Replace faulty parts (module, harness, sensors), clear codes, and test the system to ensure steady airflow and correct temp.

This code appears when the ABS light is on, ABS doesn’t work, stops are longer, or there are grinding/pulsing noises when braking. Inspect the right front outlet solenoid circuit (solenoid, wiring, connectors). Test the solenoid with a multimeter for continuity. Fix damaged wiring/connectors, clear DTC with a scanner, and test drive to check that ABS engages properly and no noises occur.

Typically, this happens when the right front vent has inconsistent airflow, no temp control, unresponsive climate settings, or no airflow/heat. Use a scanner to diagnose. Inspect the right front outlet control module and wiring for damage. Test climate control fuses, check sensors, and reprogram or replace the module if needed to restore vent function.

To solve this problem, note ABS warning light, longer stops, pulsating pedal, traction loss, or ABS noises. Connect a scanner to get codes. Inspect the right front outlet solenoid and wiring—replace damaged parts. Test the circuit with a multimeter. If solenoid/wiring is good, replace or reprogram the ABS module, clear codes, and test drive for stable braking.

If you notice inconsistent temp from the right front outlet, no/reduced airflow, only hot/cold air, or unresponsive climate settings, do a diagnostic scan. Inspect wiring and connections for the control module. Test the module—replace if faulty. Check and replace blown fuses, reset the system, and test the outlet to ensure it matches climate settings.

Does your vehicle have an ABS warning light on, worse right-front braking, spongy pedal, uneven braking, or grinding noises? Use a scanner to find the cause. Inspect solenoid valve wiring/connections for damage. Test the valve—replace if bad. Check the brake module for faults, replace parts, clear DTC, and reset to get ABS working normally.

Ignoring this fault code may lead to no airflow from the right front outlet, inconsistent temp, HVAC noises, or airflow from wrong vents (floor/defroster). Use a scanner to get codes. Inspect the blend door actuator, outlet switch—replace faulty parts. Clear codes, turn on HVAC, check airflow/temp, and do a final inspection to confirm fixes.

According to OBD-II standards, this code links to braking issues: longer stops, spongy pedal, uneven braking, ABS warning light, or grinding/squealing noises. Inspect the hydraulic release solenoid—replace if faulty. Top up brake fluid to proper level. Replace worn brake pads/rotors. Bleed the brake system to remove air. Check the caliper—replace if damaged to restore braking.

If your vehicle pulls when braking, stops are longer, ABS light is on, or pedal is spongy, use a scan tool to get codes. Inspect the left rear inlet valve and related parts—replace the valve if needed. Fix damaged wiring/connectors, test the system to ensure no leaks, clear codes, and bleed the brakes for firm pedal feel.

This code shows up when the ABS light is on, braking is worse (wet/slippery roads), ABS doesn’t engage during panic stops, left-rear noises when braking, or longer stops. Use a scanner to confirm. Inspect wiring/connectors—repair/replace. Test the left rear inlet solenoid—replace if faulty. Clear DTC, reset the warning light, and test drive to check ABS on wet roads.

Typically, this happens when the ABS light is on, stops are longer, ABS engages unexpectedly/inconsistently, grinding/pulsating brakes, or pulling to one side. Use a scanner to get codes. Inspect left rear inlet parts (wheel speed sensor, wiring, module) for damage. Test the sensor, replace faulty parts, clear DTCs, and road test to confirm smooth ABS operation.

To solve this problem, note ABS light on, longer stops, unexpected/no ABS, left-rear braking noises, or traction loss. Use a scanner to diagnose the circuit. Inspect wiring/connector—repair/replace. Test the left rear inlet solenoid—replace if bad. Clear codes, test drive, and troubleshoot more (like checking brake lines) if issues persist.

If you notice no airflow from the left rear outlet, inconsistent rear temp, noises from the outlet, or weak airflow, use a diagnostic scanner. Find the issue, then inspect the control module, wiring, and connectors—repair/replace. Test the sensor, replace if needed. Clear outlet blockages, reset the car’s computer, and clear DTC to restore rear HVAC function.

Does your vehicle have an ABS warning light on, longer stops, uneven braking (wheel lock), unexpected ABS, or traction loss? Do a diagnostic scan to get codes. Inspect wiring/connectors—repair/replace faulty parts. Test the left rear outlet solenoid valve—replace if defective. Clear DTCs, road test, and check for brake line obstructions if problems continue.

Ignoring this fault code may keep the ABS light on, make stops longer, pedal spongy, ABS work incorrectly, or cause uneven braking. Use a scanner to find the cause. Inspect left rear outlet control circuit wiring/connectors—repair/replace. Test the wheel speed sensor—replace if faulty. Check the ABS module, clear code, and test drive to ensure safe braking.

According to OBD-II standards, this code relates to ABS: warning light on, hard/spongy pedal, uneven braking, or ABS activation during normal driving. Connect a scanner to confirm. Inspect the left rear outlet solenoid wiring—repair/replace. Test the solenoid with a multimeter—replace if bad. Clear code and test drive to check that ABS only engages when needed.

If your vehicle has uneven braking, longer stops, loss of control when braking, or premature brake wear, inspect the hydraulic release mechanism first. Check for damage or leaks. Test the brake caliper—replace if it sticks or fails. Calibrate related sensors to ensure accurate readings. Fix hydraulic fluid leaks, check electrical connections for damage, and test drive to confirm steady braking.

This code appears when the engine runs rough, stalls, has poor fuel efficiency, misfires, or the check engine light is on. Use a scan tool to find the cause. Check right rear inlet control wiring/connectors—repair if frayed/corroded. Test air intake sensors to ensure they send correct data. Replace the inlet module if faulty, reprogram it, clear code, and test drive for smooth engine performance.

Typically, this happens when the check engine light is on, engine power drops, idling is rough (vibrations), or fuel efficiency decreases. Use a scanner to find the solenoid circuit issue. Inspect wiring/connectors for damage. Test the right rear inlet solenoid—replace with an OEM part if bad. Clear DTC and test drive to confirm better power, smooth idling, and improved fuel use.

To solve this problem, note right-rear noises, bumpy ride, suspension/braking warning lights, or loss of control (turns/braking). Do a diagnostic scan to confirm. Inspect wiring, connectors, and sensors for damage. Test the control module—replace if faulty. Clear codes and road test to ensure no more noises, smooth ride, and stable control.

If you can’t charge devices from the right rear outlet, the fuse blows often, no power to accessories, or there’s a dashboard electrical warning, check the fuse first. Replace if blown. Inspect wiring/connections—repair/replace if frayed/loose. Test the control module—replace if unresponsive. Swap the outlet if damaged, clear code, and test by charging a device.

Does your vehicle have inconsistent airflow/temp in the right rear, HVAC noises, unresponsive HVAC controls, or HVAC warning lights? Inspect the right rear outlet solenoid circuit wiring/connectors. Test the solenoid to ensure it works. Replace blown fuses in the circuit. Troubleshoot and replace the HVAC module if needed. Clear DTCs and test drive to check HVAC function.

Ignoring this fault code may make rear heating/cooling uneven, no airflow from right rear, inconsistent temp, or strange HVAC noises. Use a scanner to find the root cause. Inspect the control module, wiring, and actuator for damage. Test components, replace faulty parts, clear code, reset HVAC, and test drive to confirm even rear temp and airflow.

According to OBD-II standards, this code causes check engine light, reduced performance (hesitation/lack of power), fluid leaks, or erratic transmission (shifting issues). Use a scan tool to find the solenoid circuit issue. Inspect wiring, connectors, and solenoid for damage. Replace the solenoid with an OEM part, fix wiring, clear codes, and test drive for smooth performance.

If your vehicle has delayed braking, uneven suspension, hydraulic fluid leaks, brake warning light, or hydraulic system noises, use a pro scanner. Get DTCs to find the faulty part (pump, line, cylinder). Inspect hydraulic components for damage/wear. Replace faulty parts, flush the system to remove contaminants, refill with recommended fluid, then test the system for responsive braking.

This code appears when the ABS light is on, ABS doesn’t work (wheel lock during braking), stops are longer, ABS noises, or unexpected activation. Use a scan tool to read ABS codes. Inspect the ABS pump motor, wiring, connectors, and sensors. Replace faulty parts (motor, module), bleed the brake system to remove air, clear codes, and test drive to confirm ABS works.

Typically, this happens when the ABS light is on, stops are longer, ABS doesn’t engage, pump noises from the ABS unit, or traction loss on slippery roads. Do a diagnostic scan to get codes. Inspect the ABS pump module, wiring, and connectors. Check brake fluid—top up to the correct level. Test the pump—replace if it fails. Clear codes and test drive to check traction.

To solve this problem, note ABS light on, longer stops, pulsating pedal during ABS activation, pump noises, or no ABS on slippery roads. Connect a scanner to get codes. Inspect the ABS pump module, wiring, and connectors—repair/replace. Check fluid—top up or flush if dirty. Test wheel speed sensors, clear codes, and test drive to confirm ABS works on slippery roads.

If you notice ABS warning light, braking noises, hard/spongy pedal, ABS failure, or stability control light, use a scanner to find the issue. Inspect the ABS pump, wiring, sensors, and module. Replace faulty parts, clear codes, test drive to ensure responsive braking, and reset ABS if the warning light stays on.

Does your vehicle have an ABS warning light on, longer stops, unexpected ABS engagement, no traction control, or pump noises? Use a scanner to find the cause. Inspect the ABS pump, wiring, and module for damage. Test components, replace faulty parts (pump, module), clear code, and test drive to confirm traction control and ABS work.

According to OBD-II standards, this code affects ABS: warning light on, ABS not working, longer stops, pump noises, or worse braking. Use a scanner to find pump motor issues. Inspect wiring/connectors—repair/replace if damaged. Test the pump—replace if faulty. Check fluid, clear codes, reset ABS, and test drive to confirm smooth, quiet braking.

If your vehicle needs more force to brake, has a spongy pedal, longer stops, hissing when braking, or brake warning light on, visually inspect the brake booster. Check for cracks or leaks. Test vacuum pressure—if low, find the leak. Replace faulty parts (diaphragm, check valve, booster pump). Bleed the system and test drive to ensure easy, firm braking.

This code appears when the ABS light is on, traction control light is on, ABS works erratically, stops are longer, or stability issues occur. Visually inspect right front wheel speed sensor wiring/connectors—repair/replace if damaged. Test the sensor with a multimeter—replace if faulty. Clear codes and test drive; if issues persist, check ABS/traction control modules for reprogramming or replacement.

Typically, this happens when the ABS light is on, traction control light is on, braking is worse (right front), noises from right front, or erratic speedometer. Use a scanner and multimeter to diagnose. Inspect the right front wheel speed sensor, wiring, and connectors. Test sensor specs (resistance/voltage)—replace if it fails. Clear DTC and test drive to confirm accurate speedometer and good braking.

To solve this problem, note ABS light on, traction control issues, no stability control, uneven braking, or skidding. Use a scanner to get codes. Inspect right front wheel speed sensor wiring/connectors—repair/replace. Test the sensor—replace if bad. Check the ABS module—replace if faulty. Clear codes and road test to ensure no skidding and stable braking.

If you notice a spongy brake pedal, more force needed to stop, hissing from the booster, longer stops, or brake warning light, use a scan tool to get C0021. Visually inspect the brake booster, hoses, and check valve. Test vacuum pressure—if it drops fast, there’s a leak. Replace faulty parts (hoses, valve, booster). Clear DTC and test drive to confirm firm pedal.

Does your vehicle require more brake pedal force, have longer stops, a hard pedal, or hissing when braking? Use a scan tool to find the brake booster issue. Inspect the brake booster sensor—replace if faulty. Check for vacuum leaks—repair/replace lines. Test the booster to ensure it provides power assist. Clear DTC and test drive to confirm easy braking.

Ignoring this fault code may keep ABS/traction control lights on, make stops longer, brakes lock during sudden stops, or cause stability issues on slippery roads. Visually inspect right front wheel speed sensor wiring/connectors—repair/replace. Test the sensor with a multimeter—replace if bad. Check connections, test the ABS module if needed. Clear codes and test drive to confirm safe braking.

According to OBD-II standards, this code causes hard brake pedal, spongy feel, delayed braking, hissing from booster, or warning light. Visually inspect the brake booster and parts. Test vacuum pressure for leaks—fix if found. Replace the check valve if it doesn’t hold vacuum, fix the diaphragm if torn, and clean debris from the booster.

If your vehicle needs more brake pedal force, has a spongy pedal, brake warning light on, worse braking, or hissing when braking, use a scanner to confirm C0022. Inspect solenoid wiring/connections for damage or corrosion. Check vacuum lines for leaks—repair/replace. Replace the brake booster solenoid if faulty, then test the brake system for firm pedal and good stopping.

This code appears when the ABS light is on, traction control is disabled, stops are longer, skidding on slippery roads, or uneven right front braking. Visually inspect the right front wheel speed sensor and wiring. Test circuit continuity with a multimeter—fix shorts/opens. Use a scanner to clear codes, test drive—if code returns, replace the sensor to restore ABS.

Typically, this happens when the ABS light is on, traction control light is on, braking is erratic (hard/soft pedal), stops are longer, or stability is lost. Use a pro scanner to confirm C0022. Inspect the right front wheel speed sensor, wiring, and connectors—repair/replace. Clear codes, test drive. If issues persist, troubleshoot electronic control modules for failures.

To solve this problem, note missing right front wheel speed sensor signal: ABS light on, longer stops, unexpected/no ABS, traction/stability issues. Use a scanner to diagnose. Inspect the sensor and wiring—repair/replace if damaged. Test sensor by rotating the wheel—check for signal. Check the ABS module if needed. Clear codes and test drive to confirm ABS works.

If you notice ABS light on, traction control issues, erratic braking, stability problems, or unexpected ABS, use a scanner to find missing wheel speed signal. Inspect the right front wheel speed sensor, wiring, and connectors—repair/replace. Test sensor output with a multimeter—ensure it meets specs. Replace the sensor if faulty, clear codes, and test drive.

Does your vehicle have an ABS warning light on, ABS activating on dry pavement, longer stops, unresponsive/pulsating pedal, or worse braking? Use a pro tool to diagnose. Inspect the front right ABS sensor—replace if damaged/corroded. Fix wiring/connectors, clear code, test ABS. If issues persist, check the ABS control module for faults.

According to OBD-II standards, this code triggers ABS light, traction control issues, uneven braking, stability problems, or longer stops. Visually inspect the right front wheel speed sensor, wiring, and connectors. Test sensor resistance/signal with a multimeter—replace if faulty. Clean the tone/reluctor ring (remove debris), clear codes, and test drive to confirm smooth braking.

If your vehicle has ABS/traction control light on, spongy/unresponsive brakes, longer stops, braking noises, or pulls when braking, use a scanner to diagnose the brake circuit. Inspect the ABS module, wheel speed sensors, wiring, and connectors. Repair/replace faulty parts, clear codes, test drive. Flush and bleed the brake system to remove air for firm pedal.

This code appears when the ABS light is on, traction control warning is on, braking is erratic, stability issues (turns/braking), or longer stops on slippery roads. Use a scan tool to get codes, inspect the right front wheel speed sensor and parts. Test sensor resistance/signal, fix wiring/connectors. Reset code, test drive—check modules if issues persist.

Typically, this happens when the ABS light is on, traction control light is on, braking is erratic, stability issues on slippery roads, or longer stops. Connect a scanner to confirm right front wheel speed sensor signal issue. Inspect the sensor, wiring, and connectors—clean/repair. Test sensor specs—replace if faulty. Clear DTC and road test to confirm stable braking.

To solve this problem, note ABS light on, traction control issues, erratic braking, stability problems, or speedometer inaccuracies. Use a scanner to find erratic signal cause. Inspect the right front wheel speed sensor—replace if worn. Fix wiring/connectors (repair corrosion), clear codes, test drive. Check ABS/ECM if issues persist for further fixes.

If you notice ABS light on, traction control warning, erratic ABS activation, no stability control, or uneven braking, connect a scanner to read ABS codes. Inspect the right front wheel speed sensor and wiring—replace faulty parts. Test the wheel bearing—replace if loose/noisy. Clear codes, road test. Troubleshoot ECM if issues persist to fix signal.

Does your vehicle have an ABS warning light on, delayed/inconsistent braking, spongy/hard pedal, braking noises, or no traction control? Thoroughly inspect the brake system (circuit, sensors, module). Fix damaged wiring/connectors, replace faulty sensors/modules. Check and refill brake fluid to proper level, clear codes, and test drive to confirm traction control works.

Ignoring this fault code may keep ABS light on, cause pulsating pedal, unexpected ABS, traction/stability issues, or longer stops. Use a scanner to find front left ABS sensor circuit issues. Inspect wiring for damage—repair/replace. Test sensor resistance/signal—replace if bad. Secure connections (clean corrosion), clear DTC, and test drive to confirm no more ABS glitches.

According to OBD-II standards, this code leads to ABS light, no ABS (longer stops), traction control issues, uneven braking, or stability loss on slippery roads. Use a scan tool to find ABS sensor signal issues. Inspect the sensor, wiring, and connectors for damage. Replace faulty parts, repair wiring (fix frays), clear codes, and road test to confirm ABS works.

If your vehicle has an ABS warning light on, longer stops, no ABS during panic stops, traction control issues, or wheel lock risk, use a scanner to diagnose. Inspect the ABS sensor and wiring for damage. Clean the sensor area (remove dirt/debris), replace if faulty. Clear code and test the ABS system during a safe stop.

This code appears when the ABS light is on, traction control light is on, wheel noises, erratic braking (pulsing/grabbing), or lower fuel efficiency. Inspect the wiring harness—repair/replace damaged wires. Test the wheel speed sensor—replace if it fails. Fix circuit shorts to battery (repair damaged insulation), clear codes with a scanner, and test drive to confirm fuel efficiency and braking.

Typically, this happens when the ABS light is on, traction control warning is on, braking is erratic, stability control errors, or longer stops. Use a scanner to find the cause. Inspect the left front wheel speed sensor and wiring—replace if faulty. Fix circuit shorts/opens (repair wiring), test ABS module, clear codes, and test drive to confirm stable braking.

To solve this problem, note ABS light on, traction control issues, erratic braking, stability problems, or longer stops. Visually inspect the wiring harness and connectors for damage. Test wiring continuity with a multimeter—fix shorts to battery. Replace the left front wheel speed sensor if faulty, clear code, and test drive to confirm ABS works.

If you notice ABS light on, traction control disabled, erratic braking, wheel noises, or pulling when braking, use a scanner to get codes. Visually inspect the left front wheel speed sensor and wiring. Fix damaged wiring (replace frays), test sensor resistance—replace if faulty. Clear code, test drive. Check ABS/ECM if issues persist to fix braking.

Does your vehicle have ABS/traction control lights on, no traction/stability control, limp mode, inaccurate speedometer, or longer stops? Visually inspect left front wheel speed sensor wiring/connectors. Test sensor resistance/continuity—replace if faulty. Clear codes with a scanner, test drive to confirm ABS/traction control work, and speedometer reads correctly.

If P1489 shows up, there's a fault in the PCV heater's control circuit-this can stop the heater from working entirely. It's often due to a damaged control module, wires that cut out occasionally, or a heater with resistance outside the normal range (2-10Ω). Replace the damaged control module first. Then, fix any wires that cut out, and measure the heater's resistance to make sure it's within the standard range.
If common repairs can't solve it, a PCV Delete Kit offers a lasting solution.

Encountering P0439 implies a fault in the catalytic heater control circuit in Bank 2. The causes might be an abnormal heater resistor, a relay fault, or an ECU control module failure. Measure the heater resistance (it should be 2–10Ω). Replace the heater relay and test the ECU drive signals.
If the fault code keeps returning, a CAT Delete Kit may stop it permanently.

Fault code P1480 means the PCV solenoid valve has an open or closed circuit-this valve controls flow in the PCV system, so a circuit issue stops it from working. Common causes are a broken coil in the solenoid, worn wire harnesses, or corroded connectors. First, check the solenoid's resistance (it should be 3-5Ω) to confirm the coil issue. Then, replace worn harnesses and clean corroded connectors.
If common repairs can't solve it, a PCV Delete Kit offers a lasting solution.

If your vehicle triggers fault code P051A, it means the crankcase pressure sensor's circuit isn't working right-this sensor monitors pressure in the crankcase, so a faulty circuit can throw off readings. Common issues behind this are a broken sensor, damaged wires or connectors, or a vacuum leak messing with the sensor's data. To fix it, start by replacing the bad sensor. If that doesn't help, repair any damaged circuits or connectors, and seal up any vacuum leaks you find.
If common repairs can't solve it, a PCV Delete Kit offers a lasting solution.

Fault code P051B points to a problem with the sensor circuit's range or performance-this means the sensor isn't sending signals that fall within the normal range. Why might this happen? It could be a faulty sensor, corroded or broken wires, or a blocked PCV system (or mechanical issue) causing too much pressure. First, replace the sensor. If the issue lingers, fix the damaged circuits and either clean the PCV system or check the engine for mechanical problems.
If common repairs can't solve it, a PCV Delete Kit offers a lasting solution.

When P051C pops up, the sensor circuit has too low voltage-this stops the sensor from working properly. The main causes here are a sensor with an internal short, a wire that's grounded incorrectly, or a failing PCV system. Begin by swapping out the sensor. Next, repair the ground circuit to fix the voltage issue, and take a look at the PCV valve and hoses to make sure they're in good shape.
If common repairs can't solve it, a PCV Delete Kit offers a lasting solution.

P051D means the sensor circuit has too high voltage, which can disrupt the sensor's ability to send accurate data. This is often due to a short in the sensor's signal wire, a wire that's accidentally connected to power, or too much blow-by (gases leaking past pistons) causing weird pressure. Replace the sensor first. Then, separate the signal wire from power sources, and check the piston rings to stop excess blow-by.
If common repairs can't solve it, a PCV Delete Kit offers a lasting solution.

Fault code P051E is an intermittent issue with the sensor circuit-this means the problem comes and goes, not staying constant. It's usually from a sensor with bad contact, a loose connector, or a vacuum leak that fluctuates. Replace the sensor to fix poor contact. After that, make sure the connector is tight, and check the intake manifold for leaks that might come and go.
If common repairs can't solve it, a PCV Delete Kit offers a lasting solution.

If you see P051F, the PCV filter is clogged-this filter keeps debris out of the PCV system, so a clog can block airflow. What causes it? Sludge or debris buildup in the filter, a collapsed PCV hose, or a stuck PCV valve. Start by replacing the clogged filter. Then, swap out any collapsed hoses, and either clean the stuck PCV valve or replace it if cleaning doesn't work.
If common repairs can't solve it, a PCV Delete Kit offers a lasting solution.

P052E signals a performance problem with the PCV regulator valve-this valve controls pressure in the PCV system, so poor performance throws off pressure. The issues here are usually a valve stuck due to mechanical problems, a blocked ventilation pipe, or a circuit with bad contact. Replace the stuck regulator valve first. Then, clean out any blocked ventilation tubes, and fix any loose or damaged electrical connections.
If common repairs can't solve it, a PCV Delete Kit offers a lasting solution.

P120B indicates the PCV diagnostic valve has too low input voltage-this valve helps diagnose PCV issues, so low voltage ruins its accuracy. Why? The valve itself might be broken, the power line has too much resistance (slowing voltage), or the ECM (engine control module) is sending bad signals. Replace the faulty diagnostic valve first. Then, check the power line for resistance issues, and update the ECM software if needed.
If common repairs can't solve it, a PCV Delete Kit offers a lasting solution.

When P053A appears, the PCV heater's control circuit is open-this heater keeps the PCV system from freezing, so an open circuit stops it from working. The causes are often a blown heater fuse, a bad relay, or a control module that isn't outputting power. Test the heater's continuity first to check for a fuse issue. Then, replace the bad relay, and check if the control module is getting power.
If common repairs can't solve it, a PCV Delete Kit offers a lasting solution.

P053B means the PCV heater's control circuit has low voltage-this makes the heater work poorly or not at all. It's usually from a heater with a partial short, a wire shorted to ground, or an ECM that can't supply enough power. Replace the faulty heater first. Then, fix any wires shorted to ground, and test the ECM to make sure it's outputting enough current.
If common repairs can't solve it, a PCV Delete Kit offers a lasting solution.

Fault code P053C points to high voltage in the PCV heater's control circuit-this can damage the heater or other parts. The main issues are a heater with an internal open, a broken control line, or abnormal reference voltage from the PCM (powertrain control module). Replace the heater first to fix the internal open. Then, repair the broken control line, and check the PCM's signal for normal voltage.
If common repairs can't solve it, a PCV Delete Kit offers a lasting solution.

P145E is a fault in the PCV heater 'B' circuit-this auxiliary heater helps the main heater, so a fault here affects cold-weather performance. Causes include a broken auxiliary heater, damaged bypass control wires, or ECM communication issues. Replace the faulty auxiliary heater first. Then, repair any damaged bypass wires, and update the ECM firmware to fix communication problems.
If common repairs can't solve it, a PCV Delete Kit offers a lasting solution.

When fault code P0420 pops up, it indicates that the catalytic system efficiency in Bank 1 is below the threshold. This could stem from a clogged or failed three-way catalytic converter, faulty front or rear oxygen sensors, exhaust pipe leakage, or poor fuel quality or leaded gasoline contamination. To fix it, start by checking for and repairing exhaust leaks. Then, test the oxygen sensor data stream and replace any faulty sensors. You can also clean the catalytic converter with a specialized cleaner like a solvent solution. If cleaning doesn't work or the carrier is melted, replace the OEM catalytic converter.
If the fault code keeps returning, a CAT Delete Kit may stop it permanently.

Fault code P0430 signals that the catalytic system efficiency in Bank 2 is below the threshold. Likely causes include a failure of the second-row catalyst, a corresponding oxygen sensor fault, or engine misfire or an overly rich mixture. First, confirm the damage and replace the faulty second-row catalytic converters. Then, replace out-of-tolerance oxygen sensors. Also, inspect for misfire causes like spark plugs or injectors and address rich mixture issues.
If the fault code keeps returning, a CAT Delete Kit may stop it permanently.

Spotting fault code P0426 means there's an issue with the catalytic temperature sensor circuit range or performance in Bank 1. The main culprits are temperature sensor damage, sensor circuit short or open, or an ECU signal processing error. Your first move should be to replace the faulty temperature sensor. Next, inspect the wiring harness and connectors. If needed, update or reprogram the ECU software.
If the fault code keeps returning, a CAT Delete Kit may stop it permanently.

When P0436 shows up, it's a sign of a problem with the catalytic temperature sensor circuit range or performance in Bank 2. Possible reasons are a Sensor 2 fault, circuit corrosion or poor contact, or exhaust leakage affecting temperature measurement. Replace the second-row sensors first. Then, repair any damaged circuits. Finally, seal up exhaust leak points.
If the fault code keeps returning, a CAT Delete Kit may stop it permanently.

Fault code P0427 indicates low voltage in the catalytic temperature sensor circuit in Bank 1. This can be due to an internal short circuit in the sensor, poor grounding, or a signal line to ground short circuit. Test the sensor resistance and replace abnormal components. Repair the grounding line and check for insulation damage on signal lines.
If the fault code keeps returning, a CAT Delete Kit may stop it permanently.

If you come across P0437, it means low voltage in the catalytic temperature sensor circuit in Bank 2. It's probably caused by a sensor fault, wiring plug corrosion, or an ECU power supply abnormality. Replace the sensor right away. Clean or replace the plug and test the ECU output voltage.
If the fault code keeps returning, a CAT Delete Kit may stop it permanently.

Fault code P0428 points to high voltage in the catalytic temperature sensor circuit in Bank 1. The common causes are a sensor signal line to power short circuit, ECU failure, or a sensor internal open circuit. Check if the wiring harness is in contact with the 12V line. Replace the sensor and test the ECU reference voltage.
If the fault code keeps returning, a CAT Delete Kit may stop it permanently.

When P0438 appears, it shows high voltage in the catalytic temperature sensor circuit in Bank 2. The likely reasons are sensor failure, circuit open, or electromagnetic interference. Replace the sensor first. Repair broken circuit points and check the ignition coil shielding.
If the fault code keeps returning, a CAT Delete Kit may stop it permanently.

Fault code P0434 means the catalytic temperature in Bank 2 is below the threshold. It may be because the catalyst isn't reaching the operating temperature, there's a temperature sensor deviation, or frequent cold engine starts. Check the catalytic converter insulation. Calibrate or replace the temperature sensor and investigate cooling system failures.
If the fault code keeps returning, a CAT Delete Kit may stop it permanently.

Fault code P0429 signals low catalytic heater efficiency in Bank 1. This can result from heater aging, insufficient supply voltage, or catalyst physical damage. Replace the catalytic converter assembly (with an integrated heater). Check the generator output voltage and look for exhaust pipe impact deformation.
If the fault code keeps returning, a CAT Delete Kit may stop it permanently.

When P0432 pops up, it means the main catalyst reaction in Bank 2 is insufficient. The possible factors are catalyst carrier fracture, lead or sulfide poisoning, or long-term low-temperature operation. Replace the catalytic converter and use unleaded gasoline. Clean the fuel system and avoid short trips.
If the fault code keeps returning, a CAT Delete Kit may stop it permanently.

Fault code P043D indicates a high catalytic temperature sensor circuit in Bank 2, Sensor 2. The causes could be a sensor short circuit, an abnormal ECU reference voltage, or long-term low-temperature operation. Replace the sensor. Test the ECU A/D conversion module and try to avoid short trips.
If the fault code keeps returning, a CAT Delete Kit may stop it permanently.

Fault code P043C shows a low catalytic temperature sensor circuit in Bank 2, Sensor 2. It's usually due to a sensor ground fault or a signal line open circuit. Repair the grounding line first. If needed, replace the sensor assembly.
If the fault code keeps returning, a CAT Delete Kit may stop it permanently.

If you encounter the fault code P1405, it means detected high voltage in the DPF EGR sensor circuit. The likely causes include DPF EGR sensor failure, sensor circuit wiring/connector issues, or ECM (engine control module) failure. To resolve this, replace the DPF EGR sensor (if voltage exceeds limits), repair or replace damaged wires or connectors, and replace the ECM when necessary.
When standard repairs fail, try a DPF Delete Kit to resolve the issue for good.

When P2003 shows up, it indicates DPF efficiency below threshold (bank 2). Possible culprits are excessive DPF soot accumulation leading to regeneration failure, differential pressure sensor failure, or DPF upstream/downstream exhaust leak or damage. Try a forced regeneration with a scan tool to clear soot, replace the differential pressure sensor with abnormal readings, and repair or replace damaged exhaust components.
When standard repairs fail, try a DPF Delete Kit to resolve the issue for good.

If you encounter the fault code P242F, it means DPF ash accumulation limit has been reached. The likely causes include long-term neglect of DPF cleaning or replacement, excessive oil consumption increasing ash, or a pressure/temperature sensor failure misjudging resistance. To resolve this, professionally clean or replace the DPF (after ash confirmation), replace faulty sensors (pressure/temperature), reset DPF fault codes, and verify with a test drive.
When standard repairs fail, try a DPF Delete Kit to resolve the issue for good.

Fault code P244A signals DPF pressure differential below threshold (bank 1). This could be due to DPF differential pressure sensor failure, a DPF upstream/downstream exhaust leak, or DPF damage, cracking, or missing parts. To fix it, replace the differential pressure sensor with abnormal readings, repair or replace leaking exhaust components, and inspect the DPF for physical damage, replacing if necessary.
When standard repairs fail, try a DPF Delete Kit to resolve the issue for good.

When P244B shows up, it indicates DPF pressure differential above threshold (bank 1). Possible culprits are excessive soot or ash accumulation inside the DPF, DPF differential pressure sensor failure, or an exhaust leak or blockage. Try forced DPF regeneration to clear soot, replace the differential pressure sensor with out-of-limit readings, and replace the assembly if regeneration fails or the DPF is damaged.
When standard repairs fail, try a DPF Delete Kit to resolve the issue for good.

If you encounter the fault code P245E, it means DPF pressure sensor 'B' circuit failure. The likely causes include DPF pressure sensor failure, wire or connector damage, or DPF blockage or damage. To resolve this, replace the sensor after testing and confirmation, repair or replace damaged wires or connectors, and clean or replace the DPF.
When standard repairs fail, try a DPF Delete Kit to resolve the issue for good.

Fault code P246B signals vehicle conditions incompatible during DPF regeneration. This could be due to insufficient high-speed driving, short trip driving cycles, or exhaust temperature sensor failure. To fix it, drive at high speed over a long distance to promote regeneration, replace a faulty exhaust temperature sensor, and instruct the driver on proper operation.
When standard repairs fail, try a DPF Delete Kit to resolve the issue for good.

When P2454 shows up, it indicates DPF pressure sensor 'A' circuit voltage too low. Possible culprits are sensor failure, wire or connector issues, or software/calibration issues. To fix it, replace the sensor after test failure, repair or replace damaged wires, and update vehicle software or calibrate.
When standard repairs fail, try a DPF Delete Kit to resolve the issue for good.

If you encounter the fault code P2455, it means DPF pressure sensor 'A' circuit voltage too high. The likely causes include sensor failure, wire short circuit or corrosion, or DPF blockage causing high back pressure. To resolve this, replace faulty sensors, repair or replace damaged wires, and perform regeneration or replace the DPF.
When standard repairs fail, try a DPF Delete Kit to resolve the issue for good.

Fault code P2456 signals DPF pressure sensor 'A' circuit intermittent failure. This could be due to sensor failure, sensor hose damage or blockage, or wire or connector issues. To fix it, replace the sensor with unreliable readings, clean or replace pressure hoses, and repair or replace damaged wires.
When standard repairs fail, try a DPF Delete Kit to resolve the issue for good.

When P2458 shows up, it indicates DPF regeneration duration abnormal. Possible culprits are DPF failure, exhaust system leak, or ECM issue. To fix it, replace the DPF, repair exhaust leaks, and repair or replace ECM issues.
When standard repairs fail, try a DPF Delete Kit to resolve the issue for good.

If you encounter the fault code P2459, it means DPF regeneration frequency too high. The likely causes include poor combustion or bad fuel quality, temperature/pressure sensor failure, DPF system failure, or intake restriction. To resolve this, clean or replace the DPF, repair or replace faulty sensors, and inspect and repair the fuel system (injectors/fuel quality).
When standard repairs fail, try a DPF Delete Kit to resolve the issue for good.

Fault code P2460 signals DPF pressure sensor 'B' circuit voltage too low. This could be due to sensor 'B' failure, wire corrosion or damage, or exhaust leak or blockage. To fix it, replace the sensor after testing and confirmation, repair or replace damaged wiring, and resolve exhaust leaks or blockages.
When standard repairs fail, try a DPF Delete Kit to resolve the issue for good.

When P2461 shows up, it indicates DPF pressure sensor 'B' circuit voltage too high. Possible culprits are sensor 'B' failure, circuit short-circuit or damage, or DPF clogging or fault. To fix it, replace faulty sensors, repair or replace damaged wiring, and clean or replace the DPF.
When standard repairs fail, try a DPF Delete Kit to resolve the issue for good.

If you encounter the fault code P2462, it means DPF pressure sensor 'B' circuit intermittent failure. The likely causes include sensor 'B' failure, pressure hose damage or blockage, or circuit corrosion or loosening. To resolve this, replace the sensor after fault confirmation, clean or replace hoses, and repair wiring and secure connections.
When standard repairs fail, try a DPF Delete Kit to resolve the issue for good.

When P2464 shows up, it indicates DPF pressure differential below threshold (bank 2). Possible culprits are differential pressure sensor failure, exhaust blockage or leakage, or DPF over-cleaning or removal. To fix it, replace faulty sensors, repair exhaust leaks or blockages, and check DPF maintenance records.
When standard repairs fail, try a DPF Delete Kit to resolve the issue for good.

If you encounter the fault code P2465, it means DPF pressure differential above threshold (bank 2). The likely causes include DPF clogging (soot/ash), differential pressure sensor or circuit failure, or exhaust leakage or blockage. To resolve this, force regeneration to clear soot, replace the DPF when ash content is excessive, and replace sensors or repair wiring.
When standard repairs fail, try a DPF Delete Kit to resolve the issue for good.

If your check engine light comes on with the fault code P042E, it indicates that the EGR (Exhaust Gas Recirculation) did not reach the expected closed position. This could be due to carbon buildup in the EGR valve or channel, a failure of the EGR valve position sensor, or issues with the circuit or connector. To address this, start by cleaning the EGR valve and channels. If the problem persists, replace the faulty EGR valve or sensor, or repair or replace any damaged wiring or connectors.
If regular fixes don’t work, an EGR Delete Kit can provide a permanent solution.

When the fault code P046C appears, it means the EGR sensor 'A' circuit has range or performance abnormalities. Possible causes include position sensor failure, circuit damage or corrosion, and EGR carbon buildup blockage. Replace faulty sensors first. If that doesn't work, repair or replace the wiring or connectors, or clean or replace the EGR valve.
If regular fixes don’t work, an EGR Delete Kit can provide a permanent solution.

With P0407 (EGR sensor 'B' circuit voltage too low), sensor 'B' failure, circuit corrosion or damage, or PCM failure are possible reasons. Replace out-of-limit sensors, repair or replace wiring or connectors, or reprogram or replace the PCM.
If regular fixes don’t work, an EGR Delete Kit can provide a permanent solution.

For P0408 (EGR sensor 'B' circuit voltage too high), sensor 'B' failure, circuit or connector issue, or ECU failure could be the case. Replace faulty sensors, repair or replace damaged wiring, or have a professional diagnose the ECU.
If regular fixes don’t work, an EGR Delete Kit can provide a permanent solution.

When P0409 (EGR sensor 'A' circuit fault) shows up, position sensor failure, circuit corrosion or damage, or EGR valve assembly failure might be the causes. Replace faulty sensors, repair or replace wiring or connectors, or replace a defective EGR valve assembly.
If regular fixes don’t work, an EGR Delete Kit can provide a permanent solution.

If P0486 (EGR sensor 'B' circuit fault) is detected, sensor or circuit failure, connector corrosion or looseness, or EGR valve carbon buildup could be to blame. Clean the EGR valve and sensors, repair or replace wiring or connectors, or replace faulty sensors or valves.
If regular fixes don’t work, an EGR Delete Kit can provide a permanent solution.

For P0487 (EGR throttle control circuit 'A' open), control valve failure, circuit corrosion or damage, or control module failure could be the reasons. Repair or replace wiring or connectors, clean or replace sticking valves, or replace the faulty control module.
If regular fixes don’t work, an EGR Delete Kit can provide a permanent solution.

When P0488 (EGR throttle control range or performance issue) appears, control actuator failure, circuit or connector issues, or carbon buildup affecting operation might be the causes. Replace the faulty actuator, repair or replace damaged wiring, or clean or replace carbon buildup components.
If regular fixes don’t work, an EGR Delete Kit can provide a permanent solution.

If P0489 (EGR throttle control circuit voltage too low) occurs, control valve failure, circuit damage or contact issues, or ECM failure could be the case. Replace faulty valves, repair or replace wiring or connectors, or upgrade or reprogram the ECM.
If regular fixes don’t work, an EGR Delete Kit can provide a permanent solution.

When P0490 (EGR motor control circuit high voltage) shows up, motor or solenoid valve failure, circuit open or short, or ECM failure might be the causes. Replace the damaged motor or solenoid valve, repair or replace wiring or connectors, or inspect or replace the ECM.
If regular fixes don’t work, an EGR Delete Kit can provide a permanent solution.

For P140F (EGR throttle stuck), carbon buildup causing blockage, actuator or motor failure, or control circuit issues could be the reasons. Clean the throttle body and components, replace the faulty actuator, or repair or replace control circuits.
If regular fixes don’t work, an EGR Delete Kit can provide a permanent solution.

If P040A (EGR temperature sensor 'A' circuit issue) is detected, temperature sensor failure, circuit or connector issue, or ECM signal error could be to blame. Replace the faulty sensor, repair or replace damaged wiring, or clear fault codes and road test.
If regular fixes don’t work, an EGR Delete Kit can provide a permanent solution.

When P040B (EGR temperature sensor 2 performance issue) appears, sensor 2 failure, wire corrosion or looseness, or carbon buildup affecting performance might be the causes. Replace the out-of-limit sensor, repair or replace wiring or connectors, or clean the EGR system.
If regular fixes don’t work, an EGR Delete Kit can provide a permanent solution.

For P040C (EGR temperature sensor 2 circuit voltage too low), sensor 2 failure, wire or connector damage, or poor grounding could be the reasons. Replace the faulty sensor, repair or replace wiring or connectors, or repair the ground connection.
If regular fixes don’t work, an EGR Delete Kit can provide a permanent solution.

If P040E (EGR temperature sensor 2 circuit unstable) is detected, sensor 2 failure, wire damage or poor connection, or ECM failure could be to blame. Replace the faulty sensor, repair or replace wiring or connectors, or clear fault codes and road test.
If regular fixes don’t work, an EGR Delete Kit can provide a permanent solution.

When P040F (EGR temperature sensor 'A/B' correlation fault) appears, sensor A/B failure, wiring issue, or EGR valve failure might be the causes. Repair or replace sensor wiring, replace the faulty sensor, or clean or replace the EGR valve.
If regular fixes don’t work, an EGR Delete Kit can provide a permanent solution.

For P1402 (EGR valve stuck in open position), carbon buildup or mechanical failure, solenoid or actuator failure, or wiring issues could be the reasons. Clean the EGR valve and passages, replace the faulty valve or solenoid, or repair or replace wiring.
If regular fixes don’t work, an EGR Delete Kit can provide a permanent solution.

If P1403 (EGR system valve 1 issue) is detected, EGR valve sticking or blocking, wire corrosion or damage, or channel or mixer carbon buildup could be to blame. Clean or replace the EGR valve, repair or replace wiring or connectors, or clean passages and the intake manifold.
If regular fixes don’t work, an EGR Delete Kit can provide a permanent solution.

If P1406 (DPFE sensor downstream hose issue) is detected, hose rupture or blocking, DPFE sensor failure, or EGR system carbon buildup could be to blame. Replace or reattach hoses, replace the contaminated sensor, or clean the EGR system.
If regular fixes don’t work, an EGR Delete Kit can provide a permanent solution.

When P1407 (EGR flow exceeds self-test range) appears, carbon buildup blocking the channel, EGR valve sticking, or sensor or solenoid failure might be the causes. Clean passages and valves, replace the stuck EGR valve, or replace faulty sensors or solenoids.
If regular fixes don’t work, an EGR Delete Kit can provide a permanent solution.

For P3130 (EGR system adjustment exceeds limit), EGR valve sticking or obstruction, channel carbon buildup blocking, or position sensor or wiring failure could be the reasons. Clean the EGR valve and passages (replace if ineffective), replace the faulty sensor, or inspect and repair EGR wiring.
If regular fixes don’t work, an EGR Delete Kit can provide a permanent solution.

If your check engine light comes on while driving, it may mean the U0001 Mercury issue. This is a problem with the vehicle's high-speed CAN bus (a network for module communication). Common reasons are corrosion or damage to the wiring harness connected to the high speed can bus. To fix it, first, use a scanner to find the cause. look for signs of corrosion, damage, or loose connections.

To solve the C0010 code in your Mazda, start by checking the left front inlet solenoid valve system—this solenoid controls ABS brake fluid flow. Your ABS warning light will be on, and you may have pulsating brakes or longer stops. Causes include electrical faults, damaged wiring, a faulty solenoid, or contaminated fluid. Do a diagnostic scan, inspect the solenoid and wiring, replace faulty parts, clear the code, then test drive to ensure ABS works properly.

If you see check engine light illuminated when starting your car, it could be U0004 Ford. This code relates to a problem with the vehicle's high-speed CAN bus (a network for module communication). Likely causes: faulty high-speed can communication bus wiring. Do first, use a scanner to find the cause. use a multimeter to check the voltage levels on the high-speed can bus to pinpoint the area where the voltage is low.

To solve the U0004 problem (which is a problem with the vehicle's high-speed CAN bus (a network for module communication)), you should first, use a scanner to find the cause. test the high speed can communication bus module for proper functionality. This issue causes check engine light is illuminated and often comes from wiring or harness issues causing a short or open circuit.

Usually, this happens because damaged or rusty wiring harness. The U0003 code means a problem with the vehicle's high-speed CAN bus (a network for module communication). You may notice illumination of the check engine light. To resolve it, first, use a scanner to find the cause. use a multimeter to test the continuity of the wiring and connectors to pinpoint the location of the open circuit.

When the vehicle's CAN bus has communication problems, U0002 RAM appears. You'll likely see check engine light illuminated. It usually happens because faulty wiring: damaged or rusty wiring within the can bus system can disrupt communication between ecus. Next, first, use a scanner to find the cause. inspect wiring and connections: thoroughly inspect the wiring harnesses, connectors, and terminals within the can bus system for any signs of damage, corrosion, or looseness.

If your check engine light comes on while driving, it may mean the U0002 Jeep issue. This is a CAN bus circuit communication issue. Common reasons are faulty wiring or connections in the can bus network. To fix it, first, use a scanner to find the cause. check and test the control modules for proper functioning.

If you see check engine light illuminated when starting your car, it could be U0002 Dodge. This code relates to a CAN bus circuit communication issue. Likely causes: faulty wiring: poor connections, damaged wires, or short circuits in the wiring harness can disrupt communication on the can bus. Do first, use a scanner to find the cause. check wiring and connectors: inspect the wiring harness for any damage, corrosion, or loose connections. repair or replace any faulty wiring or connectors.

To solve the U0002 Chrysler problem (which is a CAN bus circuit communication issue), you should first, use a scanner to find the cause. test and potentially replace any malfunctioning control modules or sensors. This issue causes check engine light is illuminated and often comes from faulty wiring or connections in the can bus system.

Usually, this happens because damaged wiring harnesses. The U0002 code means a problem with the vehicle's high-speed CAN bus (a network for module communication). You may notice check engine light illuminated. To resolve it, first, use a scanner to find the cause. inspect the wiring harnesses and connectors for any damage or corrosion, repairing or replacing as necessary.

When the vehicle's CAN bus has communication problems, U0001 RAM appears. You'll likely see check engine light illuminated on the dashboard. It usually happens because damaged wiring or connectors in the can bus circuit. Next, first, use a scanner to find the cause. check the electronic control units (ecus) for any faults and replace them if necessary.

If your check engine light comes on while driving, it may mean the U0001 issue. This is a problem with the vehicle's high-speed CAN bus (a network for module communication). Common reasons are bad can bus wiring: damaged or rusty wiring within the high speed can bus system can disrupt communication between modules. To fix it, first, use a scanner to find the cause. check the wiring harness, connectors, and terminals in the high speed can bus system for any signs of damage, corrosion, or loose connections.

If you see check engine light illuminated when starting your car, it could be U0001 Lincoln. This code relates to a problem with the vehicle's high-speed CAN bus (a network for module communication). Likely causes: faulty control module: a malfunctioning control module within the high speed can bus system can trigger the u0001 code. Do first, use a scanner to find the cause. check wiring and connectors: inspect the wiring harness and connectors for any signs of damage, corrosion, or loose connections. repair or replace as necessary.

To solve the U0001 Jeep problem (which is a CAN bus circuit communication issue), you should first, use a scanner to find the cause. check for any loose connections or poor grounds within the network. This issue causes check engine light illuminated on the dashboard and often comes from faulty can bus wiring or connectors.

Usually, this happens because damaged wiring harnesses or connectors. The U0001 GMC code means a problem with the vehicle's high-speed CAN bus (a network for module communication). You may notice check engine light illuminated. To resolve it, first, use a scanner to find the cause. check and secure all connections related to the high-speed can communication bus.

When the vehicle's CAN bus has communication problems, U0001 Ford appears. You'll likely see check engine light illuminated. It usually happens because faulty high-speed can bus wiring. Next, first, use a scanner to find the cause. inspect the high-speed can bus wiring for any damage or corrosion, repairing or replacing as necessary.

If your check engine light comes on while driving, it may mean the U0001 Dodge issue. This is a CAN bus circuit communication issue. Common reasons are wiring issues, such as damaged or rusty wires affecting the can bus circuit. To fix it, first, use a scanner to find the cause. inspect the wiring harness and connectors for any signs of damage, corrosion, or loose connections.

If you see check engine light illuminated when starting your car, it could be U0001 Chrysler. This code relates to a CAN bus circuit communication issue. Likely causes: faulty can bus wiring or connectors. Do first, use a scanner to find the cause. test the continuity and resistance of the wiring to ensure proper connectivity.

To solve the U0001 Chevrolet problem (which is a problem with the vehicle's high-speed CAN bus (a network for module communication)), you should first, use a scanner to find the cause. use a multimeter to check the continuity and resistance of the wiring to identify any open circuits or short circuits. This issue causes check engine light, abs, or airbag light and often comes from damaged wiring harnesses.

Usually, this happens because corroded or damaged wiring harnesses. The U0001 Cadillac code means a problem with the vehicle's high-speed CAN bus (a network for module communication). You may notice check engine light illuminated. To resolve it, first, use a scanner to find the cause. check for any signs of corrosion, damage, or loose connections and repair or replace as needed.

If your check engine light turns on in your Lincoln, it might be due to the U0004 code, which points to a problem with the High-Speed CAN bus—this network lets vehicle modules talk fast. Common causes include damaged/corroded wires, loose connectors, a faulty module, water getting in, or electrical interference. You might notice erratic behavior like stalling, inoperative systems (ABS, airbags), or lower fuel efficiency. To fix it, use a scan tool to diagnose, repair/replace bad wires/connectors, test and replace faulty modules, clear the code, then test drive to confirm.

When the U0004 code appears in your Mercury, it means the High-Speed CAN bus (which connects control modules) has low voltage, disrupting communication. Your check engine light will likely come on, and you may face stalling, transmission issues, or ABS malfunctions. This usually happens from damaged wires, a bad control module, loose connectors, water damage, or electrical interference. First, use a diagnostic scanner to find the issue, check wires/connectors for damage (repair/replace as needed), test modules, clear the code, then road test to ensure it’s fixed.

Typically, the U0005 code happens because the High-Speed CAN bus—what lets your vehicle’s ECUs (like engine or ABS modules) communicate—has high voltage. Your check engine light will turn on, and you might see erratic behavior (stalling, rough idle), reduced performance, or lost communication between systems. Causes include faulty wires, short circuits, a bad control module, water damage, or electrical overload. To address it, use a scan tool to diagnose, repair/replace damaged wires, test and replace faulty modules, clear the code, then recheck with the scanner.

To solve the U0005 code in your Ford, start by knowing it stems from high voltage on the High-Speed CAN bus (which links control modules). Your check engine light will be on, and you may have erratic electronics, safety system malfunctions, or engine issues. Common causes are wiring shorts, a bad control module, power supply problems, corroded wires, or water in connectors. Inspect wires/connectors for damage, check the power supply, use a scan tool to find faulty modules, repair/replace parts, clear the code, then test drive.

If your Lincoln has erratic behavior like stalling or a lit check engine light, you might have the U0005 code—it means the High-Speed CAN bus has high voltage on its positive side, disrupting ECU communication. Causes include damaged wires, short circuits, a faulty ECU, water damage, or electrical overload. You may also lose instrument cluster function or enter limp mode. Diagnose with a scan tool, repair/replace bad wires/connectors, test and replace faulty ECUs, clear the code, then test drive to ensure restored communication.

When your Mercury’s check engine light is on and you notice stalling or lower fuel efficiency, the U0005 code could be the culprit—it signals high voltage on the High-Speed CAN bus’s positive side, hampering module communication. This is often from wiring shorts, corroded wires, a bad module, water damage, or aftermarket interference. First, inspect the CAN bus wires/connectors for damage, test the module, clear the code, then test drive. If the code returns, consult a pro for further diagnosis.

The U0006 code means your vehicle’s High-Speed CAN bus (for component communication) has an open circuit on its negative side—this is a break in wiring/connections stopping signal flow. Your check engine light will come on, and you may face inoperative systems (ABS, airbags), rough idling, or reduced performance. Causes include damaged/corroded wires, loose connections, a bad control module, water intrusion, or physical wire damage. Use a scan tool to diagnose, repair/replace bad wires/connectors/modules, clear the code, then verify communication with the scanner.

If your check engine light is on and your vehicle has rough idling or transmission shifts issues, the U0007 code could be to blame—it refers to low voltage on the High-Speed CAN bus’s negative side, disrupting ECU communication. Common causes are damaged wires, a faulty module, a short to ground, or water damage. You may also lose engine power. To fix it, use a scan tool to diagnose, repair/replace bad wires/connectors/modules, clear the code, then test drive to confirm the issue is resolved.

If your Ford’s airbag warning light is on and the airbag fails self-tests, the B0001 code could be the issue—it affects the driver frontal airbag’s stage 1 deployment control. This means the airbag might not deploy right in a crash. Causes include bad sensors/modules, wiring issues, corrosion, collision damage, or defects. Use a scanner to find the problem, inspect sensors/wires for damage, replace faulty parts, clear the code, then recalibrate the system if needed.

When the vehicle's CAN bus has communication problems, U0001 Buick appears. You'll likely see check engine light, abs light, or transmission light. It usually happens because damaged wiring or connectors in the high-speed can bus network. Next, first, use a scanner to find the cause. inspect wiring and connectors for damage, corrosion, or loose connections. repair or replace as needed.

Usually, the U0007 code in a Ford occurs because the High-Speed CAN bus (for module communication) has low voltage, causing communication issues. Your check engine light will illuminate, and you may see erratic system behavior (ABS, transmission) or even stalling. Causes include damaged wires, a bad control module, loose connections, or CAN bus malfunctions. Diagnose with a scan tool, inspect wires/connectors for damage (repair/replace), test modules, repair/replace faulty parts, clear the code, then test drive.

If your Dodge’s SRS warning light is on and there’s an airbag system message, the B0002 code is active—it’s about the driver frontal squib 2 control. This means the airbag may not deploy in a crash. Causes include a faulty squib module, loose/corroded wires, collision damage, wiring harness issues, or software glitches. Diagnose with a scanner, check the squib for damage, repair wires, replace the module if needed, clear the code, then reset the system.

Usually, the B0002 code in a Chrysler happens because the driver frontal squib 2 control (airbag part) is faulty. Your airbag warning light will be on, and the airbag may not deploy. Causes include a bad squib module, damaged wires, corrosion, collision damage, or network issues. First, diagnose to confirm the code, inspect squib-related wires/connectors, repair/replace parts, clear the code, then test to ensure the airbag works.

When your Acura’s airbag warning light won’t turn off, the B0002 code is likely—it signals low resistance in the driver’s airbag second inflator circuit. This could cause unexpected or no deployment. Causes include damaged wires, bad connectors, a faulty control module, corrosion, or collision damage. Diagnose with a scanner, inspect wires/connectors/module for damage, repair/replace parts, test the system, then clear the code to reset the light.

When your Mazda’s airbag warning light is on and there’s a communication loss with the airbag module, the B0001 code is active—it targets the driver’s airbag module. This risks no deployment in a crash. Causes include bad sensors, wiring issues, loose connections, corrosion, or collision damage. Diagnose with a scanner, inspect the sensor and wires, repair/replace damaged parts, reset the system, clear the code, then test the airbag.

If your Lincoln’s airbag warning light is on and it fails safety checks, the B0001 code is to blame—it affects the driver frontal airbag’s stage 1 deployment control. This means the airbag might not work in a crash. Causes include bad modules, wiring issues, faulty sensors, a broken clockspring, or front damage. Use a scanner to diagnose, inspect modules/wires/sensors, replace faulty parts (like the clockspring), clear the code, then reset the system.

The B0002 code means your vehicle’s driver frontal airbag stage 2 deployment control has a cross-coupled signal—this disrupts communication, so the airbag may not deploy right. Your airbag warning light will turn on, and you might see a system failure message. Causes include bad wires/modules, collision damage, corrosion, or software issues. Inspect the airbag system, repair/replace damaged wires/modules, clear the code, reset the system, then test deployment.

If your Nissan’s airbag warning light is on and the horn works intermittently, the B0001 code could be it—it’s an issue with the driver airbag module. This means the airbag may not deploy in a crash. Causes include a faulty module, wiring issues, bad sensors, or module damage. Use a scanner to find the problem, inspect wires for damage, test sensors, replace the module if needed, clear the code, then test the system.

To solve the B0001 code in your Mercury, start by disconnecting the battery (to avoid accidental airbag deployment)—this code relates to the driver frontal airbag’s stage 1 deployment control. Your airbag warning light will be on, and the airbag may not deploy. Causes include bad sensors, loose/corroded wires, a faulty module, or past collision damage. Inspect sensors/wires, test the module, replace faulty parts, clear the code, then test the system.

To address the B0001 code in your Jeep, know it’s about the driver frontal squib 1 control (airbag inflator’s control). Your airbag warning light will be on, and the airbag may not deploy. The main cause is often a faulty airbag control module. First, use a scan tool to diagnose, find the issue source, then repair/replace the module or fix related parts, clear the code, and test the system.

Typically, the B0001 code in an Infiniti occurs because the driver airbag module is faulty—this critical safety part may not deploy in a crash. Your airbag warning light will turn on, and you might see a system fault message. Causes include bad sensors, wiring issues, a faulty control module, or module damage. Diagnose with a scanner, inspect sensors/wires for damage, check the control module, replace faulty parts, clear the code, then test the module.

When your Honda’s SRS warning light is on and the driver’s airbag acts up, the B0001 code is likely—it signals low resistance in the airbag’s first inflator. This risks improper deployment in a crash. Causes include damaged wires, a bad inflator, collision damage, corrosion, or defects. Diagnose with a tool, test the inflator’s resistance, repair/replace wires or the inflator, clear the code, then test drive to confirm the system works.

To solve the B0001 code in your Dodge, start by knowing it’s an issue with the driver frontal squib 1 control (key for airbag deployment). Your airbag warning light will be on, and the airbag may not activate in tests. Common causes are a faulty squib unit, bad control module, blown fuse, or wiring issues. Diagnose with a scanner, check the squib for damage/loose connections, inspect the module and wires, replace faulty parts, clear the code, then test.

Usually, the B0001 code in a Chrysler happens because the driver frontal squib 1 control (part of the airbag system) is faulty. Your airbag warning light will illuminate, and the airbag may not deploy in a crash. Causes include a bad squib module, damaged wires, a faulty crash sensor, corrosion, or a past collision. Use a scan tool to read codes, inspect airbag wires/connectors, test and replace the squib or sensor if needed, clear the code, then verify the system works.

When the B0001 code appears in your Acura, it means the driver’s airbag first inflator has lower resistance than normal—this could stop the airbag from deploying right in a crash. Your airbag warning light will turn on, and the airbag might not work in tests. This usually happens from a bad inflator, damaged wires, corrosion, a faulty control module, or collision damage. Diagnose with a scanner, check the inflator/wires for damage, repair/replace parts, clear the code, then test the system.

If your airbag warning light stays on, it could be due to the B0001 code—this points to a problem with your vehicle’s driver frontal airbag deployment control system. Common causes include a faulty airbag module, damaged wires/connectors, corroded sensors, or a past collision. You might also notice a non-working horn. To fix it, use a professional scanner to diagnose, inspect wires for damage, replace the faulty module if needed, clear the code, then test the airbag system.

When your Mercury has a lit check engine light and transmission shifting issues, the U0007 code might be active—it means the High-Speed CAN bus has low voltage on its negative terminal, causing system communication errors. You may also have rough idling or lost traction control. Causes include damaged wires, a bad module, low voltage, power supply issues, or corrosion. Inspect CAN bus wires/connectors, check voltage, test the module, fix power supply issues, clear the code, then test drive to confirm resolution.

To address the U0007 code in your Lincoln, know it’s from low voltage on the High-Speed CAN bus’s negative side—disrupting module communication. Your check engine light will be on, and you may have power window issues, transmission problems, or trouble starting. Causes include damaged wires, a bad module, short circuits, power supply issues, or corrosion. Inspect CAN bus wires/connectors, check voltage with a multimeter, test modules, repair/replace parts, clear the code, then test drive.

To solve the B0002 code in your Ford, start by knowing it’s a cross-coupled signal issue in the driver frontal airbag stage 2 deployment control. Your airbag warning light will be on, and the airbag may not work in a crash. Causes include bad wires/modules, damaged sensors, corrosion, or software issues. Use a scanner to find the problem, inspect wires/sensors for damage, replace faulty parts, clear the code, then test the system.

When your Honda’s airbag warning light stays on even after resetting, the B0002 code is to blame—it means the driver’s airbag second inflator has low resistance. This risks faulty deployment. Causes include damaged wires, a bad inflator/control module, loose connections, or collision damage. Inspect the airbag system, test the inflator’s resistance, repair/replace wires or modules, clear the code, then test to ensure proper function.

Typically, the B0002 code in an Infiniti occurs because the driver airbag module is faulty—this makes the airbag warning light turn on, and the airbag may not deploy. Causes include a bad module, wiring issues, faulty sensors, control module problems, or past collision damage. Use a professional tool to diagnose, inspect the module/wires/sensors, repair/replace faulty parts, clear the code, test the system, then reset the warning light.

If your Jeep’s airbag warning light is on and the airbag has deployment issues, the B0002 code is likely—it’s about the driver frontal squib 2 control. This means the airbag may not work in a crash. Causes include a faulty squib module, wiring issues, collision damage, corrosion, or a bad inflator. Diagnose with a pro scanner, inspect wires/connectors, test the squib module, replace faulty parts, clear the code, then test the system.

To address the B0002 code in your Lincoln, know it’s a cross-coupled signal in the driver frontal airbag stage 2 deployment control. Your airbag warning light will be on, and the airbag may not deploy. Causes include damaged wires, faulty sensors/modules, corrosion, or collision damage. Use a scanner to find the issue, inspect wires/sensors, repair/replace parts, clear the code, reset the light, then test deployment in a controlled setting.

When your Mazda’s airbag warning light is on and it fails safety checks, the B0002 code is active—it affects the driver’s airbag module. This means the airbag may not deploy in a crash. Causes include bad modules/sensors, wiring issues, collision damage, corrosion, or software glitches. Diagnose with a scanner, inspect wires/connectors, replace the faulty module/sensor, clear the code, then test the airbag system to confirm it works.

If your Mercury’s airbag warning light is on and there’s a system failure message, the B0002 code is to blame—it’s a cross-coupled signal in the driver frontal airbag stage 2 deployment control. This risks no deployment. Causes include bad wires/modules, collision damage, corrosion, or short circuits. Do a diagnostic scan, inspect wires for damage, test the control module, replace faulty parts, clear the code, then test deployment.

To solve the B0002 code in your Nissan, start by using an OBD-II scanner—it targets the driver airbag module, so the airbag may not deploy. Your airbag warning light will be on, and there may be an audible chime. Causes include a faulty module, wiring issues, bad sensors, SRS electrical problems, or a bad inflator. Inspect the module/wires/sensors, repair/replace parts, clear the code, then test the system and reset the light.

The B0003 code indicates your vehicle’s driver frontal airbag stage 3 deployment control circuit is faulty—this means the airbag may not deploy in a crash. Your airbag warning light will turn on, and the system may fail self-tests. Causes include a bad control module, damaged wires, a faulty sensor, or an issue with the airbag itself. Use a scan tool to diagnose, repair/replace wires or the module, test the system, then clear the code to reset the light.

When your Mazda’s airbag warning light won’t reset and the airbag acts erratically, the B0003 code is likely—it’s about the driver frontal airbag stage 3 deployment control. This risks wrong or no deployment. Causes include a bad deployment module, wiring issues, collision damage, corrosion, or software glitches. Diagnose with a scanner, inspect wires for damage, test the module, replace faulty parts, clear the code, then test deployment to confirm.

Usually, the B0004 code happens because your vehicle’s driver knee bolster deployment control (protects knees in crashes) is faulty. Your airbag warning light will be on, and there may be an audible chime. Causes include bad collision sensors, damaged wires, a faulty control module, mechanical issues, or moisture corrosion. Use a pro tool to diagnose, inspect sensors/wires, test the module, repair/replace parts, then ensure the bolster deploys.

If your Ford’s airbag warning light is on and the knee bolster makes strange noises, the B0004 code is active—it affects the knee bolster deployment control. This means the bolster may not protect knees in a crash. Causes include a bad control module, wiring issues, faulty sensors, physical damage, or software glitches. Diagnose with a scanner, inspect wires for damage, test sensors, replace the module if needed, clear the code, then test deployment.

To address the B0004 code in your Lincoln, inspect the driver knee bolster airbag system—it’s a deployment control issue, so the bolster may not deploy. Your airbag warning light will be on, and other airbags may have issues. Causes include bad sensors, wiring shorts, a faulty module, physical damage, or software glitches. Use a scanner to get codes, test sensors/wires, update or replace the module, clear the code, then test deployment.

When your Mercury’s airbag warning light won’t turn off, the B0004 code is to blame—it’s the driver knee bolster deployment control system. This means the bolster may not deploy in a crash. Causes include a bad module, damaged wires, faulty sensors, collision damage, or software glitches. Diagnose with a scanner, inspect wires/connectors, test sensors, replace the module if needed, clear the code, then test deployment in a controlled setting.

To solve the B0005 code, start by using a diagnostic scanner—it’s your vehicle’s collapsible steering column deployment control (absorbs crash impact) that’s faulty. Your airbag warning light will be on, and the steering may feel loose. Causes include a bad control module, sensor issues, damaged wires, mechanical failure, or past collision damage. Inspect sensors/wires, test the module, repair/replace steering parts, clear the code, then test drive to confirm.

If your Ford’s airbag warning light is on and the steering column rattles, the B0005 code is likely—it’s the collapsible steering column deployment control. This means the column may not collapse in a crash. Causes include a bad control module, corroded wires, a faulty position sensor, collision damage, or a bad mechanism. Diagnose with a scanner, inspect wires/sensors, replace the module or sensor, test the column, then clear the code to reset.

To solve the C0002 code, start by checking the TCS Control Channel ‘A’ Valve 2—this valve controls hydraulic fluid for traction control, so a fault can reduce stability. Your TCS warning light will be on, and the system may not engage when needed. Common causes are damaged wiring, a stuck valve, debris, corrosion, or wear. Do a diagnostic scan, inspect the valve for damage, clean or replace it, fix any wiring issues, clear the code, then test the TCS system.

When your Mercury’s TCS warning light stays on and you have increased wheel slip, the C0004 code is likely—it’s an issue with the TCS Control Channel ‘B’ Valve 2. This valve helps maintain traction during acceleration. Causes include a bad TCS module, a faulty valve, damaged wires, or sensor failure. Diagnose with a scan tool, inspect the valve and wiring, replace faulty parts, clear the code, then test drive to ensure traction control works properly.

If your Mercury’s TCS warning light is on and you have trouble maintaining traction, the C0003 code is likely—it’s a problem with the TCS Control Channel ‘B’ Valve 1. This valve helps adjust brake pressure for stability. Causes include a faulty valve, damaged wires, a bad sensor, or a TCS module issue. Use a scan tool to pinpoint the issue, inspect the valve and wiring, replace faulty parts, clear the code, then test drive to confirm the fix.

To solve the C0003 code in your Mazda, start by checking the stability control solenoid valve system—this valve controls brake fluid to prevent skidding. Your stability control warning light will be on, and you may skid more during turns. Causes include a faulty solenoid, damaged wiring, corrosion, a bad module, or low brake fluid. Diagnose with a scanner, inspect the solenoid and wiring, clean or replace parts, clear the code, then test drive to ensure stability control works.

Usually, the C0003 code in a Lincoln occurs because the TCS Control Channel ‘B’ Valve 1 is malfunctioning—this valve regulates hydraulic fluid for traction control. Your TCS or ABS warning light will come on, and you may have less stability on wet roads. Causes include a faulty valve, wiring issues, a bad TCS module, or low fluid. Start with a diagnostic scan, inspect the valve and wiring, replace the valve if needed, top up fluid, clear the code, then test drive to verify.

When the C0003 code appears in your Ford, it means the TCS Control Channel ‘B’ Valve 1 is faulty—this valve helps traction control prevent wheel slip. Your TCS warning light will turn on, and you may notice more slip when accelerating. Causes include a bad valve, damaged wires, a faulty sensor, or a TCS module issue. Use a scan tool to diagnose, inspect the valve and wiring, replace faulty parts, clear the code, then test drive to make sure traction control works.

If your TCS or ABS warning light is on and you have trouble with traction during acceleration, the C0003 code could be the issue—it affects the TCS Control Channel ‘B’ Valve 1. This valve controls brake fluid for stability. Causes include a faulty TCS module, damaged wires, a bad valve, low brake fluid, or corrosion. Do a diagnostic scan, check the wiring and valve, repair or replace parts, clear the code, then test drive to confirm the fix.

To address the C0002 code in your Mercury, know it’s a problem with the TCS Control Channel ‘A’ Valve 2—this valve is crucial for preventing wheel slip. Your TCS warning light will be on, and you may have erratic braking. Causes include a bad TCS module, a faulty valve, wiring issues, or sensor failure. Use a scan tool to find the issue, inspect the valve and module, replace faulty parts, clear the code, then test drive to ensure traction control works.

When your Mazda’s TCS warning light stays on and you notice longer stopping distances, the C0002 code is likely—it’s an issue with the traction control solenoid valve system. This valve controls brake fluid flow for stability. Causes include a faulty solenoid, damaged wiring, a bad ABS module, or low brake fluid. Diagnose with a scanner, inspect the solenoid and wiring, replace faulty parts, bleed the brake system, clear the code, then test drive to confirm it works.

Usually, the C0002 code in a Lincoln happens because the TCS Control Channel ‘A’ Valve 2 is malfunctioning—this valve helps traction control by adjusting brake pressure. Your TCS warning light will come on, and you may have uneven braking or less traction. Causes include a faulty valve, damaged wiring, contaminated fluid, or a sensor glitch. Start with a scan, inspect the valve and wiring, replace the valve if needed, clear the code, then test drive to verify the fix.

If your Ford’s TCS warning light is on and you have trouble staying stable on slippery roads, the C0002 code is active—it’s a problem with the TCS Control Channel ‘A’ Valve 2. This valve regulates traction control hydraulic fluid. Causes include a faulty valve, damaged wires, corrosion, or an ABS module issue. Use a diagnostic tool to confirm, inspect the valve and wiring, replace faulty parts, clear the code, then test drive to make sure traction control functions properly.

If your check engine light turns on and you notice erratic shifting or ABS issues, it could be the C0000 code—this points to a problem with the vehicle’s speed information circuit. Common causes include a faulty speed sensor, damaged wiring, a glitchy onboard computer, or corroded connections. To fix it, use a diagnostic scanner to find the issue, check the wiring for damage, test and replace the speed sensor if needed, reset the computer, then take a test drive to confirm it works.

When the C0001 code appears in your Mercury, it means the TCS Control Channel ‘A’ Valve 1 is faulty—this valve helps maintain traction in slippery conditions. Your TCS warning light will turn on, and you may notice more wheel slip when accelerating. Causes include a bad TCS module, a faulty valve, wiring issues, or low brake fluid. Use a scan tool to pinpoint the issue, inspect the valve and wiring, replace faulty parts, clear the code, then test drive to ensure traction control works.

If your Mazda’s TCS warning light is on and you struggle with stability during cornering, the C0001 code is likely—it’s a problem with the traction control solenoid valve system. This valve modulates brake pressure to prevent wheel slip. Causes include a faulty solenoid, damaged wiring, corrosion, or a bad ABS module. Diagnose with a scanner, inspect the solenoid and wiring, clean or replace the solenoid, test the traction control, then clear the code to reset the light.

To address the C0001 code in your Lincoln, know it’s an issue with the TCS Control Channel ‘A’ Valve 1—this valve is key for traction control and ABS stability. Your ABS or TCS warning light will be on, and you may have less traction on wet roads. Causes include a faulty valve, wiring issues, a bad ABS module, or a sensor glitch. Use a professional scan tool to diagnose, inspect the valve and wiring, replace faulty parts, clear the code, then test drive to confirm the fix.

Usually, the C0001 code in a Ford occurs because the TCS Control Channel ‘A’ Valve 1 is malfunctioning—this valve helps regulate brake pressure for traction control. Your TCS warning light will come on, and you may notice more wheel slip when accelerating. Causes include a bad TCS module, damaged wires, a faulty sensor, or hydraulic issues. Start with a diagnostic scan, inspect the module, wiring, and sensors, repair or replace faulty parts, clear the code, then test drive to make sure traction control works.

When the C0001 code triggers, it means there’s a problem with the TCS Control Channel ‘A’ Valve 1—this valve helps your traction control system prevent wheel slip. You’ll see the TCS or ABS warning light, and may have less traction on slippery roads. Common causes are a faulty valve, damaged wiring, corrosion, bad wheel speed sensors, or an ABS module issue. Use a diagnostic scanner to find the issue, inspect the valve and wiring, clean or replace the valve, test the TCS system, then clear the code.

If your GMC’s check engine light is on and the speedometer is inaccurate, you may have the C0000 code—it’s an issue with the speed information circuit. This circuit sends speed data to control the speedometer, cruise control, and transmission. Causes include a faulty wheel or transmission speed sensor, wiring issues, or a bad computer. First, use a scanner to read codes, test the sensors, check the wiring for damage, replace faulty parts, clear the code, then test drive to confirm the fix.

To solve the C0000 code in your Chevrolet, start by knowing it’s a problem with the speed information circuit—this circuit gives real-time speed data to your car’s computer for transmission and ABS. Your check engine light will be on, and you might notice erratic shifting or a non-working cruise control. Common causes are a bad speed sensor, damaged wires, corrosion, or a faulty ABS module. Diagnose with a scanner, inspect the sensor and wiring, replace faulty parts, clear the code, then test drive to ensure it works.

Usually, the C0000 code in a Cadillac happens because the speed information circuit is malfunctioning—this circuit feeds speed data to systems like transmission and ABS. Your check engine light will come on, and you may have a broken speedometer or ABS issues. Causes include a faulty speed sensor, damaged wires, a bad control module, or corrosion. Use a scan tool to confirm the code, check the sensor and wiring for damage, test the control module, replace faulty parts, clear the code, then test drive to verify.

When the C0000 code appears in your Buick, it means there’s an issue with the speed information circuit—this circuit sends accurate speed data to your car’s computer, which is key for transmission, ABS, and cruise control. You might see the check engine light, get wrong speedometer readings, or lose cruise control. Usually, it’s from a bad speed sensor, damaged wires, a faulty ECM, or corrosion. Start with a diagnostic scan, inspect the sensor and wiring, replace faulty parts, clear the code, then test drive to make sure it’s fixed.

When the C0004 code triggers, it means the TCS Control Channel ‘B’ Valve 2 is faulty—this valve helps traction control prevent wheel slip. Your TCS warning light will be on, and you may have less stability during cornering. Causes include a blocked valve, damaged wiring, a stuck component, corrosion, or wear. Do a visual check of the TCS system, use a scanner to diagnose, inspect and clean or replace the valve, clear the code, then test drive to make sure it works.

If your Ford’s TCS warning light is on and you lose traction control in slippery conditions, the C0004 code is active—it’s an issue with the TCS Control Channel ‘B’ Valve 2. This valve regulates traction control hydraulic fluid. Causes include a faulty valve, damaged wires, a bad sensor, or corrosion. Use a diagnostic tool to confirm, inspect the valve and wiring, replace faulty parts, clear the code, then test drive to ensure traction control functions properly.

Usually, the C0004 code in a Lincoln happens because the TCS Control Channel ‘B’ Valve 2 is malfunctioning—this valve is key for traction control and braking stability. Your TCS warning light will come on, and you may have uneven braking. Causes include electrical faults, a bad sensor, a faulty valve, or corrosion. Start with a scan, inspect the valve and wiring, replace the valve if needed, fix any electrical issues, clear the code, then test drive to verify the fix.

To address the C0004 code in your Mazda, know it’s a problem with the stability control solenoid valve system—this valve controls brake fluid to keep the car stable. Your stability control warning light will be on, and you may struggle to steer in sudden maneuvers. Causes include electrical faults, damaged wiring, a faulty solenoid, or a bad module. Use a scanner to diagnose, inspect the solenoid and wiring, replace faulty parts, clear the code, then test drive to confirm it works.

To solve the C0010 code, start by checking the left front inlet control—this component manages air or fluid flow to the left front, affecting systems like braking or suspension. Your dashboard warning light will be on, and you may notice poor engine performance or weird noises. Causes include a faulty sensor/module, damaged wiring, software glitches, or debris. Do a diagnostic scan, inspect the sensor and wiring, replace faulty parts, clear the code, then test drive to confirm the fix.

If your Acura’s ABS warning light is on and you feel uneven braking, the C0010 code is likely—it’s a left front inlet solenoid circuit failure. This solenoid controls fluid flow for braking/suspension. Causes include damaged wires, a faulty solenoid, a bad module, or corrosion. Use a multimeter to test the circuit, inspect the solenoid and wiring, replace faulty parts, clear the code, then test drive to make sure braking is smooth.

When the C0010 code appears in your Ford, it means the left front inlet control system is faulty—this system controls airflow to the left front wheel for braking. Your ABS warning light will turn on, and you may have longer stopping distances or squealing brakes. Causes include a bad control valve, damaged wires, blockages, or a sensor glitch. Use a scan tool to diagnose, inspect the valve and wiring, clear blockages, replace parts, clear the code, then test drive to verify.

Usually, the C0010 code in a Honda occurs because the left front inlet solenoid circuit is failing—this solenoid regulates ABS brake pressure. Your ABS warning light will come on, and you may have longer stopping distances or grinding brakes. Causes include damaged wires, a faulty solenoid, a bad ABS module, or debris. Start with a visual ABS inspection, test the circuit with a multimeter, replace faulty parts, clear the code, then test drive to ensure ABS works.

If your Lincoln’s ABS warning light is on and you pull to one side when braking, the C0010 code is active—it’s a problem with the left front inlet control. This control regulates brake fluid flow to the left front wheel. Causes include a faulty valve, damaged wires, corrosion, a bad ABS module, or a sensor issue. Use a scan tool to find the issue, inspect the valve and wiring, replace parts, clear the code, then test drive to confirm braking is even.

FAQs About Diagnostic Trouble Codes

The check engine light comes on when the OBD-II system detects a problem.

- A solid yellow light: This is usually a non-emergency issue.
- A flashing yellow/red light: This requires immediate attention and could be a serious problem like an engine misfire.
- A red light accompanied by other warnings: Stop the vehicle immediately and safely for inspection.

You can use our diagnostic code lookup tool by entering the trouble code (e.g., P1401) in the search box.
You'll immediately get an explanation of the problem, common causes, and possible solutions.

Yes and no. Universal trouble codes (0) apply to all vehicles, while manufacturer-specific trouble codes (1) may vary by brand. Be sure to check whether your trouble code is universal or brand-specific.

If the check engine light is on permanently, it's probably a minor problem. If it's flashing, stop driving immediately; this usually indicates a serious problem, such as an engine misfire.

Yes. Most OBD-II scanners allow you to clear the DTC, but if the problem isn't resolved, the check engine light may come back on.

The OBD-II diagnostic port is typically located under the driver's side dashboard, near the steering column.