Contents
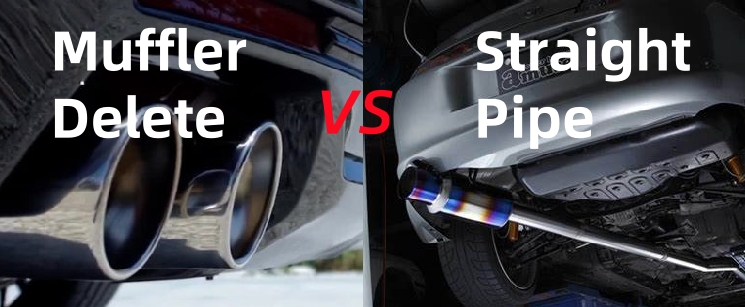
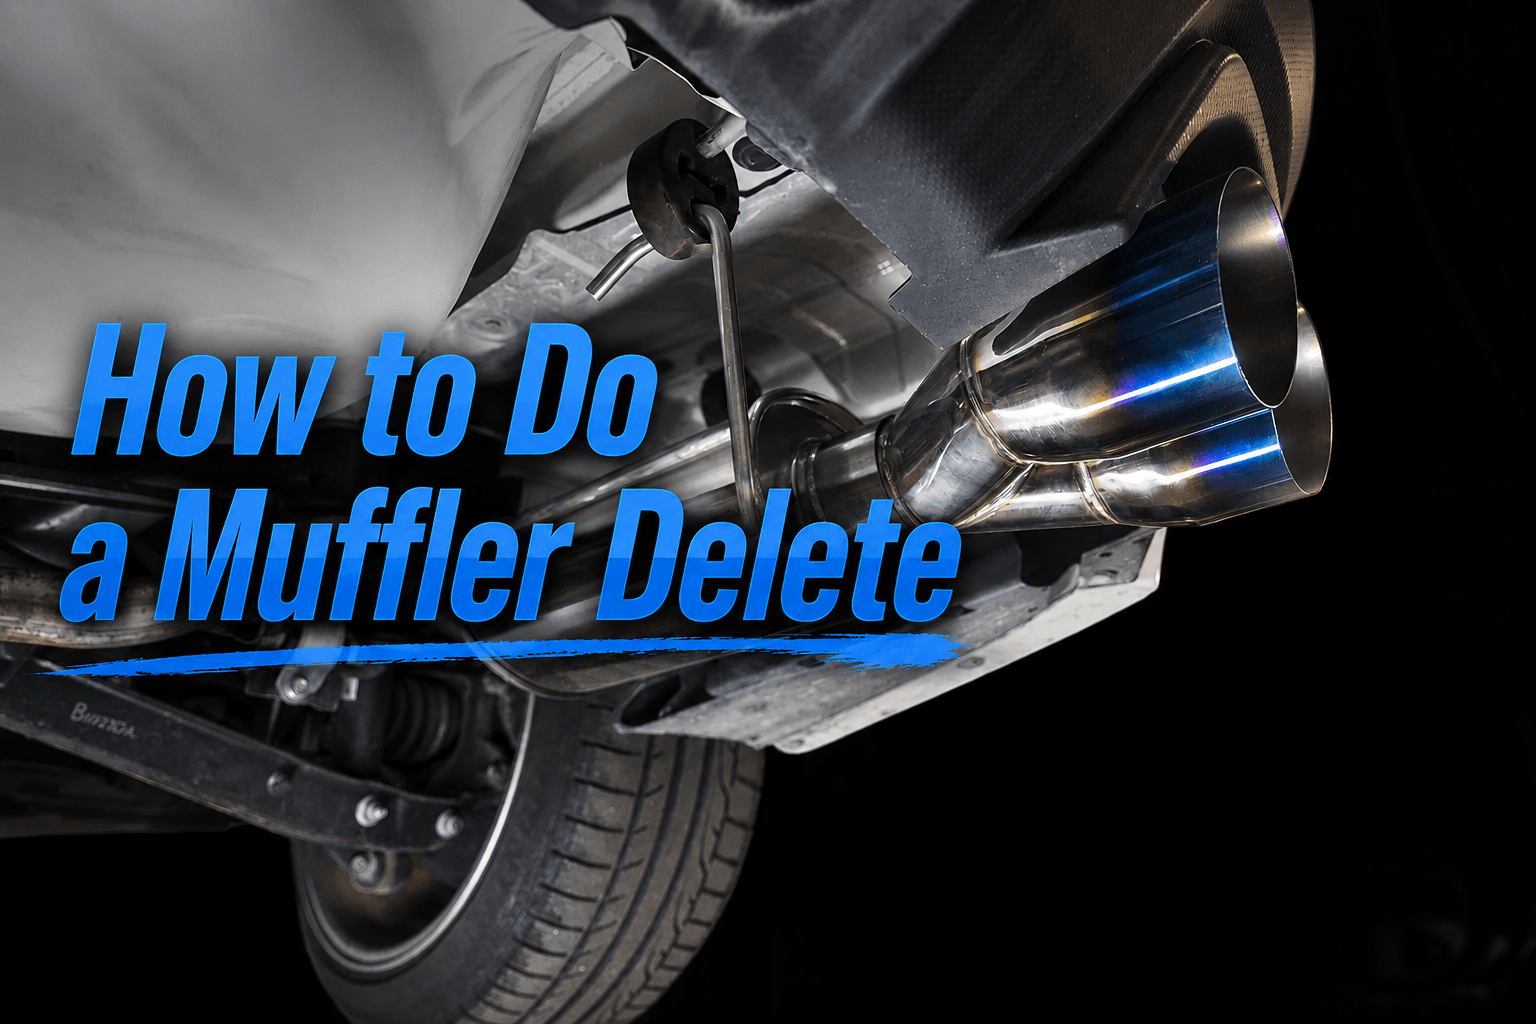
Muffler delete is a common exhaust modification. It refers to removing the rear muffler of a vehicle and replacing the original muffler section with a straight exhaust pipe. This can make the exhaust sound louder and more direct, while also giving the vehicle a sportier tone.
For many DIY enthusiasts, the appeal of a muffler delete is that it is relatively low-cost and not overly complicated. Compared with replacing an entire cat-back exhaust system, a muffler delete usually only requires removing the rear muffler and installing a straight pipe.
However, before you actually start, you need to understand a few key questions: Is your vehicle's exhaust layout suitable for a muffler delete? Do you want to use clamps or welding? Can you accept a louder exhaust sound and highway drone? And do local laws allow this modification? This article will focus on the actual DIY steps for how to do a muffler delete, and compare two common installation methods: clamp-on and welded.
What Is a Muffler Delete? Quick Overview
A muffler delete, simply put, means removing the muffler from the exhaust pipe and replacing it with a straight pipe. The muffler's job is to reduce exhaust noise through internal baffles and sound-absorbing materials, making the vehicle quieter while driving. After removing it, the exhaust sound usually becomes louder and more direct, and some vehicles may produce a rougher, more aggressive tone.
It is important to note that a muffler delete usually only removes the rear muffler. It does not mean removing the catalytic converter .
Some car owner forums also mention that some people use a rougher method by simply removing the muffler without installing a replacement pipe. However, this is not recommended, because the exhaust should still be safely directed toward the rear of the vehicle instead of exiting directly under the car.
The result of a muffler delete depends heavily on the vehicle. It may make the car sound deeper and more aggressive, or it may simply make it very loud without necessarily sounding good. Some vehicles may also experience drone at highway speeds, which is a low-frequency humming noise inside the cabin. For this reason, some owners choose an axle-back or cat-back exhaust instead, because those options provide more controllable sound, though at a higher cost.
Why Do People Do a Muffler Delete?
- A louder, sportier exhaust sound — This is the main reason.
- Slight performance changes — Removing the muffler may reduce rear exhaust restriction, but for most modern vehicles, horsepower gains are usually very limited. A muffler delete should be seen more as a sound modification than a major performance upgrade.
- Weight reduction — A factory muffler weighs about 5–15 kg. Removing it reduces weight, which may have a small effect on handling and acceleration.
What Are the Drawbacks?
- Drone at highway cruising speeds — Many owners report a low-frequency humming sound inside the cabin when driving steadily at highway speeds, which can become tiring on long trips.
- Legal risks — In many areas, removing the muffler is considered an illegal modification. Excessive noise may result in fines or inspection failure.
- Impact on resale value — A car with an exhaust modification may be harder to sell to buyers who prefer a quiet, factory-condition vehicle.
⚖️ Worried about whether a muffler delete is legal in your area? Check out our Muffler Delete Legal Guide to learn about local regulations and compliance advice.
Clamp-On vs Welded Muffler Delete: Which Method Should You Choose?
When doing a muffler delete, there are two main ways to secure the new straight pipe: clamp-on and welded. Each method has its own pros and cons. The comparison below can help you make a quick decision.
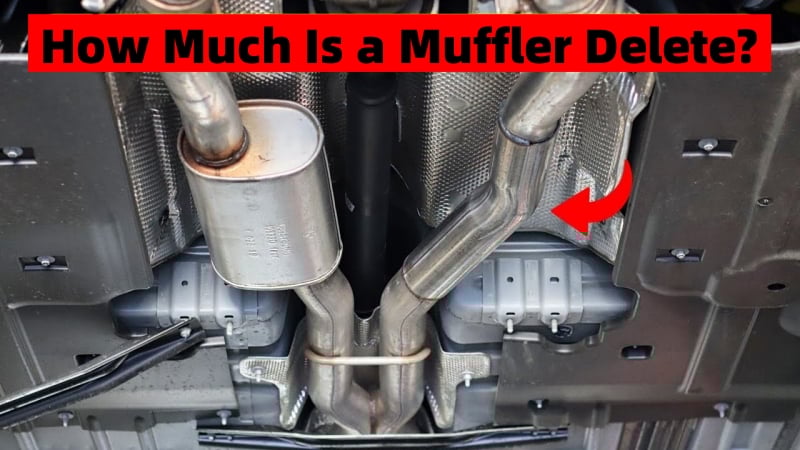
Comparison Table: Clamp-On vs Welded
| Comparison Item | Clamp-On (DIY) | Welded (Professional Installation) |
| Difficulty | Beginner to intermediate | Professional level, or advanced DIY |
| Cost | About $50–$200 (DIY total) | About $150–$500 (shop cost) |
| Time | About 30–60 minutes | About 1–2 hours |
| Mounting Method | Removable and reversible | Stronger, harder to reverse |
| Leak Risk | Low, but depends on pipe diameter and clamp quality | Usually low, but depends on weld quality |
| Durability | Good, may require regular inspection | Very good, suitable for long-term use |
| DIY Feasibility | Yes | Not recommended for beginners |
| Required Tools | Basic hand tools + cutting tools + clamps | Welder + welding safety gear + cutting tools |
| Reversibility | Easier to return to stock | More difficult, usually requires cutting and welding again |
If this is your first muffler delete, it is more recommended to start with the clamp-on method. Its biggest advantage is that it is cheap, simple, and reversible.
If you are sure you want to keep the muffler delete and want a more secure connection with less chance of leaks, welding is a better option. However, welding requires equipment and skill, so beginners should not attempt it without experience.
Most exhaust shops prefer welding because the result is stronger, cleaner, and better suited for long-term use. Most DIY users choose the clamp-on method because it has a lower barrier to entry, lower cost, and is easier to adjust later.
Another option worth considering: if you are worried that a full muffler delete will be too loud, you can look into a resonator delete first. A resonator delete can sometimes create a similar sound change, but it is not as extreme as a full muffler delete.
💡 Real advice: If you are new to modifications, start with the clamp-on method. It has a higher margin for error and is reversible, so even if you make a mistake, it is less likely to cause permanent damage. If you end up loving the sound, you can have a shop weld it permanently later.
Tools and Materials You May Need
Before starting a muffler delete, prepare the safety gear, cutting tools, and installation materials. This article mainly covers a no-weld / clamp-on muffler delete, which means a DIY method that uses clamps to secure the straight pipe without welding.
Safety Gear
- Jack / Hydraulic jack: Used to lift the vehicle.
- Jack stands / Safety stands: Used to support the vehicle securely. Prepare at least 2. Do not work under the vehicle using only a jack.
- Wheel chocks: Prevent the vehicle from moving during the job.
- Safety glasses: Protect your eyes from metal shavings, dust, or sparks.
- Work gloves: Protect your hands from sharp exhaust edges or hot components.
- Ear protection: Reduces noise exposure when using a reciprocating saw or angle grinder.
Cutting and Removal Tools
- Sawzall / Reciprocating saw: Commonly used to cut exhaust pipes and useful in tight spaces under the vehicle.
- Angle grinder: Can be used to cut exhaust pipe and clean up the cut edges.
- Metal cutting blade: Used to cut metal exhaust pipe and must be installed on the reciprocating saw or angle grinder.
- Penetrating oil: For example, WD-40, used to loosen rusty bolts, clamps, and rubber exhaust hangers.
- Socket wrench and open-end wrench set: Used to remove factory connectors, bolts, or clamps.
- Pry bar or long flathead screwdriver: Helps remove rubber exhaust hangers.
- Rubber mallet: Used to gently loosen stuck exhaust parts.
- Measuring tape: Measures exhaust pipe diameter, cut length, and replacement pipe length.
- Marker or chalk: Marks the cut locations.
Installation Materials
- Straight exhaust pipe: Used to replace the factory muffler. The diameter must match the original exhaust pipe.
- Exhaust clamps / Band clamps: Used to secure the straight pipe. Usually, 2 are needed. Band clamps are more recommended because they apply pressure more evenly and are easier to remove later.
- Exhaust sealant: Optional, used to help reduce leaks at the connection points.
- Replacement exhaust hangers: If the original hangers are old, cracked, or deformed, you can replace them at the same time.
- Vehicle-specific muffler delete kit: Optional. If you do not want to measure the pipe diameter and cut the straight pipe yourself, you can choose a vehicle-specific kit.
If you want a more permanent installation, you can also weld the straight pipe in place. However, welding requires professional equipment and experience, so it is usually better handled by an exhaust shop.
Need a Vehicle-Specific Racing Exhaust?
If you drive a diesel truck, a vehicle-specific racing exhaust is far more convenient than cutting and installing a generic straight-through exhaust. SuncentAuto offers straight-through and racing exhausts for Powerstroke, Cummins, Duramax, and EcoDiesel engines. Please check your vehicle's year, brand, model, and engine type before ordering.
Use promo code BLOG12 at checkout for a 12% discount on all products site-wide.
How to Do a Muffler Delete Step by Step
Before following the steps below, you can watch this DIY muffler delete video to see how the cutting and removal process looks in practice.
The steps below apply to the most common DIY method—the clamp-on method. If you choose welded installation, follow the same preparation steps, then leave the cutting and welding to a professional shop.
Step 1: Let the Exhaust Cool Down
Park the car on a flat surface, turn off the engine, set the parking brake, and wait for the exhaust system to cool down completely.
After the vehicle has just been turned off, the exhaust pipe, muffler, and nearby components are very hot, and direct contact can cause burns. Even if the muffler is located near the rear of the vehicle, it can remain hot for some time. Before starting, make sure the exhaust pipe is safe to approach.
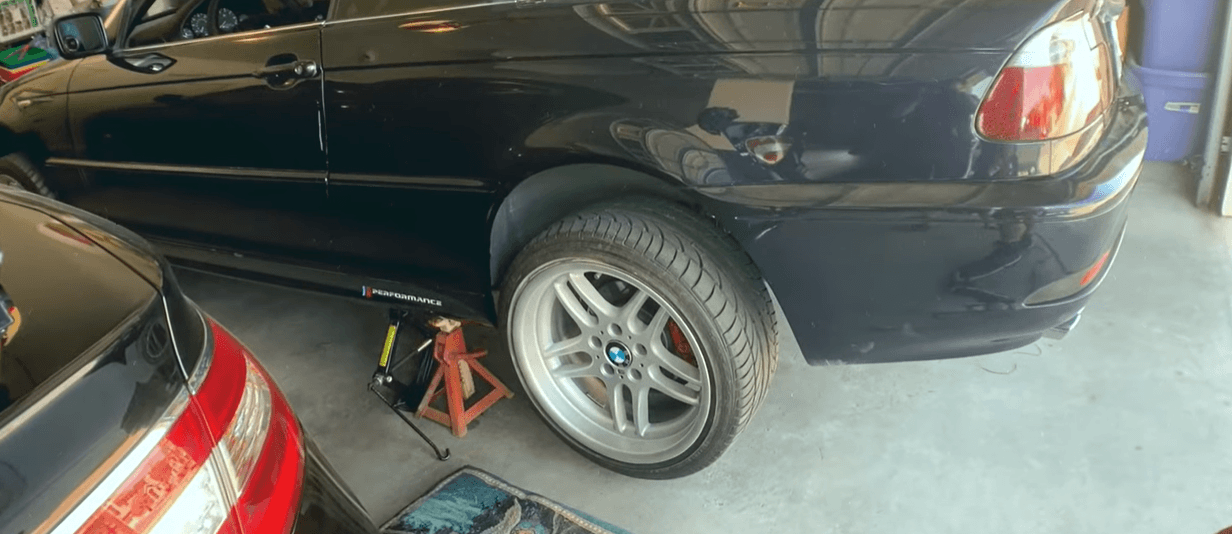
Step 2: Lift the Vehicle Safely
Use a hydraulic jack to lift the rear of the vehicle, then support it with jack stands.
Do not work under the vehicle using only a jack. A jack is only a lifting tool and is not suitable for long-term support. The correct method is to first locate the vehicle's designated lift points, raise the vehicle, place the jack stands at stable support points, and then slowly lower the vehicle so the weight rests on the stands.
After confirming the vehicle is stable, gently shake the body to make sure it will not move. It is also recommended to secure the front wheels with wheel chocks before starting work.
Step 3: Locate the Muffler
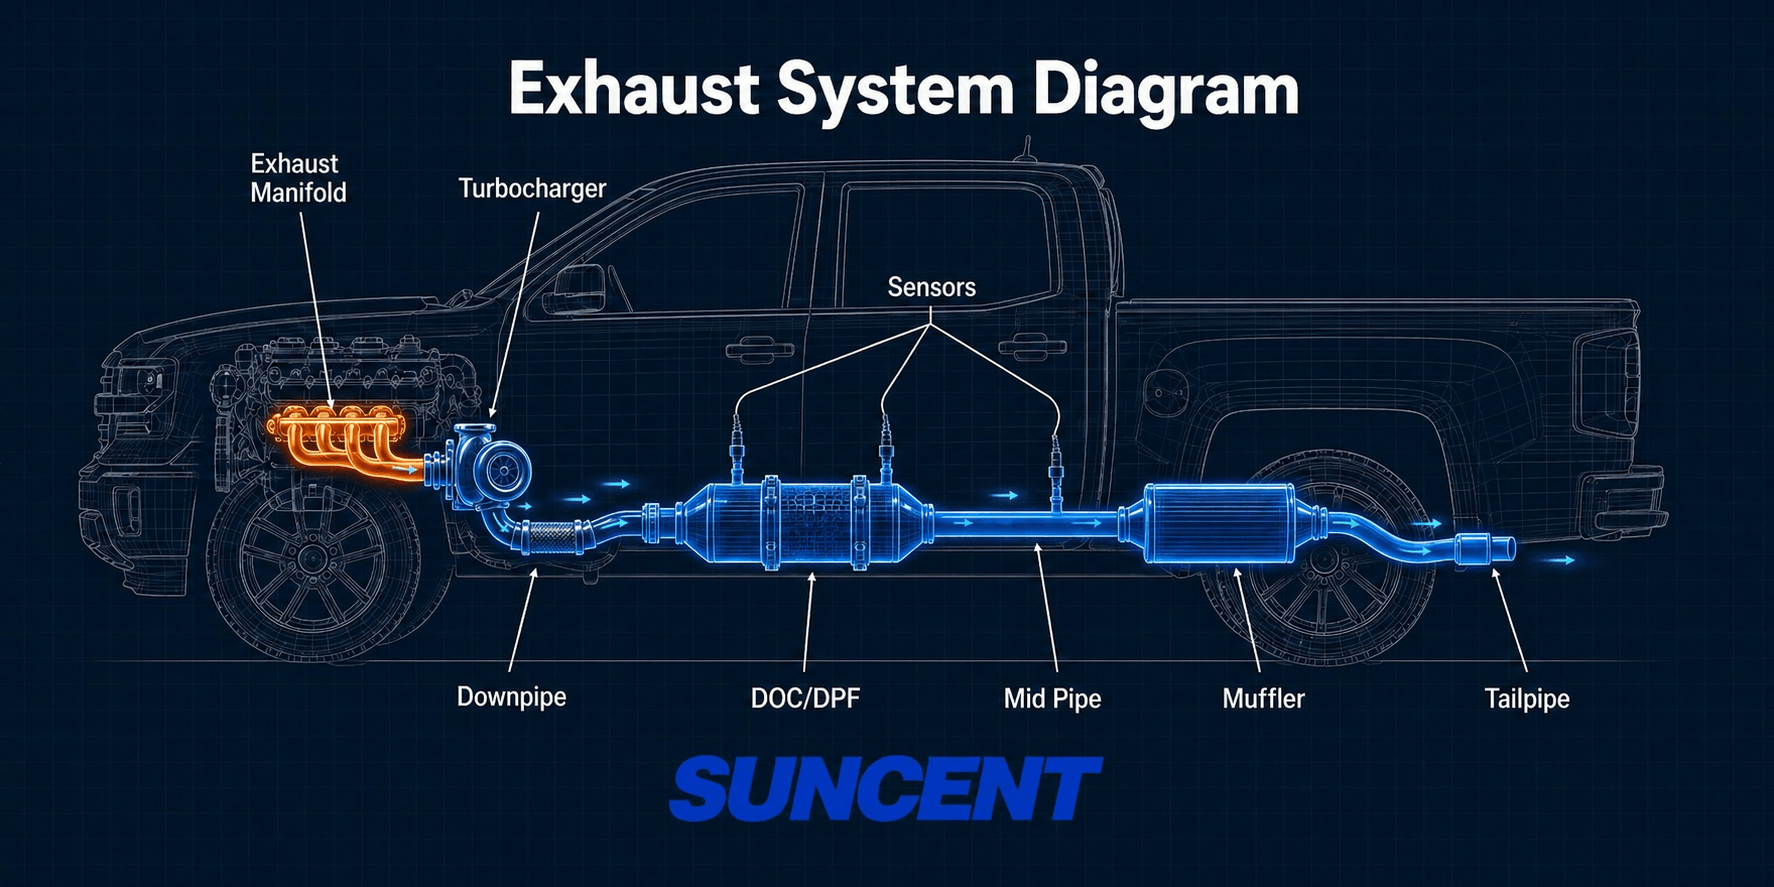
Go under the rear of the vehicle and locate the muffler. The muffler is usually located in the rear section of the exhaust system and is a larger metal canister. One end connects to the mid-pipe, and the other end connects to the exhaust tip. Many vehicles have only one muffler, while some have dual mufflers or a dual-exit exhaust layout.
If your vehicle has electronic exhaust valves, or if the area around the muffler is more complex, do not directly copy a general tutorial. It is better to check vehicle-specific information first.
Step 4: Measure and Mark the Cut Points
Look at the exhaust pipe before and after the muffler, and choose a relatively straight section that will be easy to connect to a straight pipe. Do not cut right against the muffler body, because you need to leave enough straight pipe for installing the straight pipe and exhaust clamps. If you cut too close to the muffler, the clamp may not have enough contact area, which can lead to leaks or loosening later.
Suggested steps:
- Use a measuring tape to measure the pipe sections before and after the muffler.
- Find a straight section with enough space.
- Use a marker or chalk to mark the cut points.
- Check again that there are no wires, fuel lines, brake lines, or plastic parts near the cut points.
- Record the approximate length needed to replace the removed muffler section.
Do not rush this step. Choosing the right cut points will make installation much easier.
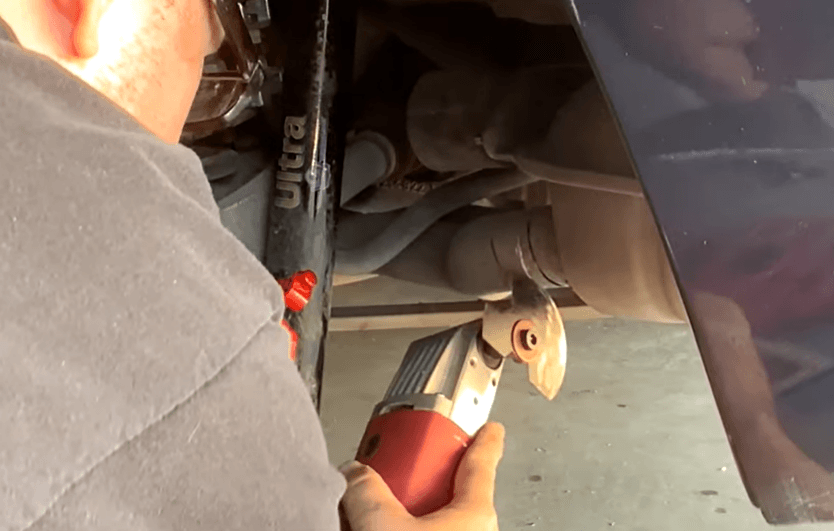
Step 5: Cut and Remove the Muffler
Cut the exhaust pipe along the marked points using a reciprocating saw or angle grinder.
If using a reciprocating saw, choose a blade suitable for metal and keep the tool steady while cutting. Do not force it too hard. If using an angle grinder, pay attention to the direction of the sparks and avoid sending sparks toward fuel lines, wiring, plastic parts, or vehicle paint.
Usually, you need to cut the exhaust pipe at both ends of the muffler. You can cut one side first, then the other. When the final section is almost cut through, support the muffler to prevent it from suddenly falling.
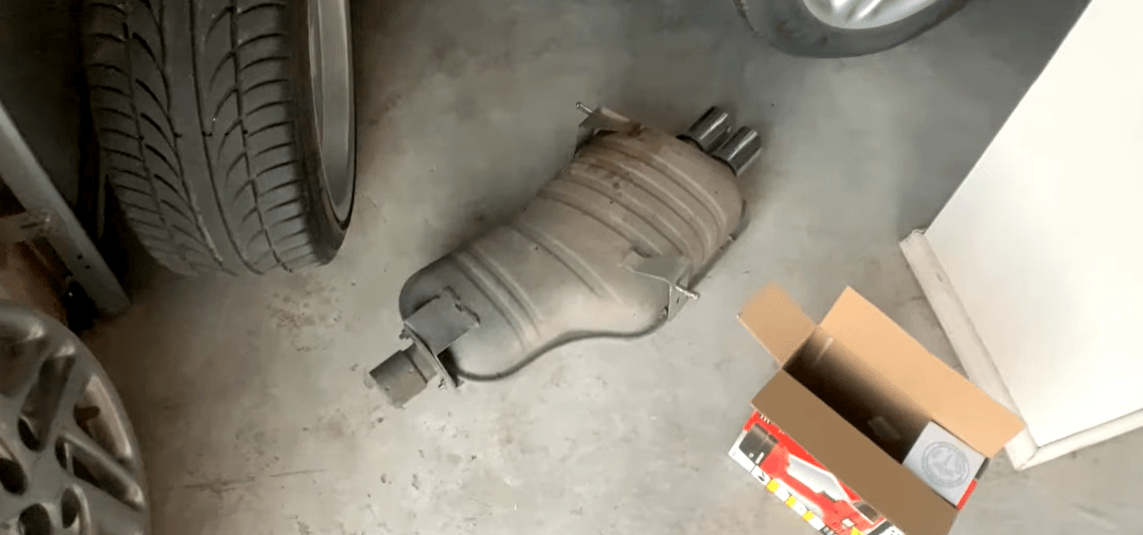
After cutting the exhaust pipe, the muffler is usually still held by rubber exhaust hangers. Spray some WD-40 to make the hangers easier to remove. Then use a pry bar, long flathead screwdriver, or your hands to slowly remove the hangers.
After removing the muffler, it is recommended to keep the factory muffler instead of throwing it away immediately. If you later find the sound too loud, the drone too severe, or need to return the car to stock, the original muffler will be useful.
Step 6: Measure the Replacement Pipe
After the muffler is removed, re-measure the gap left in the exhaust system.
Do not rely only on your estimate before cutting, because the actual cut position and angle may have slight differences. You need to make sure the length, diameter, and connection method of the straight pipe are correct.
If the straight pipe is too long, you can cut it to the correct length. If it is too short, the overlap at the connection points will not be enough, making it more likely to leak or loosen.
Step 7: Install the Straight Pipe with Exhaust Clamps
Place the straight pipe in the original muffler location and test-fit it first.
Do not fully tighten the clamps right away. It is better to first place the exhaust clamps over the two connection points, then insert or align the straight pipe between the original exhaust pipes. Make sure both ends of the pipe have enough overlap.
Next, adjust the angle and position of the straight pipe, and make sure it does not touch the chassis, suspension, bumper, or other components. Once the position is correct, evenly tighten the clamps on both ends. Do not fully tighten one side while the other side is still not adjusted. Band clamps are more recommended because they apply force more evenly than regular U-bolt clamps and are easier to remove later.

Step 8: Check for Exhaust Leaks
After installation, do not drive away immediately. Start the engine and let the vehicle idle, then check both connection points of the straight pipe for exhaust leaks. Listen for "puffing" or "hissing" sounds near the connections. If there is a leak, it may be because the clamps are not tight enough, the pipe diameter does not match, or the cut is uneven.
Do not touch the exhaust pipe directly during inspection, because it will heat up quickly. Listen nearby or observe the connection points from a safe distance.
Step 9: Test Drive and Recheck
After confirming there are no obvious leaks, take the car for a short test drive.
Drive slowly at first and listen for metallic knocking, vibration, or unusual exhaust sounds. Then lightly press the accelerator at different RPM ranges to feel the sound change. Finally, if conditions allow, test at cruising speed to check for drone, which is a low-frequency humming sound inside the cabin.
After the test drive, wait for the exhaust system to cool down, then check again whether the clamps have loosened. Because the exhaust system expands and contracts with heat, newly installed clamps may loosen slightly after the first drive.
It is also recommended to recheck the clamps after a few days of driving. If you find leaks, unusual noises, or loose clamps, adjust them promptly. This helps prevent the straight pipe from coming loose or the connection points from leaking long-term.
Common Mistakes to Avoid
When doing a muffler delete, many problems are not caused by not knowing how to cut, but by measurement, installation, and follow-up inspection mistakes. Avoid the following:
- Cutting too close to the muffler
Leave enough straight pipe on both ends of the muffler so the straight pipe and clamps can be installed properly. Cutting too close can lead to leaks or poor mounting. - Buying the wrong pipe diameter
Do not buy a straight pipe based on guesswork. Measure the original exhaust pipe diameter before starting and make sure the straight pipe matches it. - Using cheap or incorrect clamps
For clamp-on installation, properly sized band clamps are more recommended. Incorrect clamps can loosen, leak, or fail to tighten properly. - Not checking exhaust clearance
After installation, make sure the straight pipe does not touch the chassis, suspension, rear axle, or bumper. Pay special attention to keeping it away from plastic parts. - Ignoring exhaust leaks
If you hear "puffing" or "hissing" near the connection points, there may be a leak. Leaks can affect the sound and may allow exhaust gases to enter areas near the cabin. - Throwing away the original muffler
If this is your first muffler delete, keep the original muffler. If the sound is too loud or the drone is too severe later, returning to stock will be easier. - Forgetting local noise laws
A muffler delete may cause excessive noise and may be illegal or fail inspection in some areas. Check local regulations before starting. - Expecting big horsepower gains
A muffler delete is mainly a sound modification. For most modern vehicles, horsepower gains are usually very small, so do not treat it as a major performance upgrade. - Assuming louder always means better
Louder does not always mean better. The results vary greatly by vehicle. Some cars sound deep and pleasant, while others become harsh or develop noticeable drone. - Leaving the exhaust too short
Do not simply cut off the muffler and let the exhaust exit under the car. A better approach is to install a straight pipe of the proper length so the exhaust continues to exit toward the rear of the vehicle.
Final Thoughts
A muffler delete is a simple, low-cost exhaust modification: remove the rear muffler and replace it with a straight pipe to make the exhaust sound louder and more direct.
If you are a DIY beginner, it is better to choose a clamp-on muffler delete first. It does not require welding, costs less, and is easier to return to stock. If you are sure you want to keep it long-term and want a stronger, cleaner installation, you can consider welding, but it is best handled by a professional exhaust shop.
Real owner feedback on muffler deletes is mixed. Some vehicles become deeper and sportier, while others may simply become louder and develop noticeable drone. Before starting, pay attention to safety, measure accurately, and make sure you can accept the daily noise and local legal risks.
Overall, if you want to try a muffler delete, it is best to start with a reversible clamp-on setup, keep the factory muffler, and check for leaks and drone after installation. If you want a milder, more controllable sound, you can also consider a resonator delete, axle-back exhaust, or cat-back exhaust.