Contents
- Why Installing Headers on an Older F-150 Is Usually Harder Than People Expect
- The Most Common Mistake: Treating It Like a Casual Weekend Project
- DIY vs. Paying a Shop: Time, Money, and Reality
- DIY Prep: How to Avoid 90% of the Common Disasters Before You Even Start
- Step-by-Step: How to Install SunCent Long Tube Headers on a 2003 Ford F-150 5.4 2V
- What Usually Goes Wrong During Installation? The Core Pitfalls You Need to See Coming
- The Final Stretch: From Finished Installation to First Startup
- A Note to 2003 F-150 Owners
- FAQs
If you’ve made it to the point where you’re ready to install stainless steel exhaust headers on a 2003 Ford F-150 5.4 2V, you’ve already made a serious decision.
You decided not to keep living with that cracked, leaking stock manifold and its sharp, annoying ticking noise. You also chose not to simply throw on another factory-style replacement. You decided to upgrade instead. What you want is smoother exhaust flow, more immediate throttle response, and that deep, heavy V8 tone the truck should have had all along.
But as the owner of an older truck, you need to be honest with yourself before you start: this is not a simple “just bolt it on and call it a day” kind of job.
On a high-mileage older F-150, installing headers feels more like half repair job, half upgrade, with a healthy amount of patience mixed in. Because you’re not just dealing with a shiny new part. You’re dealing with everything this truck has collected over the past twenty-plus years: rusty bolts, a cramped engine bay, and all the metal fatigue that comes from endless heat cycles.
What we’re talking about here is the real garage truth. That’s what decides whether this install ends with you firing it up on Sunday night and finally hearing that V8 come alive — or whether it turns into a long, unexpected weekend of crawling around on the floor hunting for tools.

Why Installing Headers on an Older F-150 Is Usually Harder Than People Expect
In theory, installing headers sounds simple: remove the stock manifold, install the new headers, reconnect the sensors, and you’re done.
But if your truck is:
- 2003 F-150
- 5.4 2V Triton V8
- and has well over 100,000 or even 200,000 miles
then the real-world experience is usually nothing like that. At this stage, you’re not just dealing with parts anymore. You’re dealing with the truck’s entire accumulated personality over the last two decades:
- Bolts that have been through endless heat cycles: These fasteners have expanded and contracted thousands of times. The metal is tired.
- Threads that are aging, corroded, or partially seized: Rust and carbon buildup may have practically welded the bolts into the head.
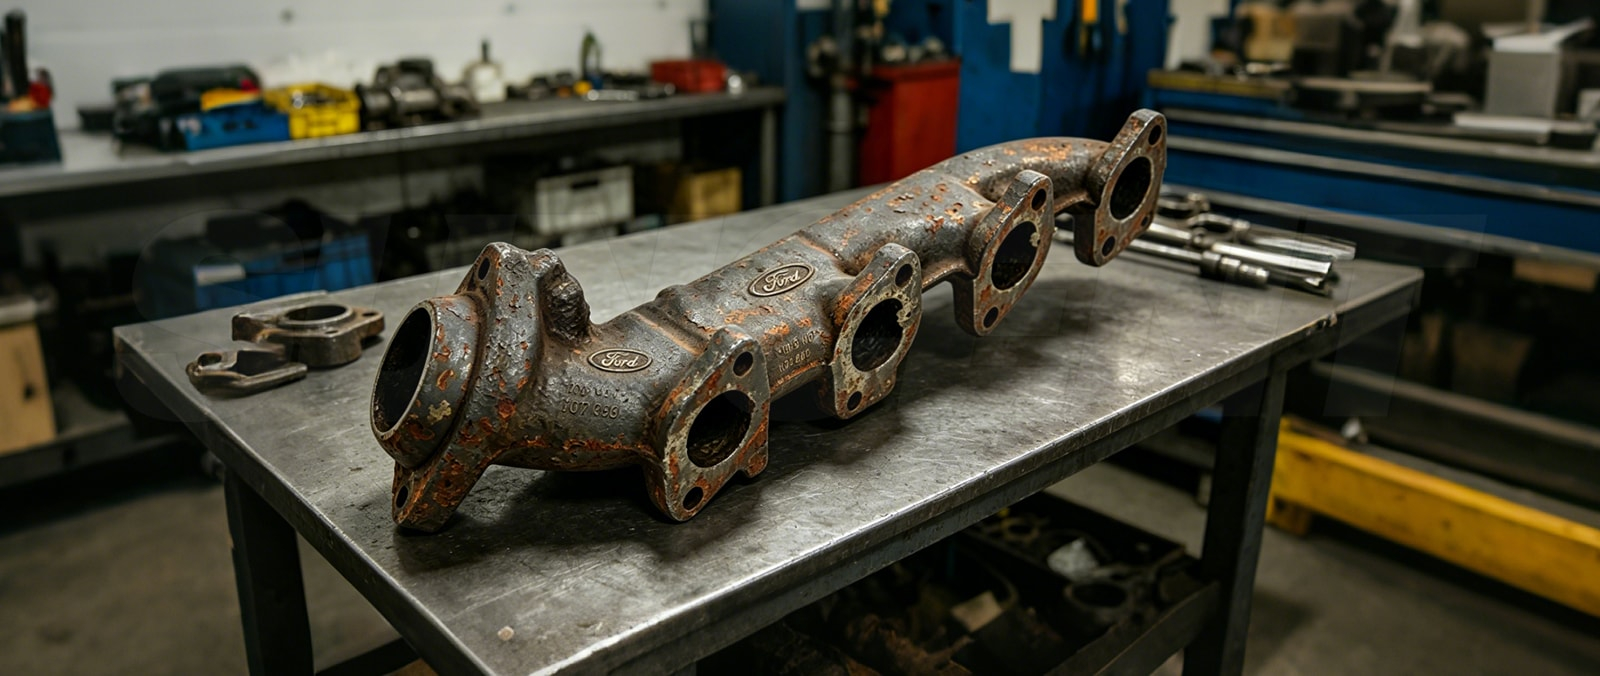
- A stock manifold that may already be slightly warped: Long-term heat stress can distort the flange surface, which adds resistance during removal.
- An engine bay that was never generous to begin with: The 5.4 2V bay is packed tight, and there is very little room for tools or arms.
Once those factors stack on top of each other, a job that looks simple on paper turns into something that requires thought, physical effort, and sometimes on-the-fly problem solving.
The real truth: removing the old parts is usually harder than installing the new ones.
There’s a line that sums it up perfectly: On an older 5.4 2V truck, the hardest part is not putting the headers on — it’s getting the old hardware off without creating new problems.
If you snap just one bolt or strip one thread, a job that should have taken a few hours can easily turn into an all-day affair or longer. That’s why the real challenge usually isn’t a lack of skill. It’s underestimating how difficult the job actually is.
The Most Common Mistake: Treating It Like a Casual Weekend Project
A lot of product pages will say something like: “Bolt-on design.”
That statement is not wrong. The mounting points on Suncent’s product are correct, and the basic structure does match the truck. But that does not mean the install is automatically easy — especially not on an older truck.
What really eats up time is not tightening the new parts down. It’s all the invisible work that happens before that:
- How do you break the stock manifold bolts loose without snapping them?
- How do you find the right angle to get a tool onto a bolt in such a tight space?
- How do you work around all the surrounding brittle plastic pieces and aging lines?
- How do you accept that, in some cases, you’ll have to remove parts you never planned to touch in the first place, like the starter?
A lot of DIY owners go through exactly the same arc: they start Saturday around noon, excited, thinking they’ll be listening to a fresh V8 growl by the evening. Then a few stubborn bolts later, it’s dark out, they’re still under the truck, swapping extensions and chasing angles.
So for a high-mileage F-150, installing headers is never just a simple performance upgrade. It is always some combination of maintenance and modification happening at the same time. Once you accept that and prepare with that mindset, the whole job becomes a lot easier to manage.
DIY vs. Paying a Shop: Time, Money, and Reality
Before you touch the first bolt, you need to do some honest math. On a 2003 Ford F-150 5.4 2V, is it cheaper to sweat through it yourself, or smarter to pay for peace and quiet?
DIY Installation: You Spend Time and Save Real Money
- Estimated time: 8–12 hours, usually spread across two half-days or one full weekend.
- Best-case scenario: If you get lucky, no bolts snap, the space works with you, and everything goes smoothly, you might finish in 6 hours.
- Worst-case scenario: If one bolt snaps or you get hung up on the passenger-side starter, your install time can double fast.
- Tool cost: If all you own is a basic adjustable wrench, you may need to spend another $50–$150 on long extensions, universal joints, and a solid set of deep sockets.
- Main advantage: You save a serious amount in labor, and by doing it yourself, you learn more about the exhaust-side health of your old V8 than anyone else ever will.
Installing at a Performance Shop or Repair Shop: You Spend Money and Buy a Safety Net
- Estimated labor time: 4–6 hours with a lift and air tools.
- Estimated labor cost: $400–$800, depending on local labor rates and how rusty the truck is.
- Important note: A lot of shops will quote high when they hear “20-year-old F-150 manifold job,” because they know broken bolts are a real possibility too.
- Main advantage: If a stud breaks in the cylinder head, that becomes the technician’s problem, not yours. You just wait for the phone call.
Quick Decision Comparison
| Category | DIY Installation | Professional Shop |
|---|---|---|
| Money | Product cost + a little tool cost | Product cost + high labor bill |
| Risk | You deal with snapped bolts and clearance issues yourself | The shop takes on the install risk and usually backs the job |
| Satisfaction | Off the charts when that V8 fires up | Basically none |
| Need for a backup vehicle | Very high if the truck doesn’t get finished | Low, since most jobs are same-day |
DIY is not just about saving a few hundred bucks. It’s also about knowing every bolt got anti-seize, every interface went together the way you wanted, and nothing was rushed. But if you only have half a day and you absolutely must drive the truck to work tomorrow morning, do not start tearing it apart on Sunday afternoon.
For most daily-driven 2003 F-150 owners, DIY is still the most common route, because the truck’s resale value usually doesn’t justify paying a huge labor bill. But that only works if you prepare properly, which is what the next section is for.
DIY Prep: How to Avoid 90% of the Common Disasters Before You Even Start
A lot of DIY installs don’t go sideways because the owner lacks skill. They go sideways because the prep work before the first bolt gets loosened was too optimistic. On a truck like a 2003 Ford F-150 5.4 2V, preparation is often worth more than the installation itself.
1. Confirm Fitment: Don’t Finish Disassembly Only to Discover You Bought the Wrong Part
Before the truck ever goes in the air, look at the box and look at your engine bay one more time. Confirm:
- Year and platform: Is it truly a 9th Gen truck (1997–2003)? Or is it a 2004 Heritage?
- Engine type: It must be the 5.4 2V. If you accidentally bought the 3V version, the flange layout will not match.
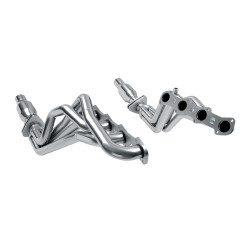
- Interface layout: Check whether your Suncent setup includes 4 O2 sensor locations and 2 EGR provisions, just like your reference material shows. If your stock exhaust uses EGR and the header doesn’t have the right provisions, you are not finishing that install today.
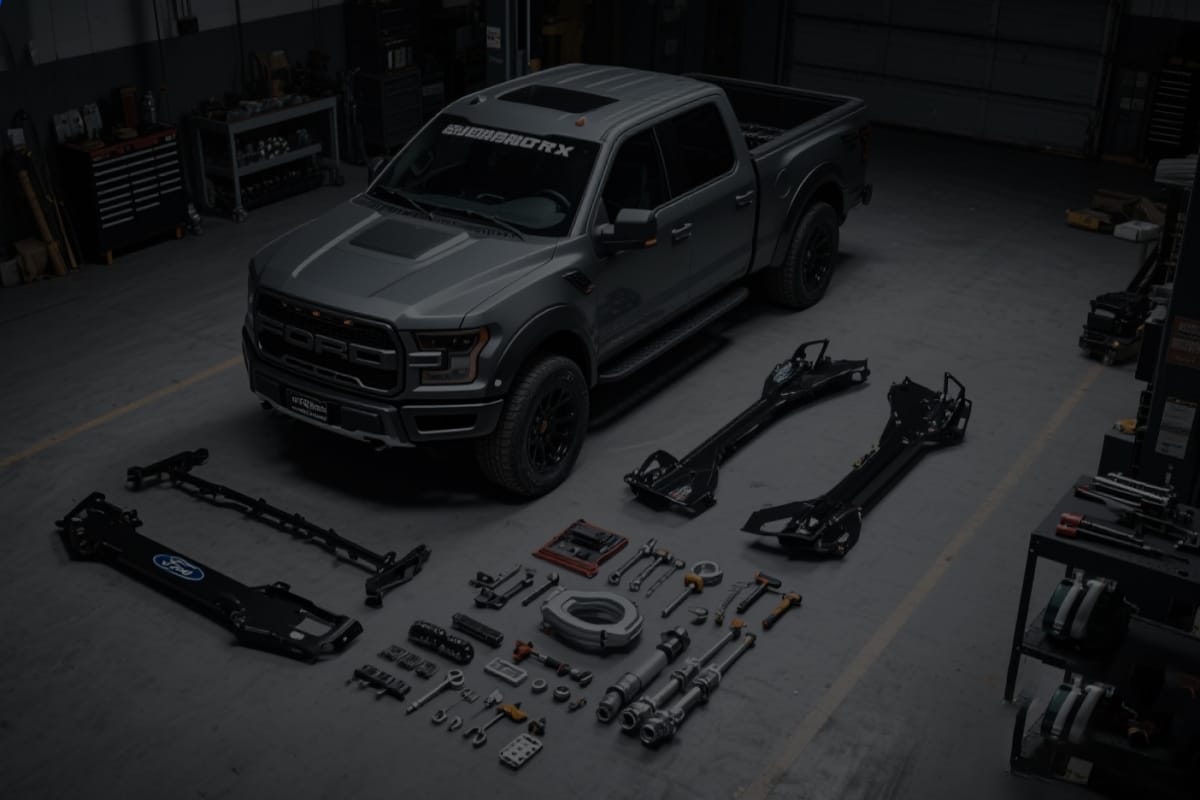
2. Inventory the Kit: Don’t Gamble on “It’s Probably All in the Box”
Lay everything out on the floor like you’re counting ammunition. Check:
- Header bodies: Are both sides there, and did anything get bent badly in shipping?
- Gaskets and hardware: Is the hardware count correct? The 5.4 2V needs 16 manifold bolts total across both sides.
- Suncent-specific detail: Inspect the 3/8-inch flange. Make sure it is flat. That flange is one of the main things standing between you and a future exhaust leak.
3. Give Penetrating Oil 24 Hours to Do Its Job
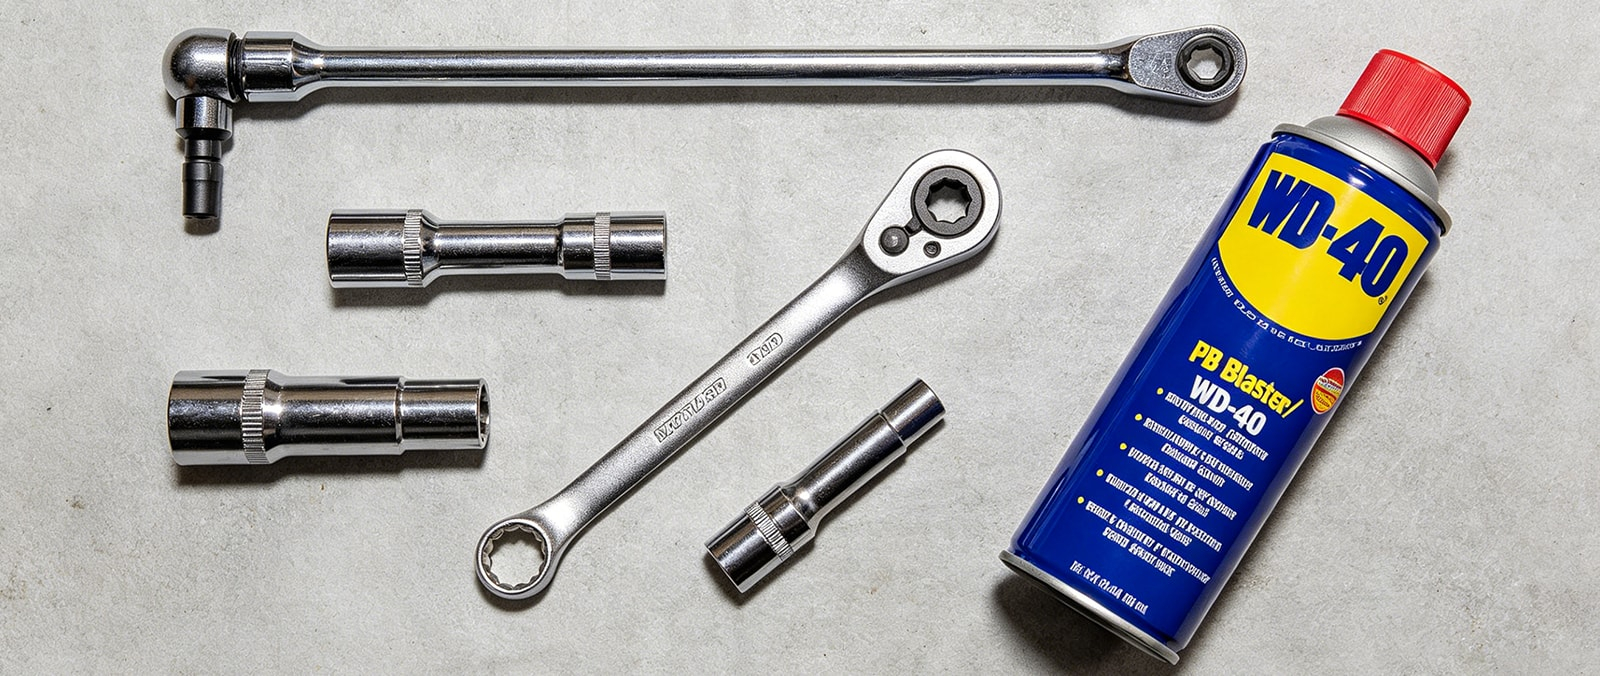
This is old-truck gospel. If you plan to work on Saturday, you should be in the wheel well on Friday night — or even Thursday — soaking those 16 manifold bolts with penetrating oil like PB Blaster or WD-40 Specialist.
And do not spray them just once. Hit them again every few hours if you can.
That waiting period matters. Those 24 hours can be the difference between “everything came apart” and “now I’m extracting a broken stud.”
4. Decide Whether You Need Backup
Ask yourself two very practical questions:
- Do I have a Plan B? If this is your only commuter and you need to drive it tomorrow morning, make sure you have a backup ride or someone who can get you where you need to go.
- Do I have help? Installing long tube headers alone is miserable. One person up top lining up the flange while another supports the tubes underneath can make a massive difference.
5. Tool Checklist
Beyond the usual hand tools, make sure you have:
- Long extensions: At least 10 inches or more.
- Universal joints: For those miserable front bolts with ugly angles.
- Deep sockets: To deal with protruding bolt heads.
- Strong lighting: A good work light or powerful flashlight is not optional here.
Step-by-Step: How to Install SunCent Long Tube Headers on a 2003 Ford F-150 5.4 2V
On a 2003 Ford F-150 5.4 2V, the point of installing Suncent Long Tube Headers is not to see who can do it fastest. It’s to see who can avoid the most unnecessary problems. This is more like old-truck repair work than a clean modern upgrade. Each step needs to be stable and deliberate, or small mistakes early on will turn into bigger delays later.
Step 1: Start with Safety and Workspace Setup
- Disconnect the battery: This is basic older-truck discipline, especially if you’ll be removing the starter later.
- Lift and support the truck securely: You need enough room to work underneath, and safety is not negotiable.
- Organize the tools: Put your universal joints, 10-inch extensions, deep sockets, and penetrating oil where you can reach them fast.
Step 2: Clear the “Entry Path” First
Do not rush straight to the manifold bolts. Start by removing the parts that will obviously get in the way:
- Remove the front wheels and inner liners. The wheel well is going to be one of your main access points.
- Disconnect the O2 sensor connectors.
- Remove the starter. This is critical. On the passenger side of a 5.4 2V, you usually do not have enough room to get the long tube headers in without taking the starter out first.
Do not try to force the headers past it. That almost always wastes more time than it saves.
Step 3: The Real Trench Warfare — Removing the Stock Manifolds
- Patience, then more patience: There are 16 bolts total, and each one needs to be worked carefully. If one feels too tight, stop, reapply penetrant, back it off a little, then work it forward again.
- Clean the cylinder head sealing surface: Once the old manifold is off, use a wire brush or appropriate cleaning pad to thoroughly clean the head surface.
- Suncent reminder: If there is carbon buildup, gasket residue, or anything left behind, the 3/8-inch flange on the new headers will not seal correctly and you may end up chasing leaks later.
Step 4: Slide the Headers In and Pre-Align Them
- Bring them in from underneath: This is where you’ll appreciate the time you spent removing the starter and liners.
- Pre-align using the flange holes: Set the header in its general position and start using the flange as your guide.
- Why this matters: This is where precise flange alignment proves its value. Don’t fully tighten anything yet. Just get the header hanging in place.
Step 5: Install the Gaskets and Bolts — No Brute Force
- Sequence matters: Start by lightly threading a few critical bolts so the header hangs evenly.
- Cross-tighten from the center out: Work from the middle outward in an even crisscross pattern.
- Torque target: On the 5.4 2V, a common range is around 18–22 ft-lbs. Do not compensate for bad access with brute force. Uneven torque can warp the flange once everything heat-cycles.
Step 6: Reconnect the O2 Sensors and EGR Tubes
- Suncent advantage: This setup includes 4 O2 sensor locations and 2 EGR provisions.
- What to do: Thread the sensors into the correct locations, make sure the wiring stays away from the hot exhaust tubes, and reconnect the EGR properly. Good sealing and clean routing here are critical if you want to avoid codes and drivability issues later.
Step 7: Connect the Rest of the Exhaust and Do Final Checks
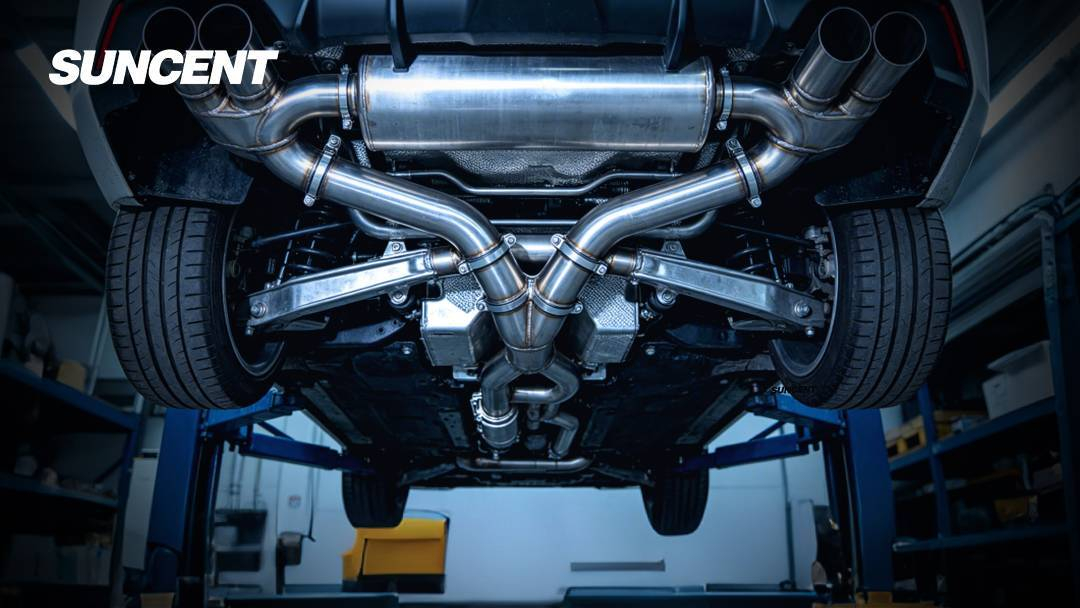
- Y-pipe alignment: The long tube collectors sit farther back than the stock manifolds, so expect to spend time aligning the Y-pipe.
- Check for interference: Make sure the tubes are not sitting too close to the chassis, brackets, or wiring.
- Finish up: Reinstall the starter, inner liners, front wheels, and reconnect the battery.
Core rule:
Get it aligned first. Tighten it evenly second. Lock it down last.
On an old truck, slow is smooth, and smooth is fast.
What Usually Goes Wrong During Installation? The Core Pitfalls You Need to See Coming
Even if you follow the process carefully, surprises still happen on a truck like a 2003 Ford F-150 5.4 2V. Rather than dealing with them in panic mode later, it’s better to understand the five problems most likely to wreck your momentum right now.
The Stock Bolts Are a Full-Blown Test of Survival
This is the part most likely to throw off the whole install. After more than twenty years of heat cycling, the factory bolts are often extremely fragile.
- The moment that makes people want to throw a wrench: the bolts near the front of the engine.
- Why they’re so bad: the space is tiny, your hands barely fit, and the socket angle is awful. You can see the bolt, but you can’t get real leverage on it.
- How to avoid disaster: If a bolt feels especially rough, back it off slightly, then move it forward again with more penetrant. If the head starts slipping, stop immediately and switch to a proper extraction socket. Do not force it.
The Passenger Side Is a Black Hole of Space Problems
A lot of people look at product photos and think long tube headers should slide right in. Then they try the passenger side and everything changes.
- Why it’s difficult: The passenger side is usually tighter than the driver side. The starter and nearby steering components create a maze that blocks the path.
- How to avoid wasting time: Don’t get precious about an extra 20 minutes of disassembly. Remove the starter and inner liner on purpose. You’re buying yourself room. Spending a little more time up front can save an hour of trying to force things around obstacles.
Missing Small Parts Can Stop the Whole Job
The thing that stops an install is often not a big component. It’s the little stuff people overlook.
- Typical risk: You remove the old hardware and realize a reused bolt is too far gone, an old gasket falls apart, or your sensor wiring is suddenly too short.
- How to avoid it: For a daily driver, this is one of the biggest risks of the whole install. Before loosening the first bolt, lay out every gasket, bolt, and plug connection. If something is missing, contact support right away. Suncent’s replacement and return policies are the safety net here.
The “Fake Fitment Issue” — It Isn’t Always the Product
Sometimes you’ll think one side just does not want to line up, and your first reaction will be: “This part must be wrong.”
- The truth: Older trucks may have had prior modifications, past repairs, or worn engine mounts that slightly shift engine position.
- How to think clearly: Learn the difference between normal install resistance and true fitment failure. If the flange holes line up but the angle is awkward, that’s installation difficulty. If the flange holes are way off, then it’s an actual fitment problem.
The “Last Mile” of Long Tube Headers — Connecting the Rest of the Exhaust
Long tube headers put the collector farther back than the stock manifolds.
- Why it matters: The Y-pipe may come in at a slightly awkward angle, even when everything else looks correct.
- How to avoid future problems: Do not force it together and call it good. If it only fits under tension, that tension may turn into noise, rubbing, or stress once the truck heat-cycles. Before tightening everything down, make sure the exhaust path sits in a natural position without obvious preload.
The “annoying” parts of installing headers on an old truck are not signs that you’re doing a bad job. They are just part of the real-world challenge of working on a 2003 F-150. The best installs happen when you stay calm, stay methodical, and do not try to overpower the truck.
The Final Stretch: From Finished Installation to First Startup
Once the last bolt is tightened and the battery is hooked back up, it’s easy to get excited about finally hearing that V8 bark. But the few minutes before that first real drive matter more than most people think. They determine whether your long tube headers bring you satisfaction — or bring your neighbors the joy of hearing your exhaust leak.
1. Double-Check Clearance and Spacing
- Wiring clearance: The 5.4L 2V engine bay is full of plastic and wiring. Headers get extremely hot, so make sure no harnesses are touching the tubes.
- Brake and steering area: Check the steering shaft and nearby brake lines. If they are too close, localized heat protection may be a smart idea.
2. First Startup: Listen, Look, and Smell
- Listen: On first startup, pay attention to the flange areas. If you hear a sharp ticking, that usually points to poor sealing or uneven torque.
- Look: A little smoke can be normal. Often that’s just protective oil or fingerprints burning off the new tubing.
- Smell: If you notice a strong fuel smell or anything that seems like burning insulation, shut it down and inspect it right away.
3. The Critical Move: Recheck Bolt Tightness After Heat Cycling
This part matters. Metal expands and contracts, and after a few heat cycles, fresh hardware can loosen slightly.
After the first 50–100 miles, let the truck cool completely, get back underneath, and recheck all 16 bolts. That one step prevents a huge percentage of the leaks people fight later.
A Note to 2003 F-150 Owners
Replacing headers on a twenty-plus-year-old truck is a form of loyalty. Yes, the process comes with rusty bolts, cramped space, and surprises you did not ask for. But when you hit the throttle and hear that true, deep V8 tone finally cut through the air, all the sweat starts to make sense.
This is not just about power. It is also a genuine tribute to the truck you’ve kept alive.