Contents
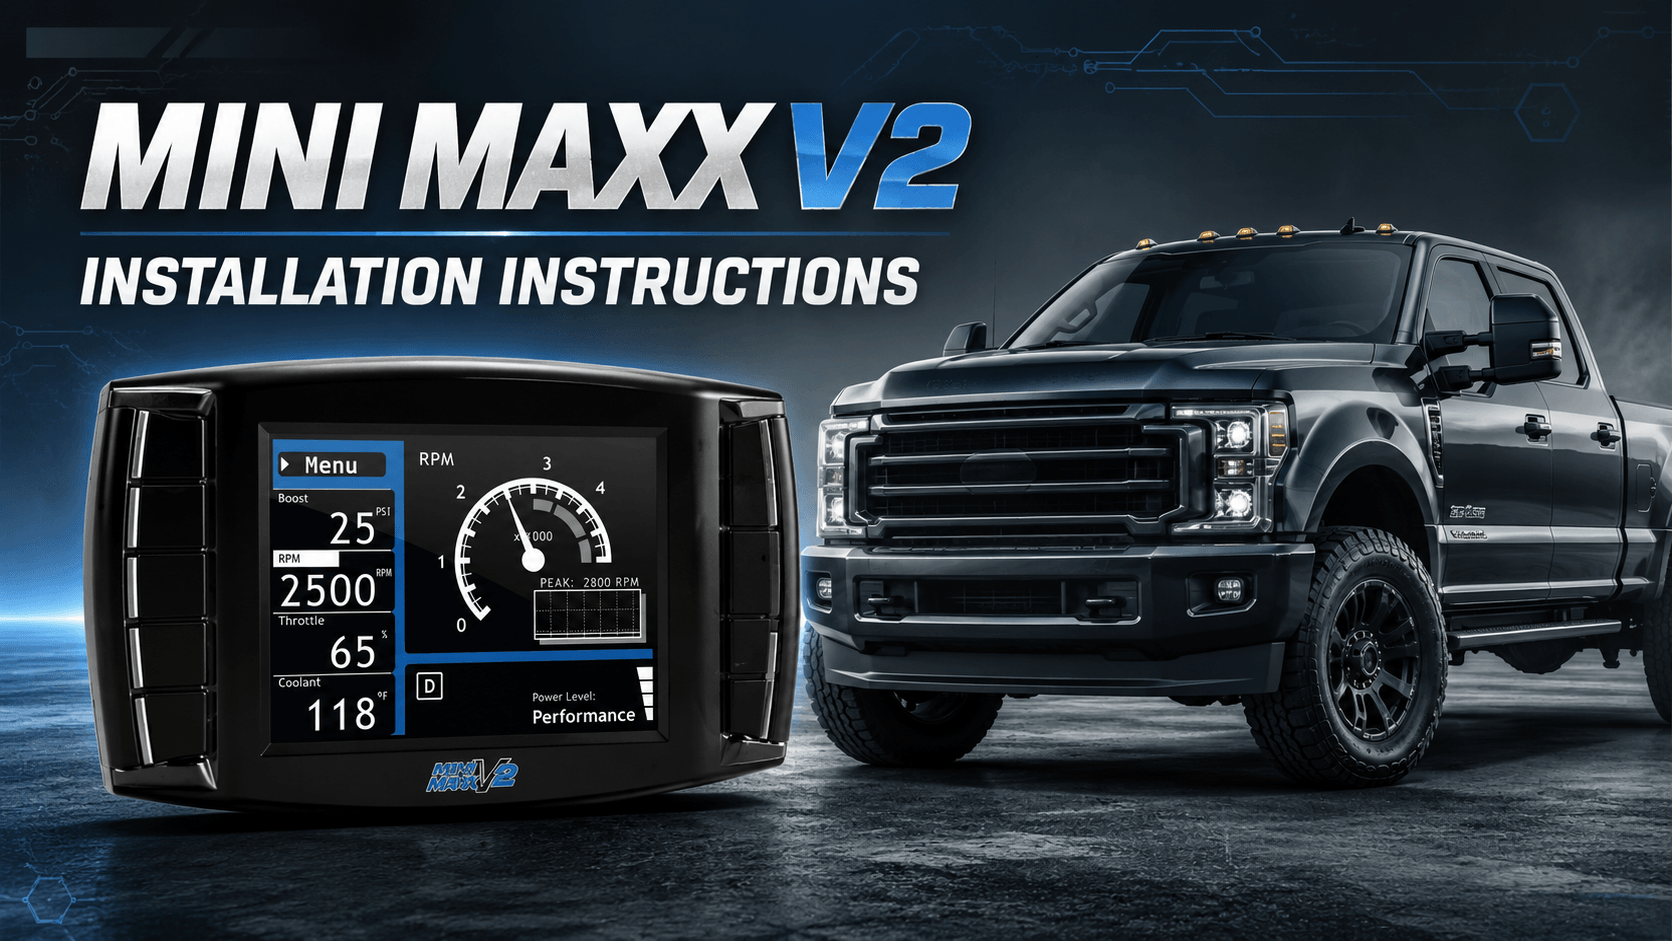
The Mini Maxx V2 Tuner is a tuning and monitoring device designed for select diesel vehicles. It can be used for vehicle parameter monitoring, tune installation, and reading or clearing diagnostic trouble codes.
This guide uses a 2012 Ford F-350 6.7L PowerStroke as an example and explains the Mini Maxx V2 installation instructions, including pre-installation checks, device connection, vehicle selection, tune installation, and final confirmation process.
Important Notice:
The Mini Maxx V2 and related tuning files are generally intended for off-road or competition use only. Before installation and use, please make sure you comply with all local laws, regulations, and emissions requirements.
Visit Product: Mini Maxx Tuner V2
For Detailed PDF Installation Instructions: How to Install the Mini Maxx Tuner V2
Mini Maxx V2 Vehicle Compatibility
The Mini Maxx V2 is compatible with the following diesel vehicles:
2008–2019 Ford PowerStroke
- 2008–2010 Ford F-250 / F-350 / F-450 / F-550, Pickup / Cab & Chassis
- 2011–2019 Ford F-250 / F-350, Pickup
2007–2016 Chevy / GMC 6.6L Duramax
- Chevrolet Silverado / GMC Sierra 2500–5500 HD
- Pickup / Cab & Chassis
2007–2021 Dodge / RAM 6.7L Cummins
- 2007–2009 & 2013–2021 Dodge RAM 2500–5500, Pickup / Cab & Chassis
- 2010–2012 Dodge RAM 2500 / 3500, Pickup
Notes:
- 2017–2019 Ford tuning files currently do not support factory EGT sensors.
- 2018–2021 RAM models require an OBD bypass cable during installation.
- 2018–2021 RAM models may not be supported if the PCM part number begins with a letter.
Required Tools and Accessories
Included Accessories
Before installation, check that all package contents are complete.
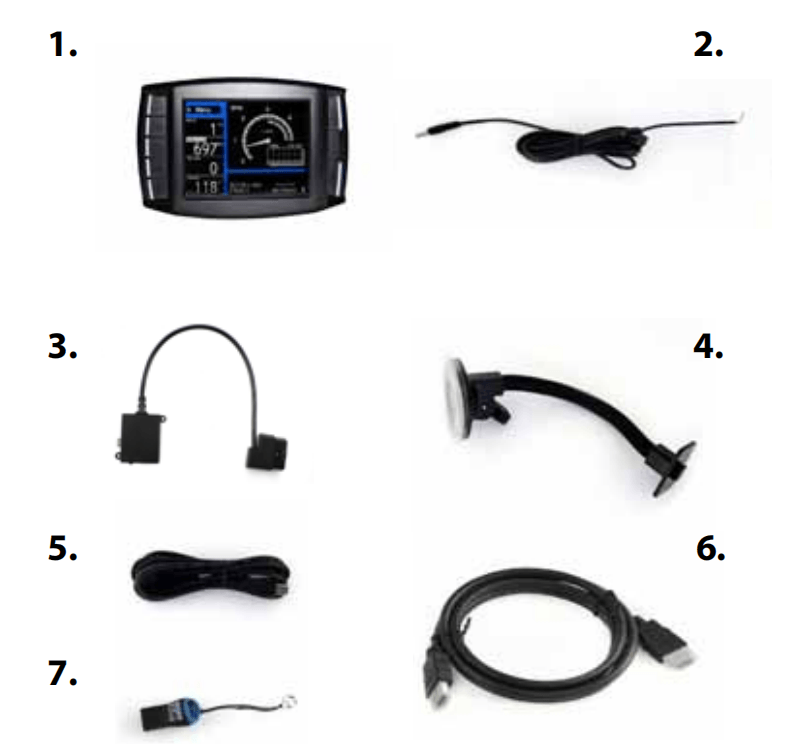
- Mini Maxx(Micro SD Cardin Mini Maxx)
- Mini Maxx Power Cable
- OBD Il Adapter
- Windshield Mount
- Mini USB Cable
- HDMI Cable
- USB Adapter
Recommended Tool
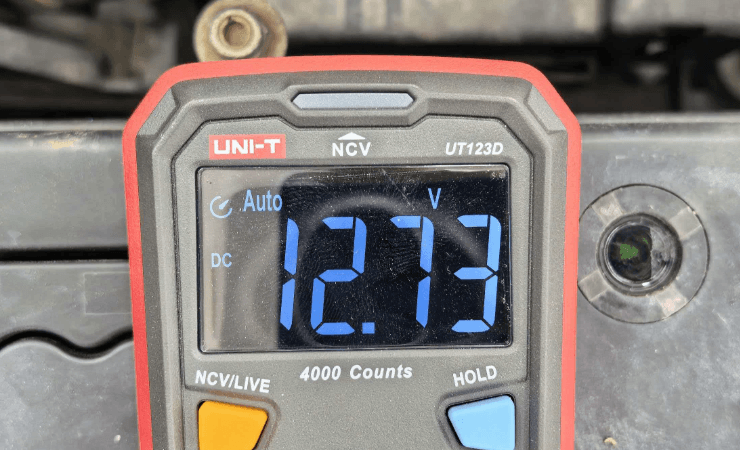
- Multimeter (for measuring voltage)
Reader Exclusive: Save 12% Today! Use code: BLOG12 at checkout.

Pre-Installation Checks
Use a voltage meter to check the battery voltage and make sure it is ≥12.5V.
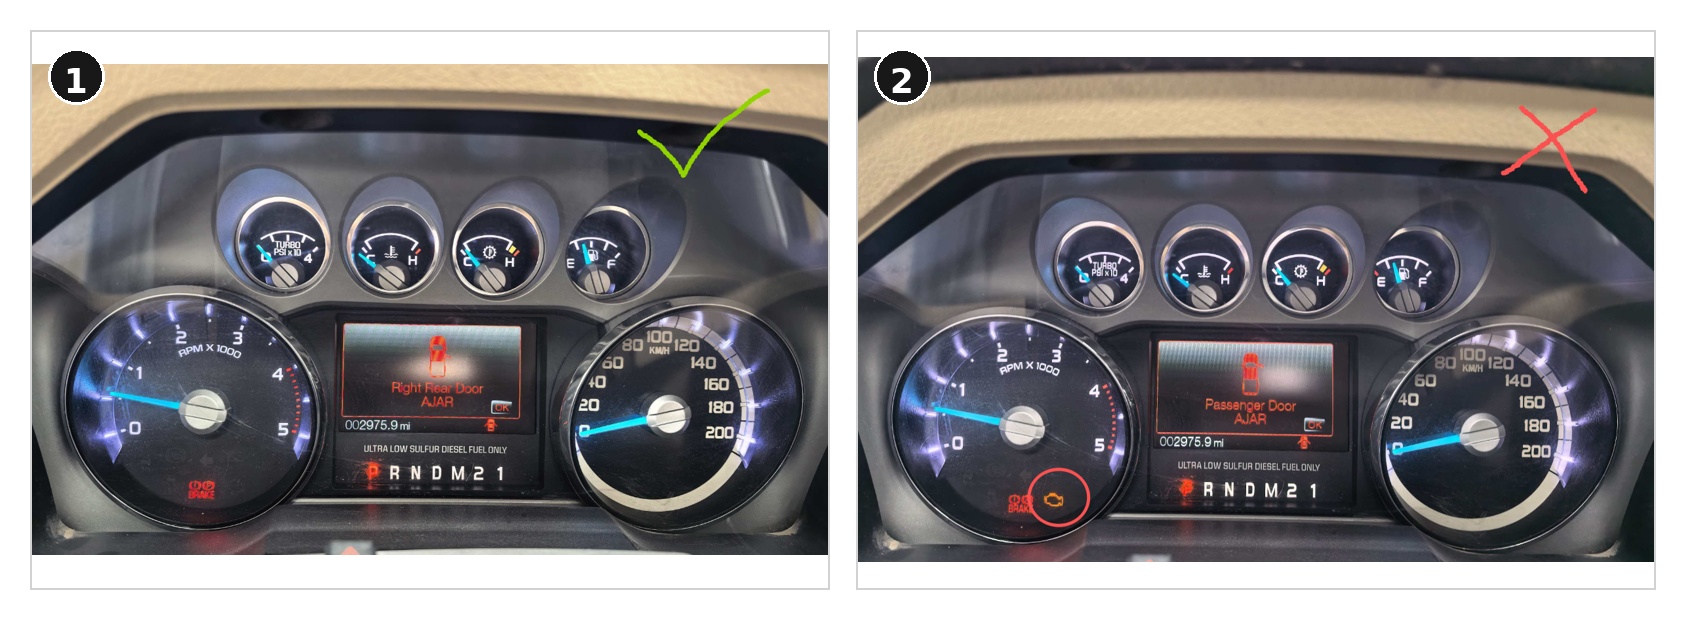
Check the vehicle dashboard and confirm that there are no warning lights.
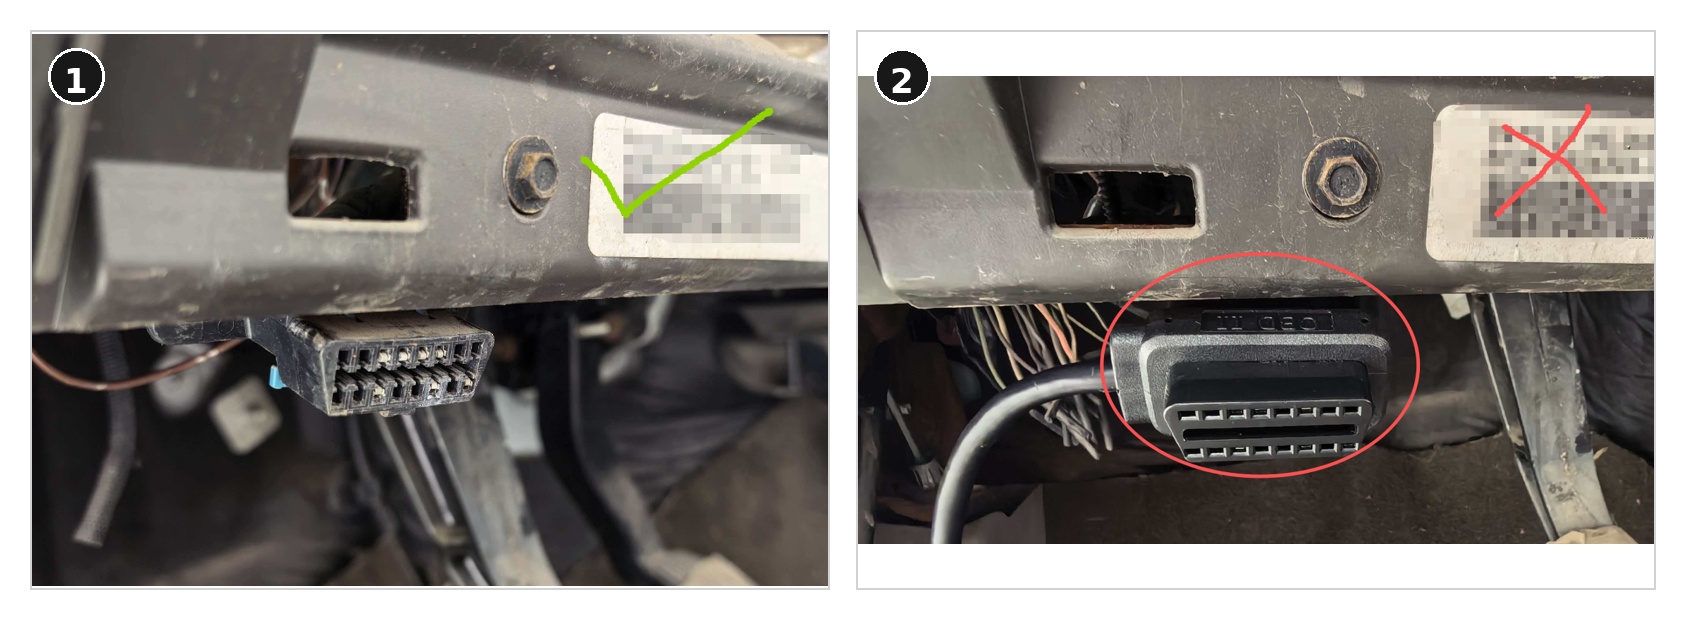
Check the OBDII port and make sure no other device is connected to it.
Installation Precautions
Do not remove any emissions-related hardware before installing the tuner.
During installation, make sure the device has a stable power supply. Do not disconnect power.
Do not randomly switch or turn the vehicle key during installation. If the installation process asks you to change the key position, follow the on-screen instructions carefully.
Installation Steps
You can watch the Mini Maxx V2 installation video tutorial below before following the step-by-step photo guide.
Step 1: Connect the Wiring
Connect the device to the vehicle according to the wiring diagram.

Step 2: Turn the Ignition On
Turn the ignition key to the " ON" position.
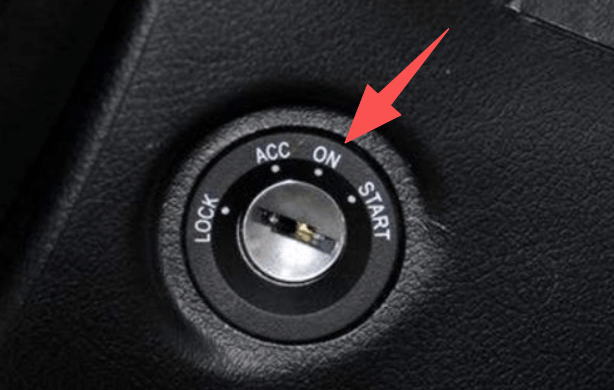
Note: Do not start the engine.
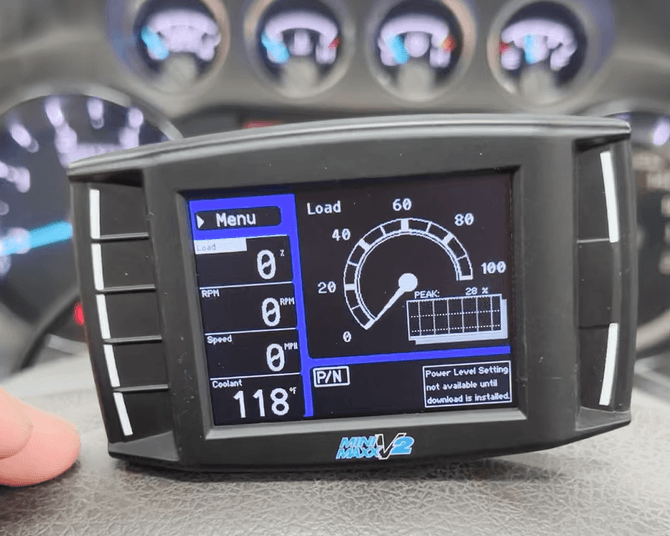
Step 3: Enter the Monitor Screen
After the device powers on, it will enter the monitor screen.
Step 4: Select the Vehicle Model
Follow this menu path:
Menu → Change Vehicle → Ford Diesel → 11-12 Ford 6.7 PowerStroke → YES
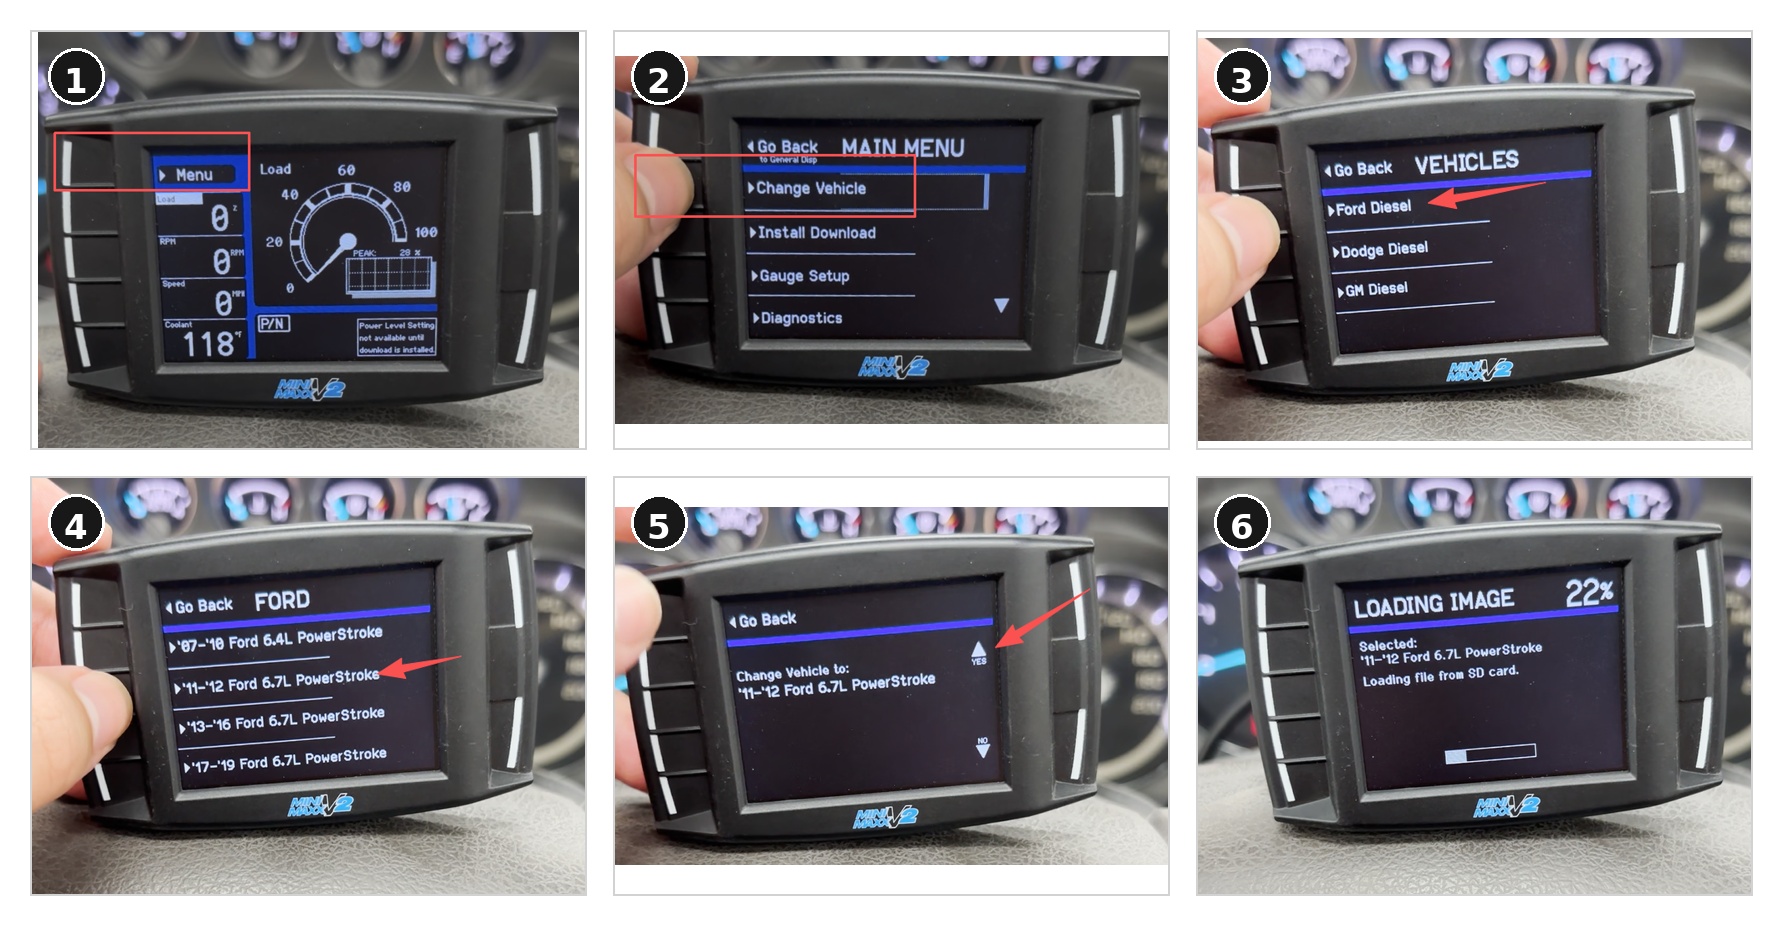
Select the correct vehicle model according to the path above.
After the vehicle model is selected, the device will restart automatically. This process takes about 10 seconds, so please wait patiently.
During the restart, the screen may go black and the device may make a "clicking" sound. This is normal and means the device is loading the selected vehicle file.
Step 5: Confirm the Vehicle Selection
Follow this menu path:
Menu → Show Settings → Application → 11-12 Ford 6.7 PowerStroke
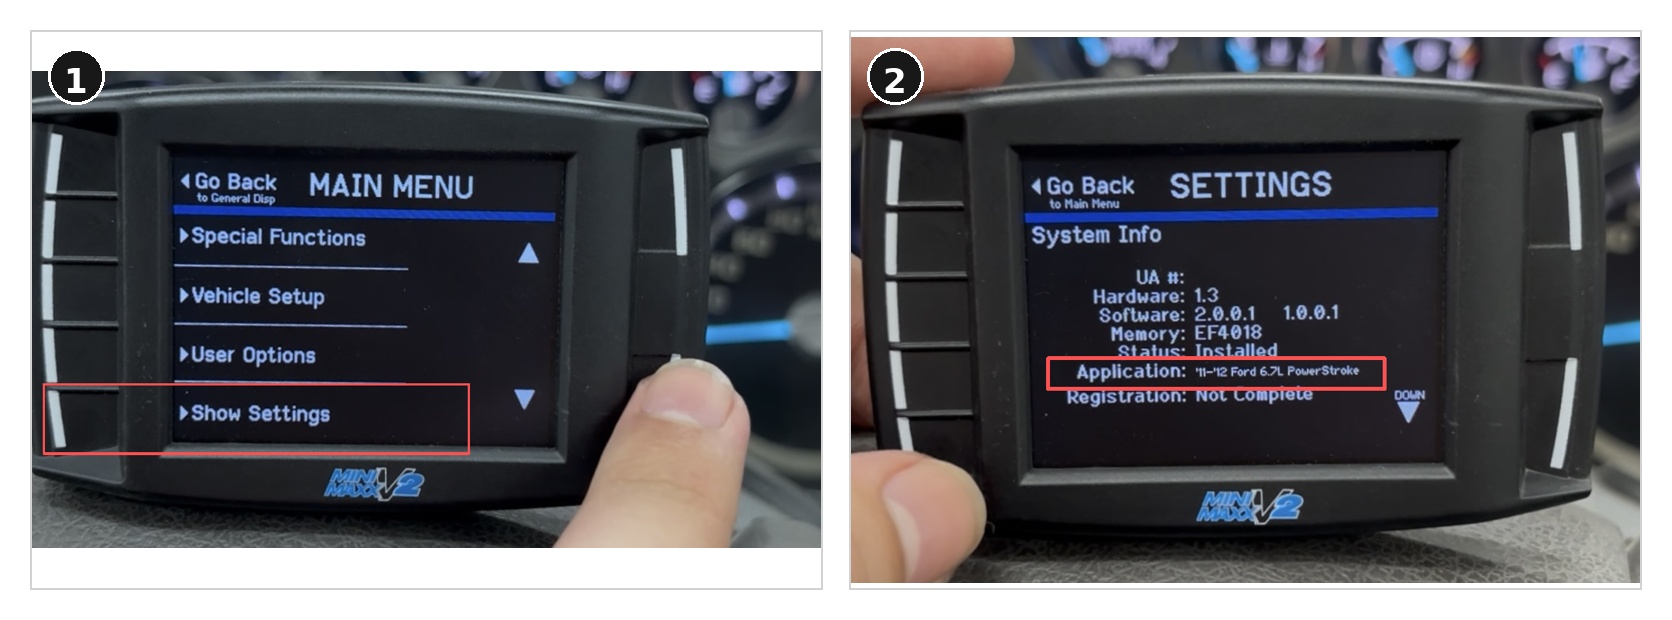
Tap the MENU button in the upper-left corner to enter the menu. Use the lower-right button to scroll down, find " Show Settings", and select it.
Check the device information and confirm that the vehicle model has been changed to the correct one before continuing to the next step.
Step 6: Install the Tune
Follow this menu path:
Menu → Install Download → More → AGREE → CONTINUE → YES → Pre-load Tune

Then follow the on-screen prompts:
Turn key to the "OFF" → CONTINUE
Turn key to the "RUN" → CONTINUE
Return to the menu page, scroll up, and select " Install Download". Follow the device prompts step by step to complete the installation.
Before confirming the installation, the device will check the vehicle model again.
Make sure the selected vehicle model matches your vehicle before continuing.
After the tune installation is complete, the device will restart automatically.
The installation process takes about 15 minutes. Please wait patiently and make sure the device does not lose power during the process.
Step 7: Confirm Installation Completion
Follow this menu path:
Menu → Show Settings → Status → Installed
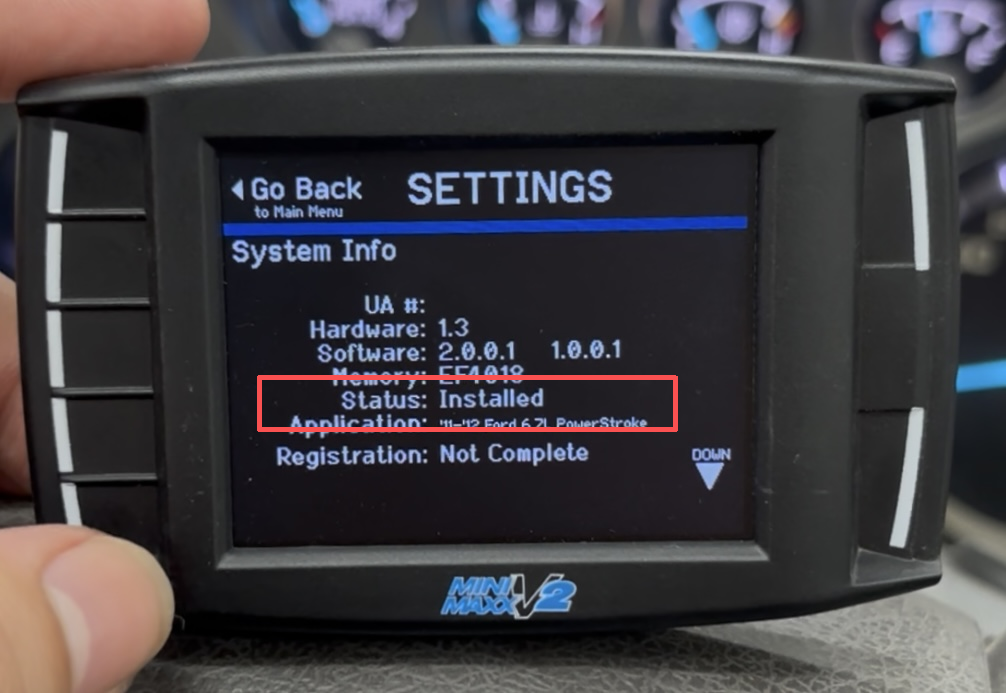
Tap the MENU button in the upper-left corner to enter the menu. Use the lower-right button to scroll down, find " Show Settings", and select it.
Check the device status. If the status shows " Installed", the tune has been installed successfully.
Step 8: Set the Device Power Switch
During tune installation, the device power mode is set to " Battery".
For daily use, switch the device power mode to:
Keyed Power
Insert the ACC power location diagram here.

Step 9: Start the Vehicle and Check
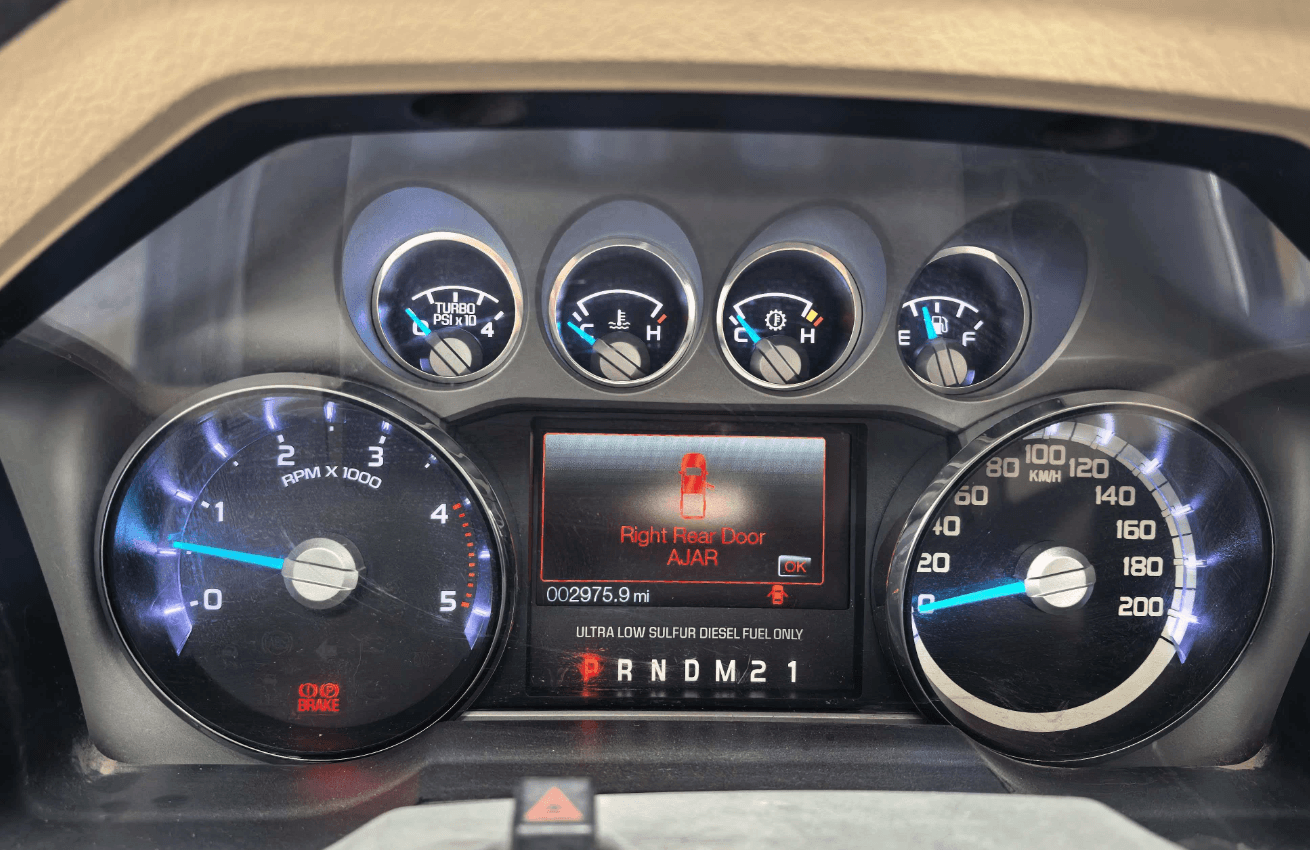
Start the vehicle and let the engine idle for 5 minutes.
Confirm that there are no warning lights on the dashboard and that the vehicle runs normally.
Step 10: Follow-Up Operation
After the tuner installation is complete, wait for the engine to cool down fully.
Once the engine has cooled down, you may proceed with emissions hardware removal if applicable and legally permitted.
Conclusion
After completing the steps above, the Mini Maxx V2 tune installation and basic setup are complete.
Please confirm again that the device status shows Installed, there are no dashboard warning lights, the engine idles normally, and the device power mode has been switched to Keyed Power for daily use.
If the device screen goes black, the device restarts, or the screen asks you to switch the key position during installation, follow the on-screen instructions first. Do not disconnect power or unplug any cables.
For related issues, you can refer to this article: Mini Maxx V2 Problems & Pro Troubleshooting Guide. If the issue still cannot be resolved, stop the operation and contact our technical support team.
We recommend saving the following information after installation for future service or technical support:
- Vehicle year, brand, model, and engine type
- Current vehicle file selected on the Mini Maxx V2
- Device installation status
- Whether any error messages appeared during installation
- Error code or photo of the screen prompt